Page 2 of 4 FirstFirst 1234 LastLast
Results 11 to 20 of 38
Like Tree56Likes

Thread: My first try at setting the bevel

  1. #11
    Junior Tinkerer Srdjan's Avatar
    Join Date
    Apr 2014
    Location
    Canberra
    Posts
    799
    Thanked: 242

    Default My first try at setting the bevel

    To the OP, if you're so inclined, you can easily measure the bevel angle. Search Google for the bevel angle calculator, it's an excel sheet with a formula. The width won't matter, as long as you're hitting the right angle zone.

    Ink the bevel, as Euclid suggested, that will help you a lot.

    Magnification... yes, you can get a cheap magnifier and it will help some. They are junk though. Ever since I got a 10x Bausch&Lomb loupe, with no lighting or anything, I never reach for anything else. It costs more, but it's well worth the price. Note that those numbers advertised on cheap magnifiers (30x, 60x etc..) are a lie. 10x B&L will tell you everything. The next thing you might want after that is a $500 microscope.
    Last edited by Srdjan; 01-17-2017 at 11:45 AM.
    Mrchick and cmsessa like this.
    As the time passes, so we learn.

  2. #12
    Senior Member blabbermouth
    Join Date
    Dec 2014
    Location
    Virginia, USA
    Posts
    2,224
    Thanked: 481

    Default

    Quote Originally Posted by cmsessa View Post
    I might be lost in translation but I didn't get a thing about your discussion
    My point was related to the size of the bevel.
    Like Cuda said, off topic and not a helpful tangent.

    Height of the bevel is determined by blade geometry - set at the factory, and generally not something you'll change. As long as you aren't using so much pressure that you flex the blade, the height of the bevel is what it is.
    cmsessa and Gasman like this.

  3. The Following 2 Users Say Thank You to Marshal For This Useful Post:

    cmsessa (01-17-2017), tinkersd (01-17-2017)

  4. #13
    Modine MODINE's Avatar
    Join Date
    Dec 2009
    Location
    Lee's Summit, Missouri- (KC)
    Posts
    1,442
    Thanked: 730

    Default

    [QUOTE=cmsessa;1700920]Story behind this SR:
    BeeJay honed me two razors and gave me one to try out myself.

    Some pics of the work done:
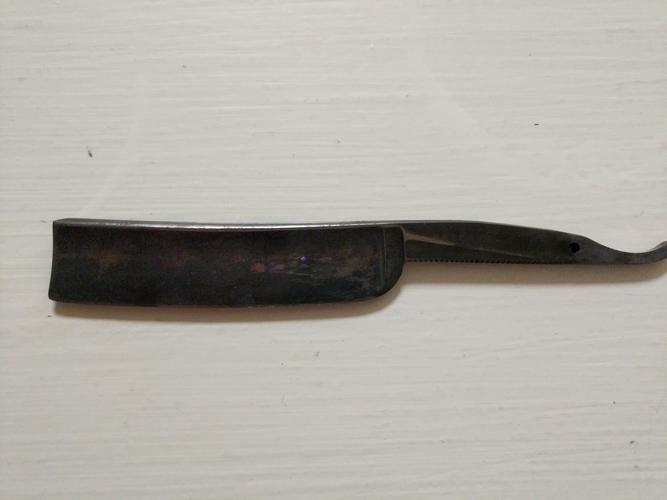
    1) Unpinning failing as usual. This is the only picture I have where you can see how the blade was:
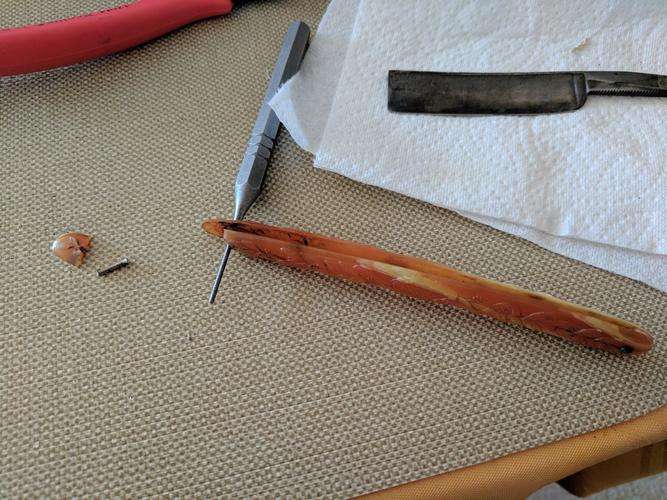
    Hello cmessa
    Good information regarding bevel setting has been given, this is directed at pin removal. If you do not already use one you may want to invest in a Jeweler’s Anvil or Watchmakers Anvil (Google it). Lay the pin on top of the correct size hole when tapping out. Go with light taps. Many have cracked scales before so be glad they were not ivory. Hope this may help some.
    MIke

    Last edited by MODINE; 01-17-2017 at 02:36 PM.

  5. The Following User Says Thank You to MODINE For This Useful Post:

    Steel (01-18-2017)

  6. #14
    Senior Member blabbermouth
    Join Date
    Apr 2012
    Location
    Diamond Bar, CA
    Posts
    6,553
    Thanked: 3215

    Default

    Yes, regarding the unpinning, supporting the scales with something like a Jewelers anvil is good advice, but do not drive the pin all the way, through the scales. Cut or drill the head off one side of the pin, then lift the scale off the pin gently.

    If you try to drive it through both scales and the pin is bent, just slightly or has a burr you will blow out the tip of the scale.

    That type/style of scale is notorious for off gassing and can become very brittle, that may be the cause of the blade turning black and rusted in photo 1, where it would have sat in the scales.

    You might also have trouble with it holding an edge, cell rot attacks the thinnest steel first, the edge. If you experience chipping you will have to remove metal, until you reach solid steel.

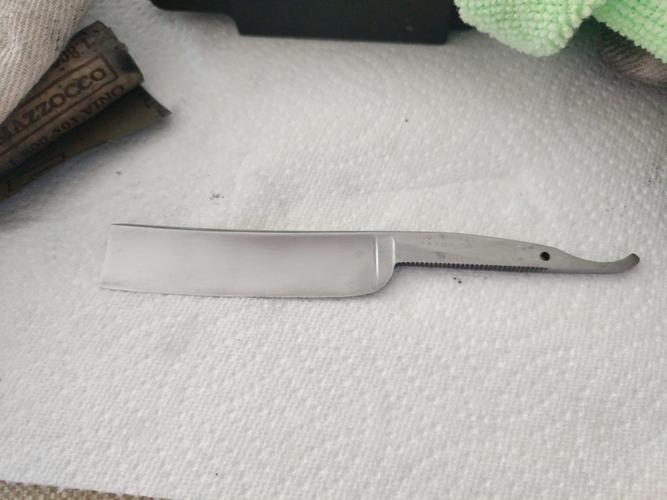
    It does appear to have cleaned up nicely.
    Steel likes this.

  7. #15
    illegitimum non carborundum Utopian's Avatar
    Join Date
    Jan 2008
    Location
    Rochester, MN
    Posts
    11,544
    Thanked: 3795
    Blog Entries
    1

    Default

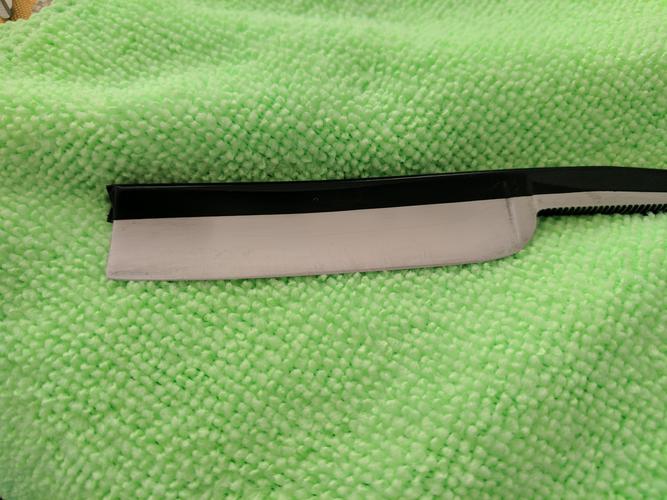
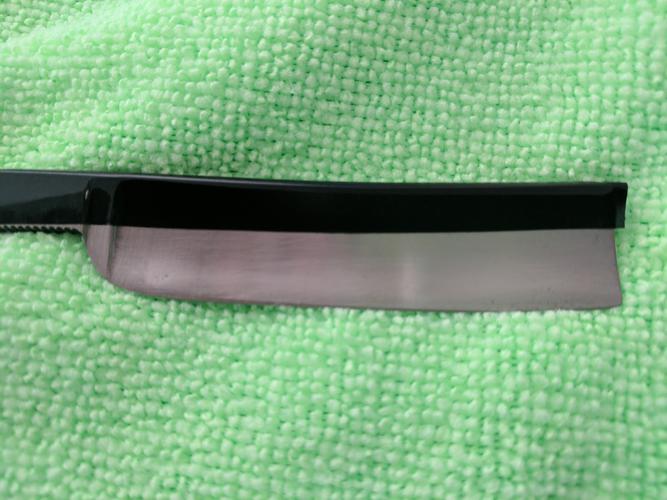
    Quote Originally Posted by cmsessa View Post
    Attachment 254680


    I doubt you can say much about the pictures but I would like to ask some general questions:

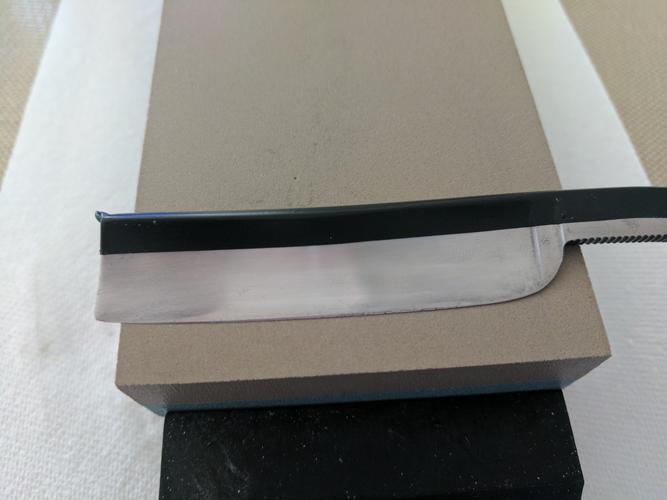
    1) At the beginning, the toe and the heel were not getting a bevel at all. I guess that's my X stroke technique fault. The last strokes I put some pressure on the toe and on the heel and it got a bit better. Is that ok?

    2) Does the "height" of the bevel matter? I noticed that the one I did is thinner than most of the SR pro honed I have. I was going to keep going but decided to stop and ask first.

    3) The bevel I have is already shaving hair from my arm. Is that enough to stop?

    4) I need to get a zoom/magnifying glass. Any recommendation?

    5) What do you think it should be my next step? My stones are: 200/1k Norton, 4k/8k Norton, 12k Naniwa


    Thanks for reading!
    First, you would be much better off NOT honing the razor at all until you re-scale the blade. This is because a) it is easier to hone the razor with the scales in place and b) the task of re-scaling the razor is more dangerous for you if you are doing it with a sharp edge.

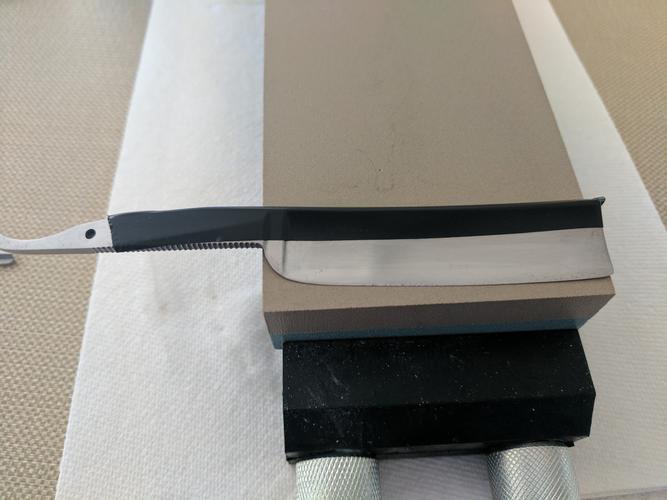
    Second, the last photo shows that the tape has been cut through on the tang. There is no reason for the tang to ever make contact with the hone and doing so lifts the heel off of the stone, preventing it from being honed. The end of the heel should be as far as the razor should extend onto the hone.

  8. The Following User Says Thank You to Utopian For This Useful Post:

    cudarunner (01-17-2017)

  9. #16
    Senior Member Maarten's Avatar
    Join Date
    Feb 2016
    Location
    Netherlands
    Posts
    151
    Thanked: 13

    Default

    Quote Originally Posted by Euclid440 View Post
    do not drive the pin all the way, through the scales. Cut or drill the head off one side of the pin, then lift the scale off the pin gently.

    If you try to drive it through both scales and the pin is bent, just slightly or has a burr you will blow out the tip of the scale.
    Exactly my advice; before working this way I also cracked some scales, and since cutting the pin after driven the pin through the first scale, problems were gone.
    A.K.A. MHHARSTA

  10. The Following User Says Thank You to Maarten For This Useful Post:

    cmsessa (01-19-2017)

  11. #17
    Senior Member BeJay's Avatar
    Join Date
    Jan 2013
    Location
    Communist State of California
    Posts
    1,461
    Thanked: 463

    Default

    Hey cmsessa. The size of the bevel doesn't matter as long as the edge is fully set. A small even bevel is much better looking though.

    You want to be sure that the bevel is fully set from heel to toe. Do some test to make sure that there are no spots that need more attention. I like to use the TNT for this but things like magnification and other test will also work.

    I use a cheap jewelers loupe that I got from eBay. Anything in the 30x-60x range will work.

    When you are confident that the bevel is fully set, do some light strokes on the 1k to lighten up the 1k scratches. This will reruce the amount of work that you have to do on the on the next stone.

    After the 1k go to the 4K until all of the 1k scratches are gone.

    Let me know if you want to get together sometime. I can show you this stuff a lot easier in person.
    B.J.

  12. The Following 2 Users Say Thank You to BeJay For This Useful Post:

    cmsessa (01-19-2017), cudarunner (01-17-2017)

  13. #18
    Member cmsessa's Avatar
    Join Date
    Nov 2016
    Location
    SF
    Posts
    79
    Thanked: 14

    Default

    Quote Originally Posted by BeJay View Post

    Let me know if you want to get together sometime. I can show you this stuff a lot easier in person.
    BJ, yes plz but first I want to try to finish this razor on my own. I would like to get together with this one "finished" and a ready to hone I can do with you!

    Thanks again for the offer.

  14. #19
    illegitimum non carborundum Utopian's Avatar
    Join Date
    Jan 2008
    Location
    Rochester, MN
    Posts
    11,544
    Thanked: 3795
    Blog Entries
    1

    Default

    Getting help in person is extremely helpful. Direct and immediate feedback goes way beyond what you can learn in a video.
    Marshal and Mrchick like this.

  15. #20
    Member cmsessa's Avatar
    Join Date
    Nov 2016
    Location
    SF
    Posts
    79
    Thanked: 14

    Default

    The acetone worked great!

    I cleaned the scales and I got some acetone 99.5%.
    Instead of using a qtip I used a syringe. I placed a couple of drops and hold it together for a couple of seconds.
    Great results:
    Name:  scales1.jpg
Views: 87
Size:  40.4 KB
    Name:  scales2.jpg
Views: 90
Size:  40.8 KB

    I already pinned the razor:
    Name:  pin1.jpg
Views: 86
Size:  57.2 KB
    Name:  pin2.jpg
Views: 91
Size:  49.6 KB
    Euclid440 and Marshal like this.

Page 2 of 4 FirstFirst 1234 LastLast

Posting Permissions

  • You may not post new threads
  • You may not post replies
  • You may not post attachments
  • You may not edit your posts
  •