
Results 31 to 40 of 47
 41Likes
 LinkBack URL
 About LinkBacks
-
02-09-2017, 05:34 PM #31illegitimum non carborundum


- Join Date
- Jan 2008
- Location
- Rochester, MN
- Posts
- 11,552
- Blog Entries
- 1
Thanked: 3795
That sounds perfect. Now for another potentially patronizing suggestion...
Make sure you replace the tape regularly, especially just before finishing on the hone.
-
02-09-2017, 05:40 PM #32Senior Member


- Join Date
- Apr 2015
- Location
- New Hampshire, USA
- Posts
- 296
Thanked: 83
Haha - not patronizing at all. I know to do this and usually I remember - but I have gotten through a honing (sort of zenned out) and realized that I never changed the tape.... so my confidence is high - just doesn't always match my competence! Originally Posted by Utopian

I have to use three layers on a W&B Glen restored for me and I peel of just one layer as I go. Once I thought I had one layer and it turned out I had taken off 2 layers and only replaced it with one. When I saw the bevel riding up I was like - what the hell and peeled it all of to reapply when I noticed the mistake. So - reminders are always welcome.
AdamLast edited by aalbina; 02-09-2017 at 06:32 PM.
Marshal likes this.
-
02-09-2017, 05:45 PM #33illegitimum non carborundum
- Join Date
- Jan 2008
- Location
- Rochester, MN
- Posts
- 11,552
- Blog Entries
- 1
Thanked: 3795
If you use alternating colors of tape, you will eliminate that confusion.
-
02-09-2017, 06:33 PM #34Senior Member
- Join Date
- Apr 2015
- Location
- New Hampshire, USA
- Posts
- 296
Thanked: 83
Never thought of that - of course that assumes I'm actually paying attention to the colors! Originally Posted by Utopian
Adam
-
02-16-2017, 02:18 AM #35Senior Member
- Join Date
- Apr 2015
- Location
- New Hampshire, USA
- Posts
- 296
Thanked: 83
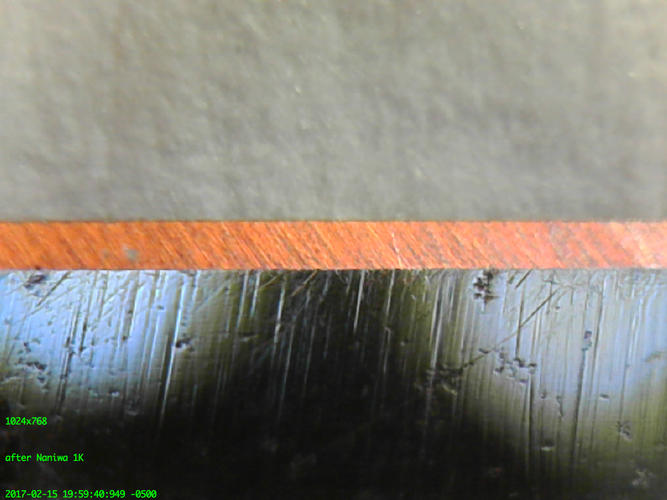
OK - Round two with the same razor. Same sequence with a Naniwa 3K in place of the Norton 4K and no Coticule after the 12K. I did joint the edge to start fresh - which likely removed the chipping. I did this after the first photo. I've adjusted the light to enhance the scratch pattern as best I could - I'm intentionally trying to bring out the stria in the photos.
Starting edge - this is after about 5 shaves and 4 linen then leather stropping as part of my regular routine.

After about 20 light laps on the Naniwa 1K:
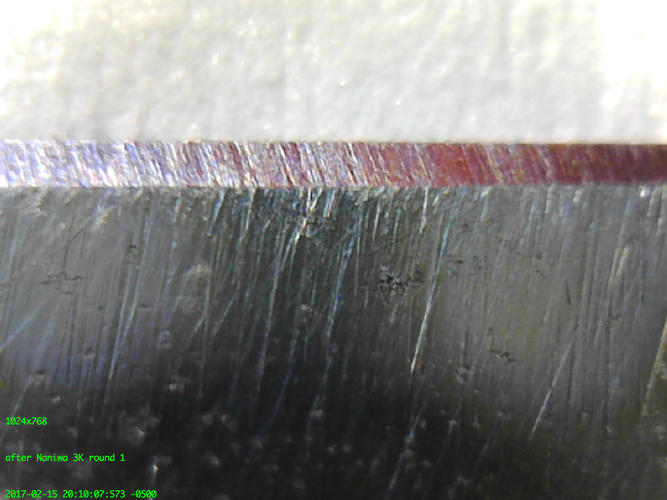
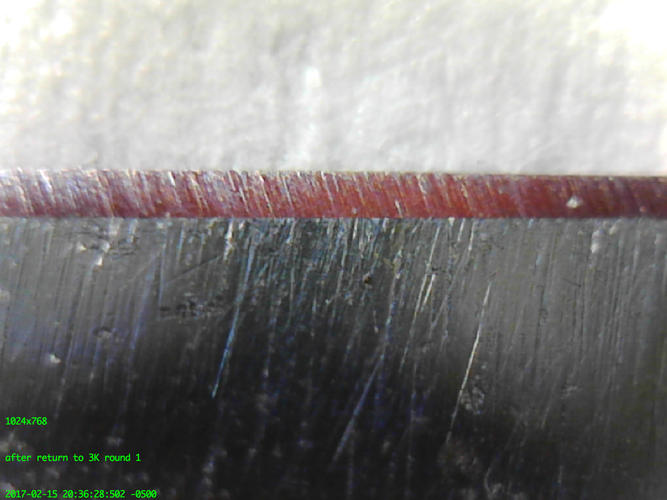
Then After Round 1, circles and x-strokes on the Naniwa 3K
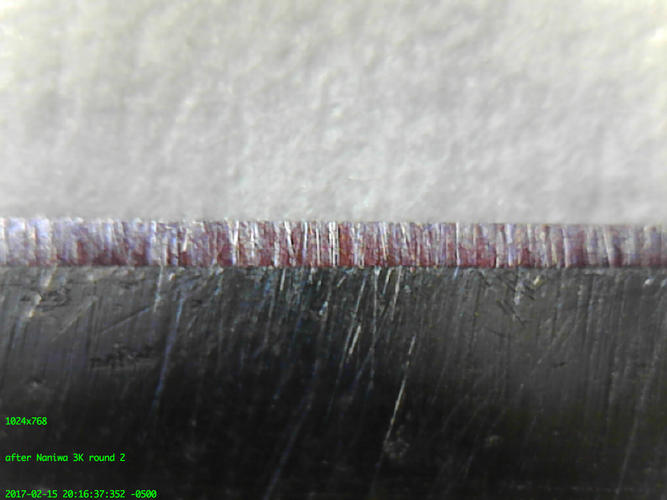
Round 2 on the 3K - fewer circles and lighter pressure x-strokes
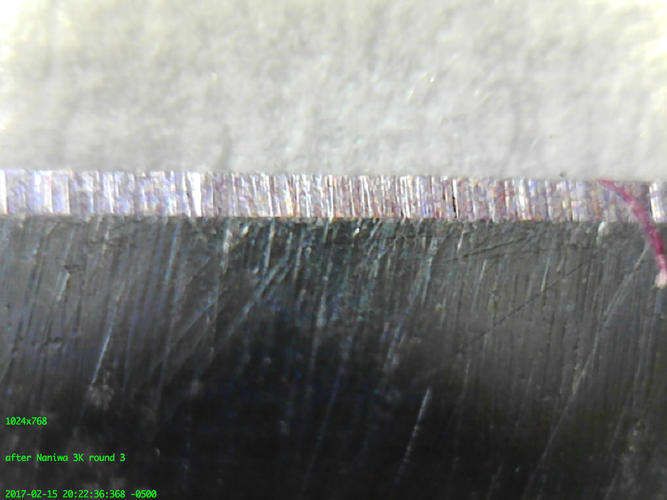
Round 3 on the 3K just light x-strokes (about 50)
On to the Norton 8K - As Euclid said - after I hit the 8K I could see that some previous stria had not been removed so I went back to the 3K for 2 rounds and then back to the 8K.

This is round 2 - on the 3K - I forgot to change the label
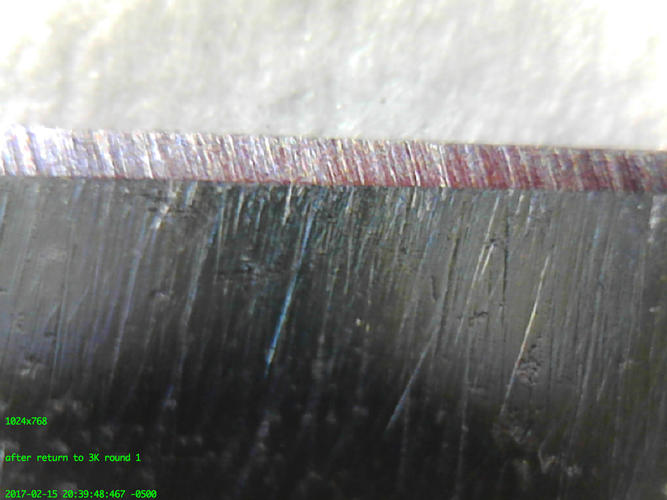

Happier with this I moved on to the Naniwa 12K, CrOx and then SRD Bridle leather.
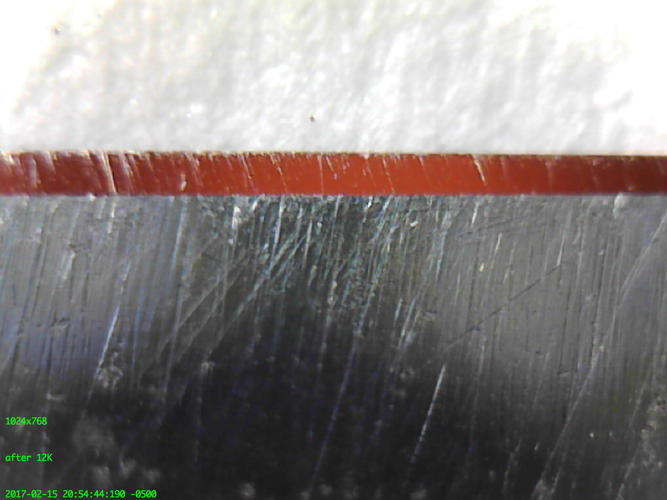
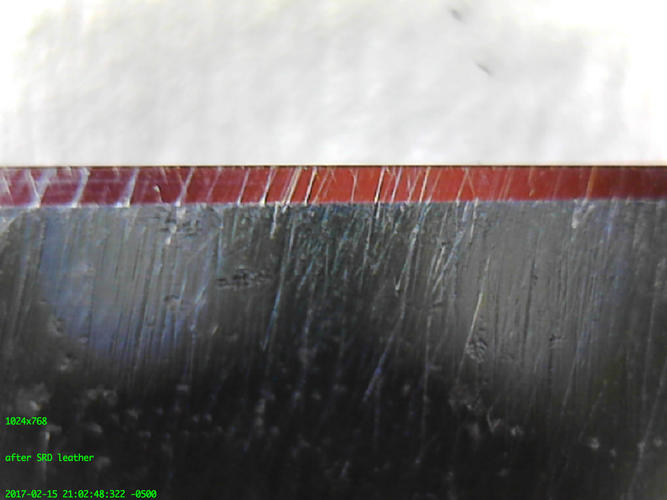
I tried to capture more of the edge so you can see more - I increased the resolution to hopefully provide a good picture at slightly lower magnification.
I was pretty happy with the feel of the Naniwa 3K - doesn't feel rough like the Norton 4K. Comparing the two sets of photos - I does appear that the Naniwa 3K did less edge damage than the Norton 4K - but apples to apples is hard to do with different lighting and magnification. I used the letter u in the Hollow Ground words on the blade to line up the shots so they are all from the same place on the blade.
Shave test tomorrow morning!
AdamLast edited by aalbina; 02-16-2017 at 02:34 AM.
gssixgun likes this.
-
02-16-2017, 03:21 AM #36Senior Member

- Join Date
- Apr 2012
- Location
- Diamond Bar, CA
- Posts
- 6,553
Thanked: 3215
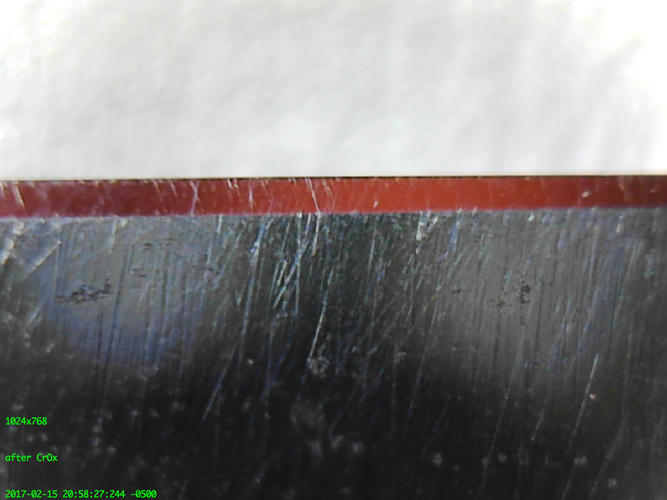
The edge looks better, but still room for improvement, chippy after 12k and Chrome Oxide, much better after leather.
You did not say how many laps you did. You need to do more on the 3 to remove the 1k stria, try to remove it all.
Ideally you want to both remove stria on the bevel and straighten the edge, at the same time, but sometimes it is easier to concentrate on, one thing at a time. Remove the deep stria, you will need some pressure and Circles will remove deep stria quicker, but can leave a ragged edge.
So, remove the deep 1k stria first and try to get the edge as straight as possible, doing light X stroke laps, jointing can help by straightening the edge first.
On the 3 or 4k, begin with circles in sets of 20, to remove the 1k stria, keep doing circles, until all the deep stria are removed, then lay down an even 3/4k stria. Once the bevel is even, then joint the edge or and or do light X laps, until the edge, is as straight as possible.
Do the same at 8k, circles and X strokes, where the edge should begin to get very straight. After 8k there should be no deep stria and the edge should be very straight and chip free.
Try stropping on linen after the 4k, you can strop on Chrome Oxide between stones.
Part of the issue may be the razor, as there is some pitting on the belly of the blade, don’t know how deep the pitting goes.
Now, keep in mind we are talking about perfecting an edge, it is not necessary to remove all the stria from each stone, but when learning and or trouble shooting, eliminate as many possibilities.
-
02-16-2017, 01:53 PM #37Senior Member

- Join Date
- Dec 2014
- Location
- Virginia, USA
- Posts
- 2,224
Thanked: 481
Looks like significant improvement over what was going on before. I'm not seeing the chipping that was present before hand around the 3K mark.
As straight as that looks after leather I'm not sure I'd do anything else to that blade unless for some reason it fails the shave test.
I kind of agree with you on the feel of Naniwa stones. I picked up an 800 grit for kicks and grins, and the soft smooth rubbery feel of the stone is kind of nice. But at the same time I dislike that sensation for lower grit honing. I see that the stone is working due to the amount of steel it removes, but it doesn't feel like it is.aalbina likes this.
-
02-16-2017, 06:12 PM #38Senior Member
- Join Date
- Apr 2015
- Location
- New Hampshire, USA
- Posts
- 296
Thanked: 83
Shave test this morning was pretty good. The blade is quite sharp and actually a little harsh. Certainly gives a nice close BBS shave but for my face, as I have experienced in the past, the edge is a little harsh from the 12K stone. This will ease a bit as I shave and strop the blade. This harshness - for my face - off the 12K is why I started down the CrOx and naturals road. I think I will try a few laps on my Thuringan or Coticule and see if it retains it's sharpness but loses a little bit of the bite. This has worked well for me in the past. I have a heavy beard and have to do a three pass shave to BBS - and that is the level of smoothness that I am after which prevents a dark 5:00pm shadow for me. It also seems to reduce the wear and tear on the knots of my ties which get frayed over time from the stubble on my neck! See - it's really all about saving money...
AdamMarshal likes this.
-
02-16-2017, 08:13 PM #39Senior Member
- Join Date
- Apr 2012
- Location
- Diamond Bar, CA
- Posts
- 6,553
Thanked: 3215
You can try more polishing on another finish stone, but in the last photo a lot of deep stria remains on the bevel and edge chipping on the left side of the photo. Micro-chipping on the edge will give a harsh shaving edge.
Additionally, there is a lot of pitting on the razor, so any deep stria may cause micro-chipping. Unless you remove, ALL the deep 1k stria, you may continue to have edge chipping and harsh edges.
Most new honers put far too much weight on the finishing stone, and are disappointed by the results.
The issue, is not the finish stone, if you build a house on a shaky, un-square foundation, it is not surprising, that the trim carpenter will have issues hanging the crown molding, adding more molding or paint will not “fix” the problem, though it may mask it.
You can see edge chipping, from before bevel set and all the way through the progression. It may be that the razor, will not take or hold an edge without chipping, but you must give it a chance, maxing out each stone in the progression, on the bevel and more importantly the edge.
I would go back to the 4k, re-set the bevel, as straight and chip free as possible and remove all the deep stria, then work up the progression keeping the edge straight and chip free.
-
02-16-2017, 09:38 PM #40Senior Member
- Join Date
- Apr 2015
- Location
- New Hampshire, USA
- Posts
- 296
Thanked: 83
I plan to do another round with this razor tonight. I think I've learned not to put to much pressure on the hones. Probably why it takes me three to five rounds on the 3/4K to work out most of the 1K stria. On the finishers, I apply literally no pressure save the weight it takes to keep the blade on the hone and flat (weight of the blade generally). Originally Posted by Euclid440
Might be the blade - I once tried to hone an Artemis razor (google it and you'll understand) for a friend of my son and it took the absolute lightest hand on a Coticule with tape to put an even close to shave-able edge on it. It chipped on any synthetic over 1 K and kept chipping all the way through the progression. I literally spent weeks on it trying to get a BS piece of steel to hold an edge. The Coticule was the only stone it liked - took forever but it finally worked.
I'm hoping this Sheffield steel hasn't been ruined over the years. I see the chipping but it's pretty minimal lower down in the progression so I'm hoping it's not the razor. The pitting isn't too bad and generally doesn't extend into the bevel.
My problem is that I don't see the 1K stria after the work on the 3/4K. It's only when I go to the next higher stone that I see them. I'll try the CrOx in between stones and see if that polished the bevel enough to see the previous stone stria.
Adam


 Reply With Quote