Page 10 of 19 FirstFirst ... 67891011121314 ... LastLast
Results 91 to 100 of 185
Like Tree211Likes

Thread: Learning Jnats with Microscope

  1. #91
    Senior Member blabbermouth
    Join Date
    Apr 2012
    Location
    Diamond Bar, CA
    Posts
    6,553
    Thanked: 3215

    Default

    Yes, that is typical of a water finish, with slight random scratches and a bit of a polished band near the edge. On an edge forward stroke the polish starts at the edge.

    It looks good and not as scratchy as most I have done with water. Will be interesting to see how it shaves.
    Skorpio58 likes this.

  2. The Following User Says Thank You to Euclid440 For This Useful Post:

    Skorpio58 (04-02-2021)

  3. #92
    Senior Member Skorpio58's Avatar
    Join Date
    Nov 2020
    Location
    Rome - Italy
    Posts
    293
    Thanked: 11

    Default Comparative Test of Naguras - The Ranking!

    Yep,
    after eight rounds of comparative tests of several Naguras it's time to draw some conclusions.

    1) All the Naguras (with the same Razor, on the same base stone, used by the same guy, with the same procedures) gave more than accettable shaves. I dare say, very good ones!

    2) The microscope (as discussed in many posts above) evidenced some differences in finesse between the naguras. But these differences weren't directly related with the outcome of the single shaves. E.g. an apparently coarser nagura, gave a better post shave.

    3) I really wasn't able to notice any appreciable difference in closeness/keeness, and noticed only subtle differences on blade's smoothness while shaving and post shave skin's behavior.

    4) Regarding the small differences I noticed, it is necessary to take into account the daily variability of the skin/beard conditions, in addition to the different conditioning/soothing effect of the different shaving soaps and after shaves that I used.
    I apologize, but I didn't manage to use the same setup over and over again for many almost consecutive times.

    5) The sensitivity of the skin and the hardness of the beard is obviously very dependent on the individual characteristics. For this reason, what I consider acceptable can, on the contrary, be considered unpleasant by others and ... vice versa.

    Note: all shaves made on a two days growt.

    Conclusions: I'm sure it's possible to get better shaves improving either my technique, or the base stone and/or getting other naguras but, I learned a lot of thinghs during this "marathon" to think about for the future, and the level of my sharpening skills/knowledge has certainly risen, and I'm happy about this!

    A special thanks to Euclid440 and all the Guys who visited or commented this thread! Happy Easter to you all!


    Name:  Ranking2.jpg
Views: 195
Size:  28.9 KB
    Last edited by Skorpio58; 04-02-2021 at 06:37 PM.
    ischiapp, jfk742, boz and 2 others like this.
    I know that I don't know (Socrates)

  4. The Following 2 Users Say Thank You to Skorpio58 For This Useful Post:

    jfk742 (04-11-2021), planeden (04-11-2021)

  5. #93
    Senior Member blabbermouth
    Join Date
    Apr 2012
    Location
    Diamond Bar, CA
    Posts
    6,553
    Thanked: 3215

    Default

    Folks that have studied Jnats say that most all Jnats contain the same or similar grit/grit size, and that the minerals and other things that make up the binders are what makes a stone perform as hard or soft, aggressive or polisher, it is how grit is released.

    Your study has pretty much confirmed what they have been saying, there is very little difference in the ability to polish an edge. Yes a few outshine the rest but really a relatively small difference. Your result pretty much reflects what I have found as far as Tomo performance. Hard Suita and Asagi are my favorite finish polishers.

    You can work a slurry and get an even different result, for example a Tsushima slurry can be worked, broken down to produce a fine finish, but it takes a bit of time and work.

    Also, what must be kept in mind is that these are your results with your natural stones, other’s techniques and stones may produce different results, but I feel your results are pretty consistent and can provide or at least point a honer in the right direction in stone selection.

    For those that have never done it, it is a lot of work and a PIA to do the test, photograph and document the process, and why we do not see a lot of it on this forum.

    So, lots of good work, the photos and documentation will help folks transition to Jnats and pull back the curtain of mystery surrounding these stones. They are after all, just rocks.

  6. The Following User Says Thank You to Euclid440 For This Useful Post:

    Skorpio58 (04-07-2021)

  7. #94
    Senior Member Skorpio58's Avatar
    Join Date
    Nov 2020
    Location
    Rome - Italy
    Posts
    293
    Thanked: 11

    Default

    Quote Originally Posted by Euclid440 View Post

    Also, what must be kept in mind is that these are your results with your natural stones, other’s techniques and stones may produce different results, but I feel your results are pretty consistent and can provide or at least point a honer in the right direction in stone selection.

    For those that have never done it, it is a lot of work and a PIA to do the test, photograph and document the process, and why we do not see a lot of it on this forum.
    and
    So, lots of good work, the photos and documentation will help folks transition to Jnats pull back the curtain of mystery surrounding these stones. They are after all, just rocks.
    Euclid,
    thanks for your conclusions. You made the point.

    In fact, I believe the final results were almost the same mainly because of my limited technical skill. I.e. given a base stone & different naguras, the outcome is due to the op. ability to squeeze the maximum performance out of it. Of course, my technical ability gradually improves, repeating the same movements over and over again, learning how slurry behaves on a certain stone and (thanks to the microscope), understanding how certain procedures affect the bevel and the edge of a certain blade, but of course, this technique takes much longer to be assimilated and perfected to the maximum.

    I agree, as a systematic approach is critical to learn and understand how Jnats behave. Yes, they are just rocks (as you said) but our newbie's approach is often limited by too little knowledge (and too much hype) about these stones. So, I'm happy If my work can be useful to anyone else who intends to approach them.

    Next Step: I'm going to make the same comparative test on my Ozuku (Asagi?) as it gives me (when honing on it) a somewhat different feeling than the Nakayama Kiita. This does not necessarily mean that the results will be very different, but it is always better to check it rationally.

    After these tests, maybe I'll be finally ready to learn HOW to work the slurry to enhance the performance of the single nagura/base stone pairing...
    Last edited by Skorpio58; 04-07-2021 at 07:42 AM.
    planeden likes this.
    I know that I don't know (Socrates)

  8. #95
    Senior Member Skorpio58's Avatar
    Join Date
    Nov 2020
    Location
    Rome - Italy
    Posts
    293
    Thanked: 11

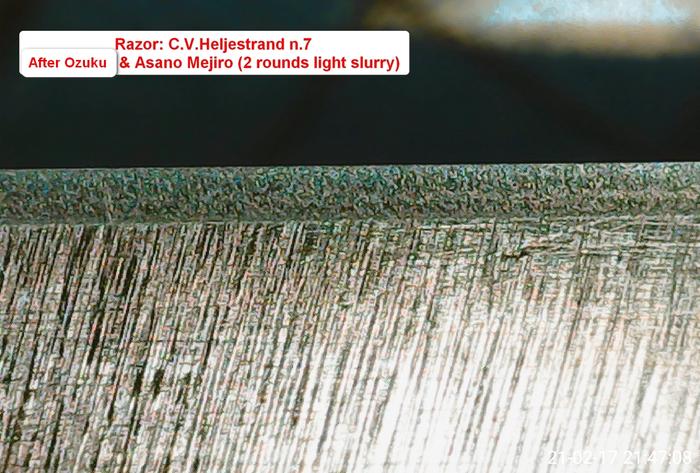
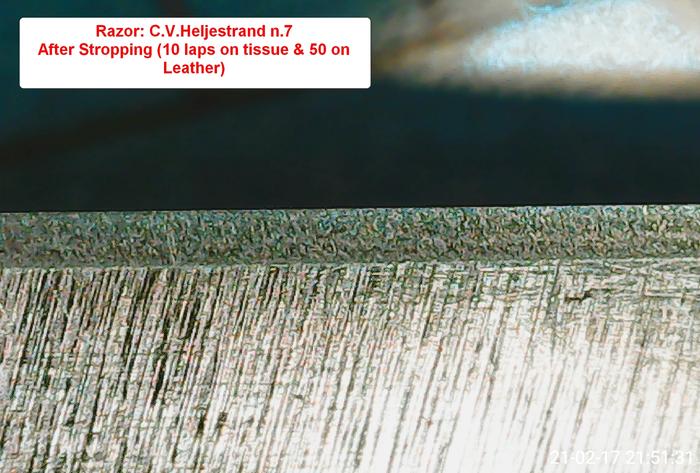
    Default Second Comparative Nagura Test - Round One.

    As I said in my previous post, Yesterday I started a new series of Naguras comparative tests: this time I used an Ozuku (asagi?) Koppa as base stone.

    I changed the razor for this series, but also this one is a 6/8" FH Solingen.
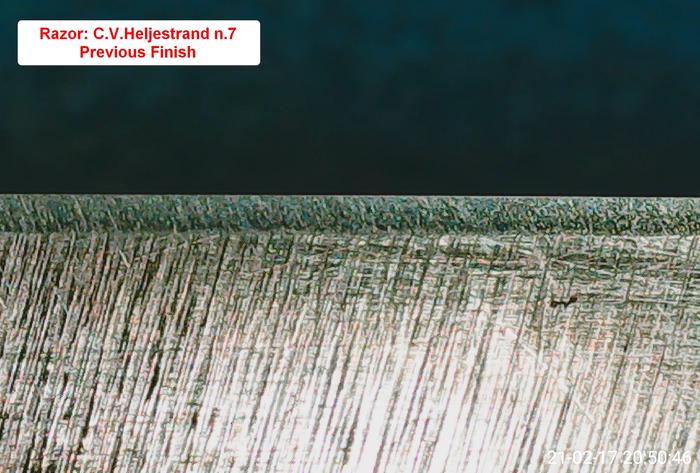
    The razor was previously honed by myself on a sinth 3/8K followed by diamond slurry on my Italian Curgèle stone (see some pages above) and finished on it water only. It shaved nicely (considering it was my third or fourth honing attempt )

    First of all I had to make a new bevel because of some edge chips caused by a bad scales centering.
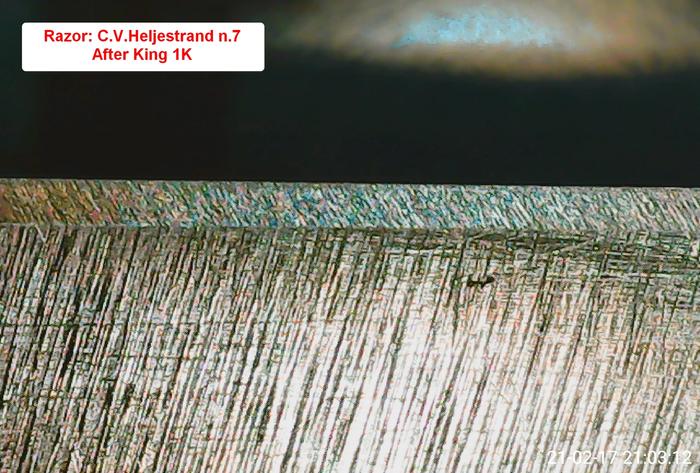
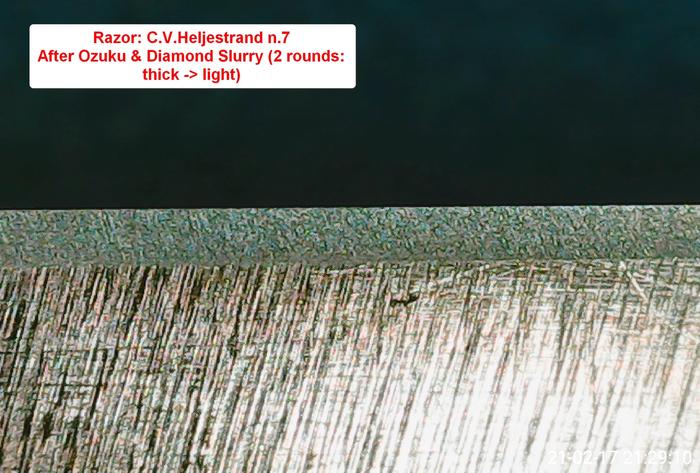
    I did it also to see (following Euclid's suggestion) how the base stone performed by itself. So, after a King 1K I made 2 rounds of thick diamond slurry (5 mins. each) to see how the 1K stria were managed by the Ozuku's abrasive power itself.
    Btw. the Eze Lap 1200G diamond plate raised quickly (about 20 seonds) a good amount of slurry(see photo)

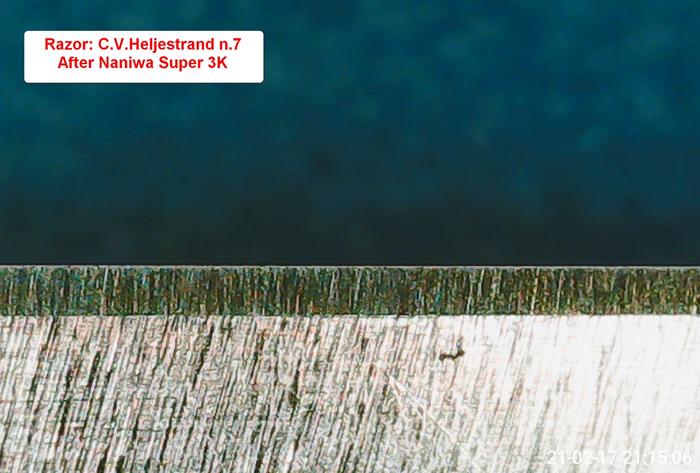
    Then I used the Black Tsushima Nagura (to set the test conditions as the previous series on Nakayama) followed by Nakayama Kiita (1) Tomo's Slurry.

    It seems to me that the diamond slurry made a good work regarding the 1K stria... but I'm waiting for more authoritative judgments. The Nakayama Kiita (1) Tomo also seems to confirm not being one of the finer in my possession. I bet the edge could be straighter too.

    Today's shave (as usual, WTG/ATG passes on a two days growth) performed very well in closeness and gave an excellent post shave. As on previous test, the general feeling during shaving was instead slightly below average.

    Name:  Ozuku - Tsushima - Nakayama Kiita 1 001.jpg
Views: 153
Size:  67.3 KB

    Name:  Ozuku - Tsushima - Nakayama Kiita 1 002.jpg
Views: 157
Size:  72.6 KB

    Name:  Ozuku - Tsushima - Nakayama Kiita 1 003.jpg
Views: 156
Size:  78.9 KB

    Name:  Ozuku - Tsushima - Nakayama Kiita 1 004.jpg
Views: 156
Size:  73.9 KB

    Name:  Ozuku - Tsushima - Nakayama Kiita 1 005.jpg
Views: 154
Size:  83.8 KB

    Name:  Ozuku Diamond Slurry.jpg
Views: 164
Size:  34.2 KB

    Name:  IMG_20210330_110556.jpg
Views: 156
Size:  33.1 KB
    Last edited by Skorpio58; 04-11-2021 at 03:16 PM.
    ischiapp and planeden like this.
    I know that I don't know (Socrates)

  9. #96
    Senior Member blabbermouth
    Join Date
    Apr 2012
    Location
    Diamond Bar, CA
    Posts
    6,553
    Thanked: 3215

    Default

    First, if you are having issues centering the blade, that needs to be fixed or it will be a reoccurring problem. It is an easy fix. Let me know if you need help with this.

    That style of scale material is notorious for Cell Rot and may be the cause of the shrinkage/warpage of the scales, and the slight pitting of the blade. Keep an eye on it. Nice looking razor.

    Your Ozuku Asagi appears to be a fast-cutting stone and may finish well on just Diamond slurry. If you want to attempt that, after removing the 1k stria, re-joint the edge and strop on linen, then re-set the edge on a thinned diamond slurry.

    You Diamond slurry bevel looks good, but the edge could use some improvement, jointing and stropping will straighten it at this stage.

    The Tsushima bevel looks similar to the Diamond slurry, but the edge is much straighter, it could be just because it has more milage on the stone, (more laps), but my experience is Tsushima is aggressive, but also breaks down finer with work, (more laps).

    The Kita tomo refined the bevel a bit but really straightened the edge. If you want to refine the edge further, when you feel you are done, lightly joint the edge, one light lap. Strop on linen 10 laps, then go back to your thinned slurry add a couple drops of water and do 10 to 20 light laps to rebuild a clean edge.

    Strop on linen 10-15 laps and 10-20 on clean leather, and shave.

    Nice work should shave well, nice clean stone.

  10. The Following 2 Users Say Thank You to Euclid440 For This Useful Post:

    ischiapp (04-11-2021), Skorpio58 (04-12-2021)

  11. #97
    Senior Member Skorpio58's Avatar
    Join Date
    Nov 2020
    Location
    Rome - Italy
    Posts
    293
    Thanked: 11

    Default

    Euclid,

    I was a bit pessimistic then... as I tought the final edge was less straight than usual.

    As you suggested I'll make some experiments jointing (btw. I forgot to say I did it also before the Tsushima... as usual in all my previous tests) the edge to push it further, but I'll do it (both after the diamond slurry alone, and after the final Tomo) separately on another razor.

    Yep, the Ozuku seems a quite nice stone, and gives me a positive and plushy feedback. It's also (albeit being a Koppa) more regular in shape than my Nakayama Koppa. So I can move better the blades on it. More, doesn't seems too hard (I think no more than Lev. 4,5) so it's a bit easier to manage (and less risky) than the "classic" Ozuku Lev. 5++
    DZEC likes this.
    I know that I don't know (Socrates)

  12. #98
    Senior Member blabbermouth
    Join Date
    Apr 2012
    Location
    Diamond Bar, CA
    Posts
    6,553
    Thanked: 3215

    Default

    I do not know about the whole hardness ranking, it is just an opinion, and I am not sure how much is just hype marketing by vendors.

    Better to do your own testing and make your opinion by how fast a stone slurries with a given diamond plate and how fast it removes 1k slurry. A very hard stone will be difficult to raise a slurry, it will also not remove 1k stria quickly.

    Another thing to think about when doing edge correction, to repair edge damage is, the damage to the steel is always much deeper than what you see. So that part of the edge will be weaker and more likely to micro chip as you shave and strop the razor and stress the edge.

    Jointing removes more of the whole edge and gets to solid steel. It also removes any flashing/burr or rough edge, making the edge straight, removing a minimum of steel. Once the edge is straight, you only need to get the bevels meeting.

    Here is an interesting demonstration by Brian Boggs on sharpening and burr creation and how to avoid it. While he is talking about tool sharpening the effects of burr creation and removal are the same.

    For years people have learned to sharpen by creating a bur, then break it off by honing on the opposite bevel. When you break off the bevel you create a ragged edge. That may be ok for knives and tools, but even for tools there are times when you want as straight and chip free an edge as possible.

    Better to try and not create a bevel and to hone to an already straight, (jointed) edge. It is similar to woodworking where you make a Knife line with a sharp knife and square for joint layout, then saw or chisel to the knife line to create a knife wall. That line will always be straighter than trying to cut to a pencil line, because the straight line is already created and will make for a straighter seamless joint.

    ()

  13. The Following 3 Users Say Thank You to Euclid440 For This Useful Post:

    bluesman7 (04-30-2021), ischiapp (04-13-2021), Skorpio58 (04-12-2021)

  14. #99
    Senior Member Skorpio58's Avatar
    Join Date
    Nov 2020
    Location
    Rome - Italy
    Posts
    293
    Thanked: 11

    Default About Diamond Slurry & Jointing the Edge

    Wanting to see if I was able to replicate what Euclid said (i.e. pushing further the edge jointing it before final laps... expecially after diamond slurry), last evening I made a short test using Diamond Slurry only on my Ozuku asagi koppa.

    Made 2 rounds with thick slurry (after the second round a small chip occurred on the edge... maybe some impurity from the stone , but I wasn't aware of it while honing ) then jointed the edge and made another round with medium to thin slurry.
    At that point, I lightly jointed (1 pass) the edge again and stropped 10 laps on Canvas, before the final 15 laps with further thinned slurry.

    Two points seems to need some thinking about.

    The first one is: was the second round with thick slurry redundant or useless?
    The second one: have i been able to reach the final result Euclid expected?

    In both cases I'm tempted to answer "yes"... but (of course) I can't be sure...

    Today's shave went quite well, with a good post shave.

    Name:  Ozuku - Test Diamond Slurry 001.jpg
Views: 131
Size:  43.4 KB

    Name:  Ozuku - Test Diamond Slurry 002.jpg
Views: 134
Size:  47.8 KB

    Name:  Ozuku - Test Diamond Slurry 003.jpg
Views: 136
Size:  48.0 KB

    Name:  Ozuku - Test Diamond Slurry 004.jpg
Views: 142
Size:  43.2 KB

    Name:  Ozuku - Test Diamond Slurry 005.jpg
Views: 141
Size:  39.4 KB

    Name:  Ozuku - Test Diamond Slurry 006.jpg
Views: 134
Size:  47.0 KB

    Name:  Ozuku - Test Diamond Slurry 007.jpg
Views: 137
Size:  42.8 KB

    Name:  Ozuku - Test Diamond Slurry 008.jpg
Views: 142
Size:  45.5 KB

    Name:  Ozuku - Test Diamond Slurry 008.jpg
Views: 142
Size:  45.5 KB

    Name:  IMG_20210330_110831.jpg
Views: 135
Size:  39.6 KB
    Last edited by Skorpio58; 04-13-2021 at 11:29 AM.
    I know that I don't know (Socrates)

  15. #100
    Senior Member blabbermouth
    Join Date
    Apr 2012
    Location
    Diamond Bar, CA
    Posts
    6,553
    Thanked: 3215

    Default

    Yes, much better-looking edge. Nice.

    Yesterday I was honing a couple razors and did some experimenting. I was honing a near NOS Filarmonica. Pristine, in the box, no hone wear, but not in the cellophane.

    I set the bevel on a King 1k and decided to see how straight I could get a 1k edge.

    This is a good experiment that will quickly show how stroke, direction, technique, pressure, jointing and stropping effect the edge. If you can improve the edge at 1k, it will make huge differences at the finish stone and edge if you employ the same techniques.

    Having never been honed, the edge was a chippy, I jointed the edge with 2 strokes with a bit of pressure, the second lap less pressure but could feel slight bumps as the small chips contacted the corner of the stone.

    I flattened and slurred the stone with a 300-diamond plate, a fairly heavy slurry. 4 sets of 10 circles, checking the bevel after each set of 10, got the bevels flat, (an even random stria pattern across the whole bevel from heel to toe). I then did 2 sets of 10,5,2,1 Ax laps, back and forth, with a bit of pressure, to set an even stria pattern, but a jagged edge. I jointed the edge one lite lap, which straightened the edge, but left some tiny dark spots when looking straight down on the edge. Those dark spots are the bottoms of microchips.

    Re-lapped the stone, washed it clean and stropped the razor on clean linen Firehose 20 laps. Then did another set of 10,5,2,1 of Axe half laps, but only edge leading, with light pressure. This brought all the stria uniform perpendicular to the edge and straightened the edge considerably.
    The edge was now fully set. And grabbing arm hair across the whole edge.

    I very lightly jointed the edge again, stropped 10 laps on Firehose, and flooded the stone with water.

    I then did a series of 10 laps vertically to the edge of the stone, up and down and walking down the stone so the bevel was on new fresh hone grit with each lap.

    For clarity, I am moving the razor up and down, not side to side edge leading, the goal is to cut off the tops of ridges of the edge leading stria.

    This will leave a horizontal stria pattern on the bevel, it took 2 sets of 10 to remove almost all the vertical stria from the bevel.

    I then re-jointed and stropped the razor. 10 laps on firehose. I then did 6 edge leading laps with lite pressure, which reset the edge, it was grabbing arm hair again.

    I re-stropped 10 laps on firehose, the edge was very straight, with light stria on the bevel.

    From there I went to an Asagi with medium Tsushima slurry and finished on Koma slurry jointing and stropping between the Tsushima and Koma slurry laps and before 10 final laps.

    The point I am making is the edge difference is dramatic by jointing, stropping, multi directional honing and pressure on a 1k stone. So, if you can see the difference at 1k, the same thing happens at the finish stone using the same techniques and will leave a super straight finished edge.

    The edge difference between a 1k with slurry and a clean 1k is pretty dramatic on the edge.

    While it may seem tedious, the whole honing process took about 20-30 minutes.
    Last edited by Euclid440; 04-13-2021 at 04:49 PM.
    DZEC and Skorpio58 like this.

  16. The Following 2 Users Say Thank You to Euclid440 For This Useful Post:

    planeden (04-13-2021), Skorpio58 (04-13-2021)

Page 10 of 19 FirstFirst ... 67891011121314 ... LastLast

Posting Permissions

  • You may not post new threads
  • You may not post replies
  • You may not post attachments
  • You may not edit your posts
  •