
Results 1 to 10 of 18
 3Likes
 LinkBack URL
 About LinkBacks
-
06-10-2011, 09:38 PM #1Senior Member


- Join Date
- Mar 2011
- Location
- Ontario, Canada
- Posts
- 157
Thanked: 13 Can't seem to set a sharp or even bevel on breadknifed blade
So im restoring an old wolstenholm and it had a pretty bad smile. So silly me decided it would be easier to breadknife it then learn how to hone smiling blades. After flattening it somewhat and removing the chips on the 220 norton, I can't seem to get a sharp or even bevel on the 1k (all nortons). I tried for a couple hours with a couple hundred laps and the bevel in the middle is very wide, much wider than my other razors and the toe and heel are still fairly thin. Nothing along the edge passes the thumbnail test. I'm at a loss, suggestions? I don't want to finish my entire restore to learn it's not useable.
-
06-10-2011, 09:47 PM #2At this point in time...


- Join Date
- Jun 2007
- Location
- North Idaho Redoubt
- Posts
- 27,029
- Blog Entries
- 1
Thanked: 13245
Yeah the spine and wear on the spine is from the smile so changing it to a straight is going to be a problem in itself...
Breadknifing is a restoration technique, it is not honing and to bring it back you need to restore the bevel before you hone the bevel...
There is a instructional video on my Youtube channel and a warning not to even start unless you are ready to do the work and since you compounded the problem by wiping out a smile first yours is going to be a royal pain in da butte'
Str8Shooter likes this.
and since you compounded the problem by wiping out a smile first yours is going to be a royal pain in da butte'
Str8Shooter likes this.
-
06-10-2011, 09:49 PM #3Scale Maniac


- Join Date
- Mar 2009
- Location
- Decorah, IA
- Posts
- 2,671
Thanked: 641
Ohhh man. Like Glen said, there is some serious geometry that will have to change in order to get a good edge on that razor... big +1 to watching some videos on how to fix the problem (Glen's are a great tutorial) and then very, very patiently going back at it...
Remember, it is way WAY easier to read a little than it is to put steel back on a razor...
-
06-10-2011, 09:49 PM #4Senior Member


- Join Date
- Feb 2008
- Posts
- 32,564
Thanked: 11042
The first lesson is don't breadknife unless there is a very good reason. To begin with sharpen it as if it were a pocket knife with the spine slightly above the honing surface. When you begin to get a bevel that you can feel by rubbing your thumbpad across the edge go to three layers of tape on the spine and continue with the taped spine contacting the hone. Bring your lunch because it is a chore to get it back from that condition.
Be careful how you treat people on your way up, you may meet them again on your way back down.
-
The Following User Says Thank You to JimmyHAD For This Useful Post:
pinklather (06-18-2011)
-
06-10-2011, 09:50 PM #5..mama I know we broke the rules...

- Join Date
- Feb 2010
- Location
- Toronto, Ontario, Canada
- Posts
- 2,895
- Blog Entries
- 8
Thanked: 993
Geometry wise, you've taken all aspects of a point, or a V, and bypassed a rounded point (or U), and made it a rectangle or trapezoid of steel. If you're on the nortons, may I suggest setting a pre-bevel that passes the thumb nail test first. Then move to the 1k and begin to even it out. At the 1K, then I'd use the thumb pad and arm hair tests.
-
06-10-2011, 09:53 PM #6
+1 on Jimmy's advice.
It's going to be a slog to sort out because of how much the blade has changed.
I definitely agree about not breadknifing unless absolutely necessary. There's no point in making something dull if you want it to be sharp...!
Good luck and keep us posted!
-
06-10-2011, 09:55 PM #7illegitimum non carborundum


- Join Date
- Jan 2008
- Location
- Rochester, MN
- Posts
- 11,551
- Blog Entries
- 1
Thanked: 3795
First, HAVE you restored it yet? Is the restoration done? You don't want to be doing any further work on the razor after it is sharpened.
On to the sharpening. I think as a general rule, breadknifing should be made illegal. It makes so much more work for those who already don't know what they are doing. I don't mean any offense, but the times when breadknifing is justified is only a small fraction of the time that is seems to be done around here.
First, tape the spine so you don't trash it. Importantly, is the bevel wide in the middle on BOTH sides of the razor? If so, then that's good news because it means it is your fault and you can be fixed easier than the razor if it were warped, as would be indicated by a wide bevel in the middle on one side and on the ends on the other side.
For a smiling blade, you're going to need to do two things. First, hone the razor with the heel leading the toe by a 30 to 45 degree angle. Second, you are going to have to learn how to do a rolling x stroke. One easy way to learn this is to draw a line (real or imaginary) on your hone about one inch from the side that faces your honing hand. Now, when you hone, pretend that this one inch wide region is the entire width of your new imaginary narrow hone. Alter the pressure so that the water is always being pushed in that region and make sure that the toe ends up inside that region.
That's a start for you anyway.Last edited by Utopian; 06-11-2011 at 02:55 PM.
-
The Following 6 Users Say Thank You to Utopian For This Useful Post:
BKratchmer (06-10-2011), cpcohen1945 (06-11-2011), dyimages (06-10-2011), jeness (06-11-2011), pinklather (06-18-2011), Sando (06-10-2011)
-
06-10-2011, 09:58 PM #8illegitimum non carborundum
- Join Date
- Jan 2008
- Location
- Rochester, MN
- Posts
- 11,551
- Blog Entries
- 1
Thanked: 3795
My advice was based on the premise that the smile at least partially remained, since you said that you had removed it "somewhat." Originally Posted by gssixgun

-
06-10-2011, 10:29 PM #9Senior Member
- Join Date
- Mar 2011
- Location
- Ontario, Canada
- Posts
- 157
Thanked: 13
Wow that was a lot of replies in a short time. I'll try to answer most of the questions.
I have not started the restoration. Ive removed the patina and the pitting with 220 sandpaper, but that's all. So I only have a night or two of handsanding into the razor.
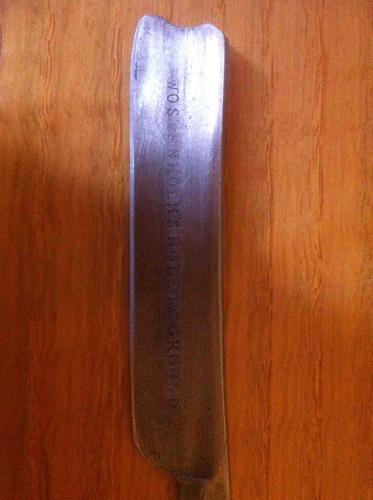
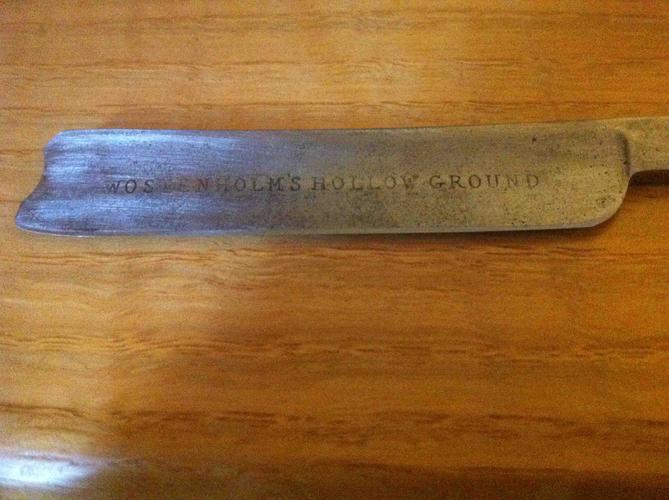
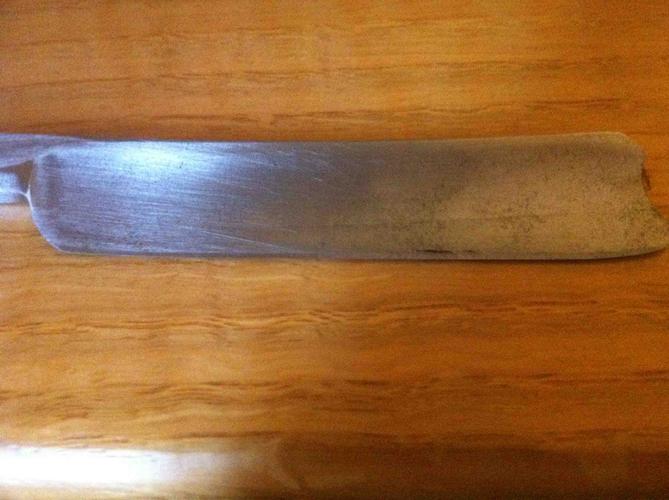
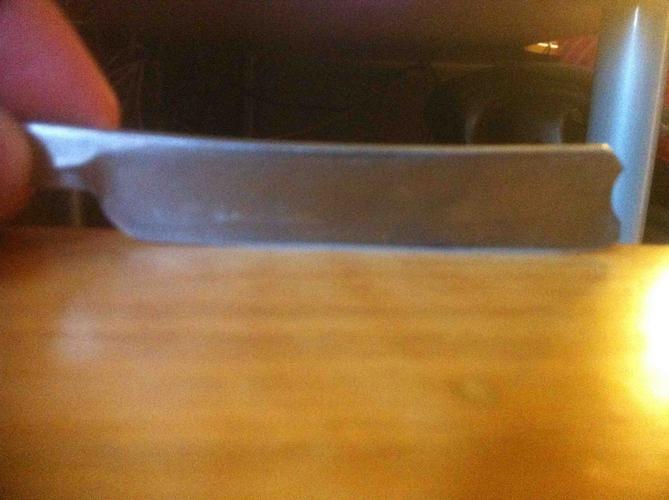
I did not drastically breadknife the razor, there is still a good amount of smile left, and the spine itself has a smile. Perhaps it's easier if I just post some pictures and then everyone can give me some more specific advice on where it's at.
Oh and yes the bevels look very similar on both sides of the razor. And I have used one piece of tape the entire time so I haven't worn out the spine at all.
I hope that's all the questions
-
06-10-2011, 10:43 PM #10Senior Member
- Join Date
- Mar 2011
- Location
- Ontario, Canada
- Posts
- 157
Thanked: 13
OK, here are the pictures. I hope they're enough for everybody to work with.


 Reply With Quote