Results 1 to 10 of 92
Threaded View
-
04-21-2013, 08:30 PM #2Straight razor padawan

- Join Date
- Apr 2013
- Location
- Norcal.
- Posts
- 52
Thanked: 12
EP table setup
Understanding that the razor is a very thin edge blade, I thought about how to set the EP up so that the razor did not get bent/distorted and came up with the plastic card shim. The shim allows for a small section of the blade to hang off the EP platform. The second card is to provide a stop for the razor's edge so it can be placed on the EP consistently.
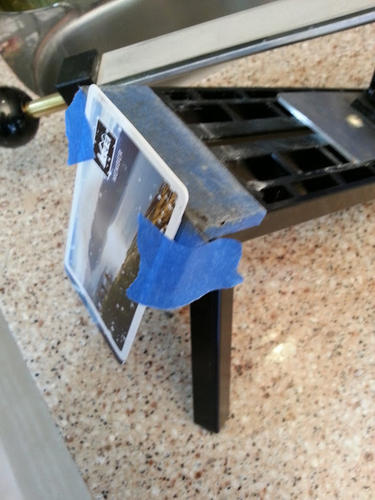
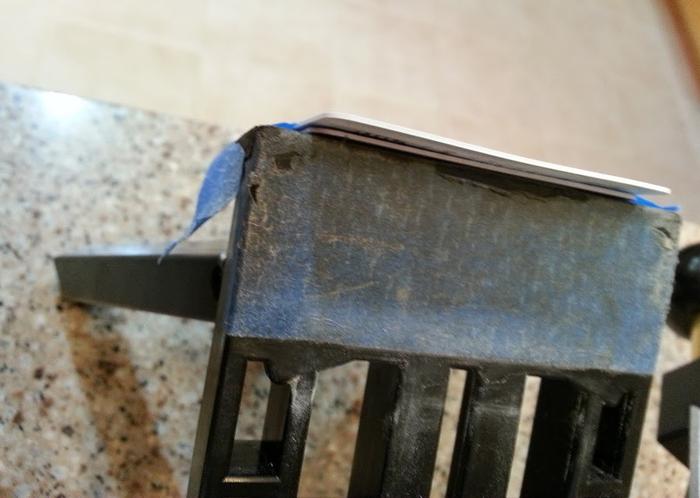
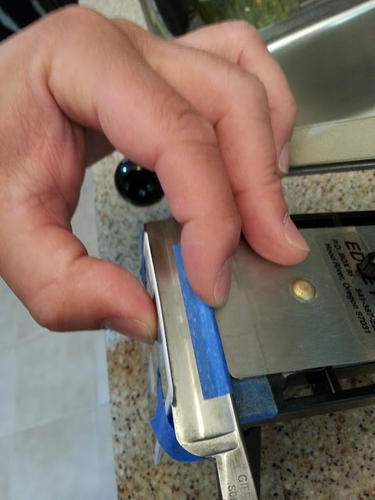
EP arm setup
Ben Dale from Edge Pro suggested I keep the EP arm as close to the cutting edge of the razor as well as the spine without touching the spine. From the videos I have watched, the spine acts as a guide when drawing the razor across a strop or stone. To remedy this, I placed some painters tape on the spine of the razor and then placed the arm in a position where the cutting edge and the spine were in contact.
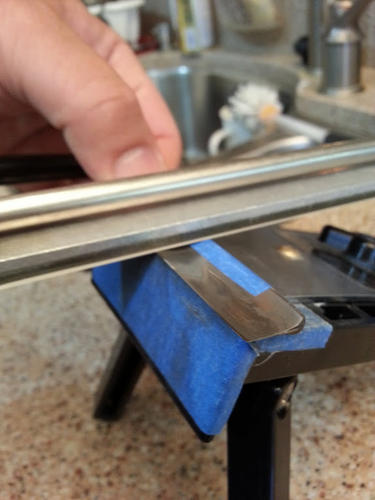
After the arm was set I removed the tape and went to the sharpening. As previously mentioned in other posts, I use the sharpie method. I cover the cutting edge with sharpie and then slide the stone/polish tape over the edge to see if the media is cutting the edge properly.
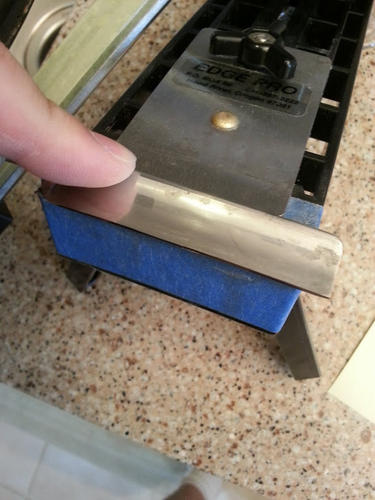
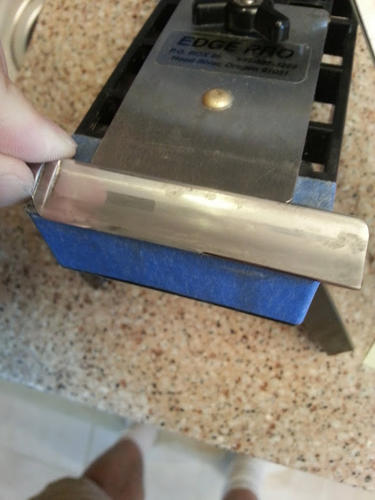
I verified that the spine was not getting touched by the tape by marking the spine and cutting edge again with sharpie.
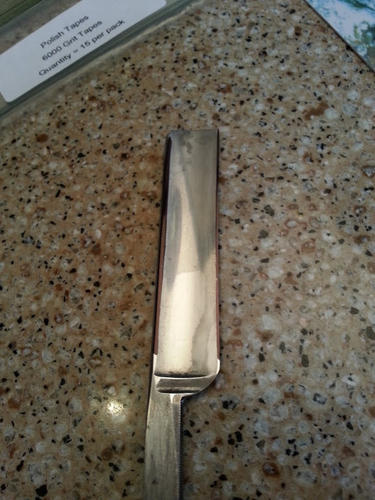
Sharpening procedure
I first thougt of starting at my 1k stone but decided to start using my 2k polishing tape. I first tested the razor with the arm shave test to see how it performed. The blade was sharp but did not shave. Now the fun begins...
I sectioned the blade in two when I started drawing the tape over the edge. From the point to the middle of the blade and from the shoulder to the middle of the blade. After that I would pas the tape over the middle section. The tape would be lubricated with a water and dish soap mix between passes.
Here are the tape progressions Pass pattern 20, 15, 10, 5:
2k tape: 20 passes (front to back stroke = 1 stroke) - point to middle
20 passes - shoulder to middle
20 passes -middle area
Flip razor and repeat
15 passes - point to midle
15 passes - shoulder to middle
15 passes - middle area
Flip razor and repeat
All the way down to 5 passes.
3k tape: Same as above
6k tape: Stopped at 20 passes.
I stopped at 20 because I had to run some errands and I had to test the blade on my face.
All that I did for face prep was a splash of water and some Target shaving gel that I had left over (no time to make lather as I was running late). I wiped the blade down with some isobroply alcohol and shaved my cheek. I was very happy with the results. The blade cut smoothly and easily. I do need to make a point about what my interpretation of smooth is. My sample size of straight razor shaves is all of 6. I have been using a shavette with Shark blades. So the experience I have may be on the lower end of the shave scale due to my initial setup. I am going to run the 6k tape through the full progression before I shave with it again.
I also plan on buying wet sanding paper to clean up the blade itself.. As for a strop, I am not sure as of yet, not enough data against or for the EP...yet.
*Update*
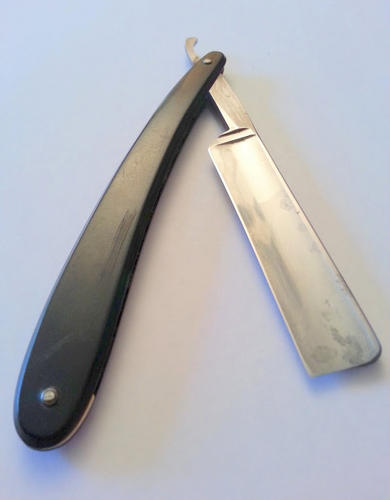
I finished the blade with the 6k tape progression. Now to shave with it…


 57Likes
 LinkBack URL
 About LinkBacks


