
Results 1 to 10 of 21
 25Likes
Thread: Homemade razor stand
 LinkBack URL
 About LinkBacks
-
09-29-2013, 11:13 PM #1Senior Member


- Join Date
- Apr 2013
- Location
- Fort Worth, TX
- Posts
- 112
Thanked: 3 Homemade razor stand
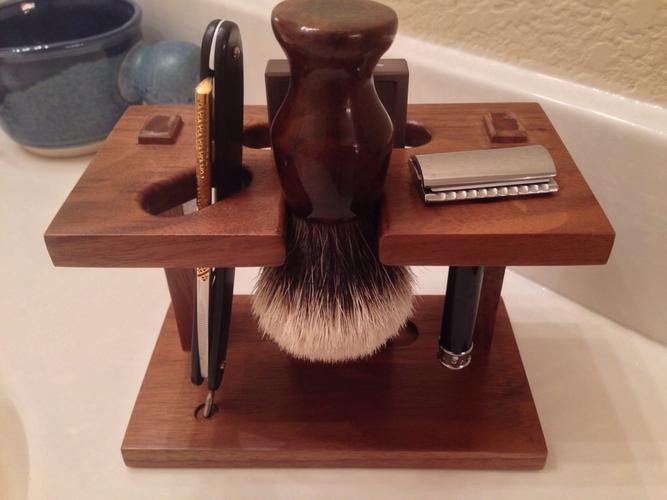
Here's a razor stand I made using some scrap walnut I had laying around. I got the idea off of a stand I saw on the internet and expanded on it to add a place for my DE razor and Swaty hone. I haven't finished it yet. I was just trying it on for size. I think it'll work after a few coats of poly and rubbing it out with steel wool and wax!
Will post more pics after final finish.
-
09-29-2013, 11:29 PM #2Senior Member

- Join Date
- Jan 2011
- Location
- Roseville,Kali
- Posts
- 10,432
Thanked: 2027
very nice work

-
The Following User Says Thank You to pixelfixed For This Useful Post:
Jetmech (09-29-2013)
-
09-29-2013, 11:35 PM #3Senior Member


- Join Date
- Feb 2010
- Location
- California
- Posts
- 4,833
Thanked: 1841
Looks great. So does that flowing.
Bob
"God is a Havana smoker. I have seen his gray clouds" Gainsburg
-
The Following User Says Thank You to lz6 For This Useful Post:
Jetmech (09-29-2013)
-
09-29-2013, 11:48 PM #4
When does it go into production. I want the 2nd one.
ScottGoodman and Jetmech like this.
-
09-30-2013, 07:18 AM #5Simple Shaver


- Join Date
- Dec 2012
- Location
- LA county
- Posts
- 223
Thanked: 52
Great work. Very practical, love the slot for the barber hone.
-
The Following User Says Thank You to RoobtheLoob For This Useful Post:
Jetmech (09-30-2013)
-
09-30-2013, 07:31 AM #6Senior Member

- Join Date
- Sep 2011
- Location
- Perugia, Italy
- Posts
- 1,924
Thanked: 469
Very good job! I too love the slot the the barber hone.
The RazorGuy - StraightRazorChannel on Youtube and Google+
-
The Following User Says Thank You to razorguy For This Useful Post:
Jetmech (09-30-2013)
-
09-30-2013, 09:59 AM #7aka shooter74743


- Join Date
- Sep 2009
- Location
- SE Oklahoma/NE Texas
- Posts
- 7,285
- Blog Entries
- 4
Thanked: 1936
Nice job my friend, it does need sealing...but you did a awesome job!
Southeastern Oklahoma/Northeastern Texas helper. Please don't hesitate to contact me.
Thank you and God Bless, Scott
-
The Following User Says Thank You to ScottGoodman For This Useful Post:
Jetmech (09-30-2013)
-
10-01-2013, 01:46 AM #8Senior Member
- Join Date
- Apr 2013
- Location
- Fort Worth, TX
- Posts
- 112
Thanked: 3
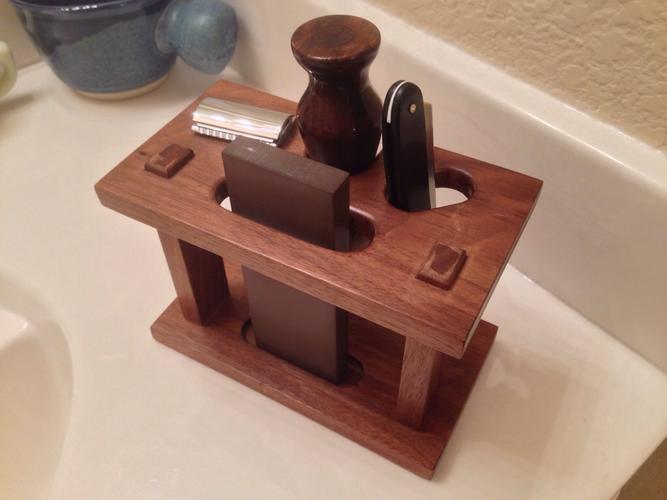
Well here's the finished product. I should have applied the poly before glue up. I would have gotten a better finish. Also, the glue soaked in to the wood around the joints and you can see that through the clear coat. Oh well, live and learn. I'll just have to make another one out of some more scrap wood I have😃
-
10-01-2013, 01:51 AM #9Senior Member

- Join Date
- May 2007
- Location
- outside of Tucson, AZ
- Posts
- 1,546
Thanked: 145
That is really cool. How simple yet I would never have thought of something like that. very well done
-
The Following User Says Thank You to sinnfein For This Useful Post:
Jetmech (10-01-2013)
-
10-01-2013, 10:26 AM #10
Give me your address and I'll send a box to get this bad memory out of your way.
 Originally Posted by Jetmech


 Reply With Quote