
Results 1 to 3 of 3
 10Likes
Thread: Top Opening 2 Razor Box Tutorial
 LinkBack URL
 About LinkBacks
-
12-01-2014, 12:42 AM #1Senior Member


- Join Date
- Dec 2011
- Location
- Omaha, Ne
- Posts
- 479
Thanked: 262 Top Opening 2 Razor Box Tutorial
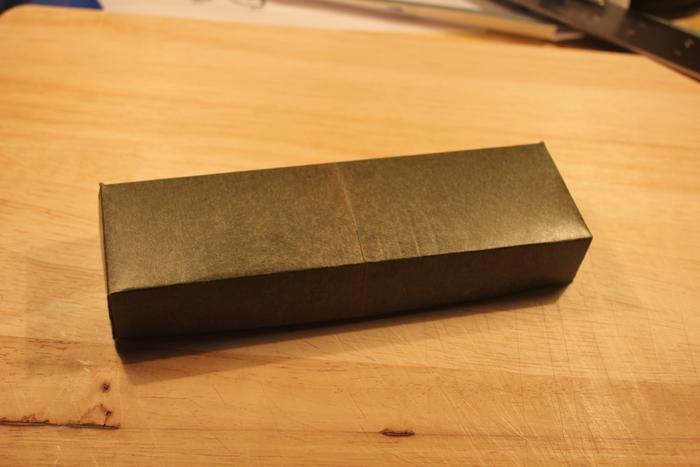
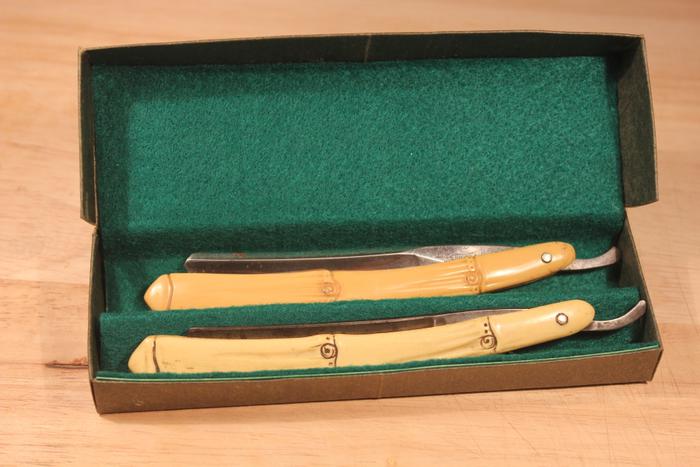
I was recently asked to design a top opening, paper carton that would hold 2 razors. This is my design and tutorial for that carton, it displays the razors at an angle and is felt lined.
First, a few pics of the final product:
Disclaimers:
This is a storage/display box and not a heavy duty shipping box. Heavier, stiffer paper could be used but the design would need modifications to accommodate the thickness of different material. I cannot guarantee the fit or suitability of this design for a given project.
Upon request, I will supply a .dxf file to any CAD users if they wish to modify the design.
As you read through the tutorial you'll notice many of the photographs are not of the final box shown above. Several prototypes were made to iron out details and to improve the design and pics from those were used in the tutorial.
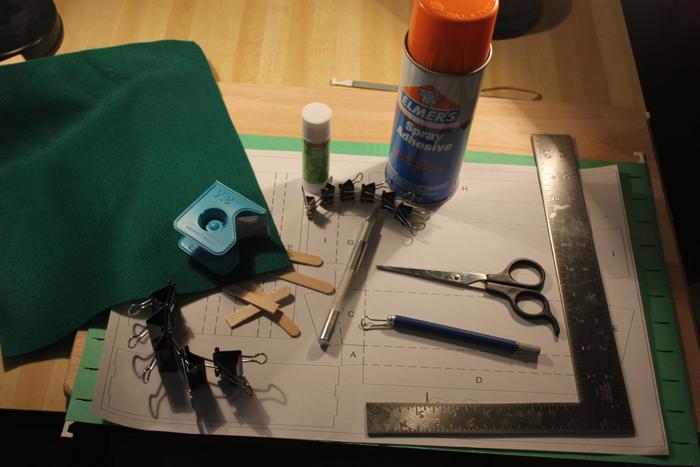
I will discuss tool and material options in more detail as they are used, but for now here is a list of each.
Materials needed:
Heavy paper, at least 10 x 11 inches
Pattern (pdf printed on 11 x 17 paper)
Scissors
Paper or painters tape
Glue stick
Felt
Adhesive spray
Tools needed:
Exacto type knife
Cutting board
Straight edge
Creasing tool
Binder clips
Craft sticks
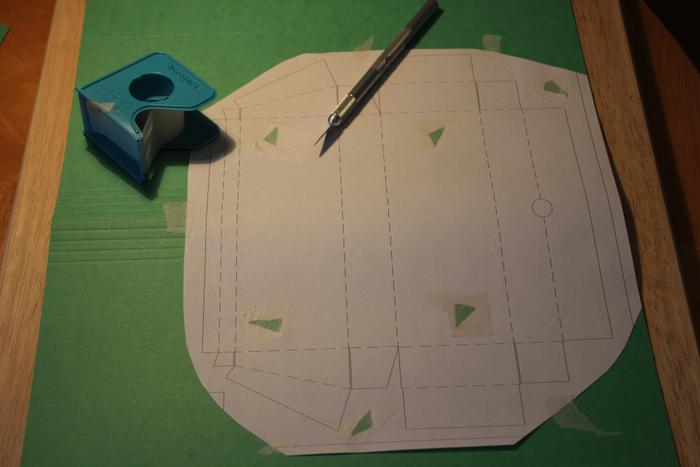
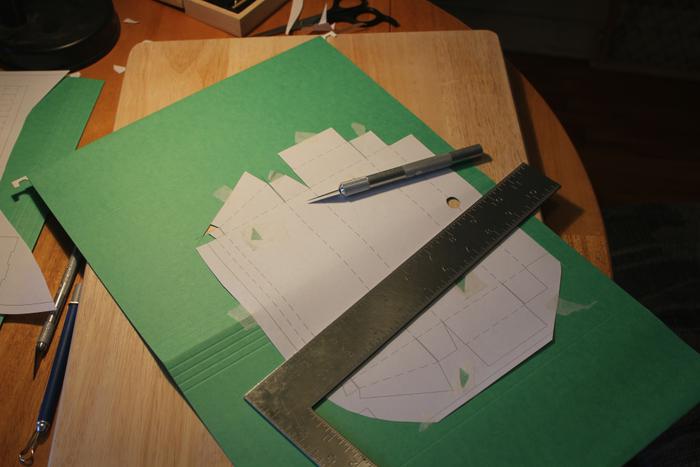
The first step is to cut the carton pattern away from the other pieces and cut several triangles, as in the photo, with the knife, this allows you to tape the pattern down in several places in the middle, instead of outside edges only.
The paper Im using is a hanging file folder, it has several scores at the bottom and Im incorporating those as a decorative feature for my carton.
Position the pattern on the paper and tape it down over the triangles. Here, Ive used paper medical tape (Ive found that cellophane tape will often pull up paper fibers when being removed) but a painters tape should work just as well.
Cut out the perimeter using a straight edge and knife, be very careful not to overcut into other parts of the carton. Separate from the rest of the paper, in some of the tighter areas you may need to carefully use your knife to make any additional cuts. Do not remove the pattern yet.
Continued in Post 2.
-
The Following User Says Thank You to joamo For This Useful Post:
Substance (06-22-2015)
-
12-01-2014, 12:48 AM #2Senior Member
- Join Date
- Dec 2011
- Location
- Omaha, Ne
- Posts
- 479
Thanked: 262
Next up is to impress the score or fold lines. A variety of tools could be used to do this, what I’m using is part of a binder clip mounted in an Exacto handle. Whatever you use it needs to be capable of handling a lot of pressure and be able to move smoothly over the score lines.
Use the straight edge to guide the tool and use a lot of pressure to give it a good impression. Die cutting machines that cut and score in one hit use well over 60 tons of pressure, obviously we can’t do that, but a clean line with some compression of the paper will work. Please note that the crease lines for the top are just slightly wider than the box part. This is so that the lid will close over the bottom without interference.
Use the straight edge as you begin folding to keep everything straight and crisp. Some of the score lines, like the front lip and sides will benefit from being folded over and rubbed with a smooth surface to flatten them. The crease that connects the bottom and top will need this done also and it wouldn’t hurt to fold it the opposite direction and rub again.

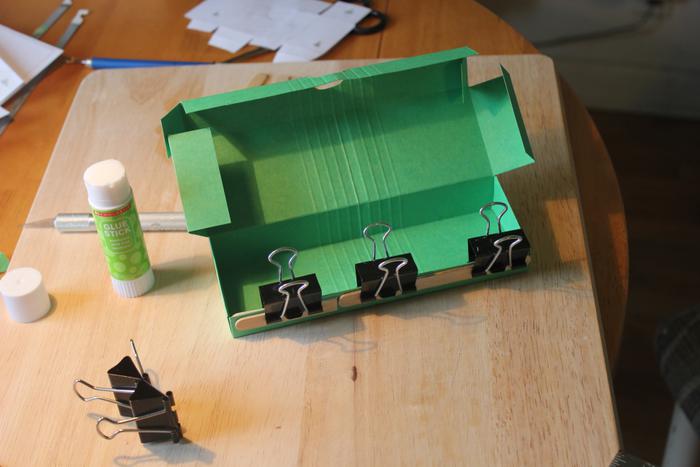
To glue everything up, use a name brand glue stick, I’ve found the dollar store types don’t grab as well and are messier. Glue the front and rear tabs, A & B to the sides, C, using binder clips as clamps, if needed. Keep everything crisp and as square as possible and clean up any excess glue. Apply glue to the front flap, D; craft sticks can be used here along with the binder clips to clamp a longer area. Do the same for the side flaps, E, and the top, F and G first, and then fold the flaps , I and H over the tabs. Clamp and set aside to dry.
The next task is to make the felt covered insert that will separate the razors. This design will support the razors at an angle. If you would rather they lay flat, you can make a simple T insert instead.
Begin by cutting triangles in the scored rectangle and the notched base on the pattern, tape to heavy paper and cut out, but don’t score it yet. Check to make sure the base will fit inside the bottom of the box , trim if necessary and set aside.
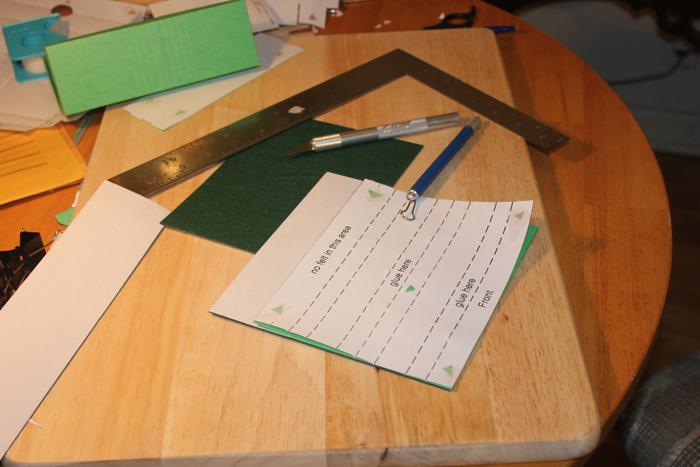
Measure and cut a piece of felt to 6.75 x 6.125 inches. This will be applied to the insert before scoring and continue into the top of the box, reinforcing the hinge area. Without removing the scoring pattern, mask off the area on the backside that corresponds to the “No felt in this area” on the pattern. That area will be folded down and glued to the inside back of the box and the felt will go up into the inside of the lid. Now the scores can be done, using less pressure than on the box, the felt allows a deeper impression with less effort and you don’t want to tear through the paper.
Spray the paper, not the felt, and lay the paper onto the felt then apply some pressure to ensure adherence.
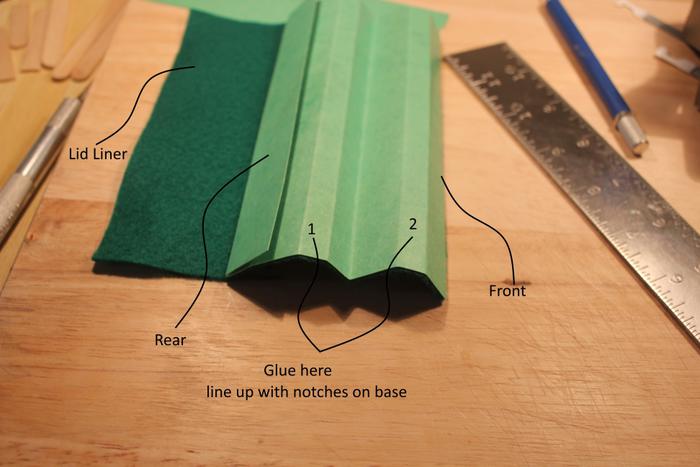
Fold as shown in the photo and on the pattern. Glue the flat bottom areas of the felt insert to the base, lining up with the notches. This will keep the insert from shifting in use. This can be quite difficult to keep lined up while the glue sets. Glue the middle area first, lining up with the notches on the base, let it set. When it is dry, glue the front flat area and line up with the front notches. When this is all dry, apply glue to the vertical front and the vertical rear and the bottom of the insert and carefully place into the box bottom and line up the edges and clamp. When everything is dry you can mask and spray the inside of the lid. Then carefully smooth the loose felt into the interior of the box lid. Trim if necessary.
Your box is now complete. A thumb notch can be cut into the front of lid if desired to aid in opening.
If you make any boxes using this design, please consider sharing photos of them on the forum.

-
-
12-01-2014, 02:32 AM #3Senior Member
- Join Date
- Dec 2011
- Location
- Omaha, Ne
- Posts
- 479
Thanked: 262
I went off to hone some razors and forgot to attach the pattern PDF.
This prints on 11 x 17 paper.
topopen.pdf
-
The Following 2 Users Say Thank You to joamo For This Useful Post:
criswilson10 (12-02-2014), Euclid440 (12-01-2014)


 Reply With Quote