
Results 1 to 10 of 38
 100Likes
Thread: Paper Case for Razors
 LinkBack URL
 About LinkBacks
-
03-14-2012, 11:46 PM #1Senior Member


- Join Date
- Dec 2011
- Location
- Omaha, Ne
- Posts
- 482
Thanked: 263 Paper Case for Razors
Paper case Tutorial
When I began shaving with a straight, I located a razor I had bought a long time ago but never really used. It was stored in the plastic case that it had when purchased. Its fit was rather tight and I managed to break the case one morning while opening it. Snapped it clean off and it was irreparable.
I decided to design and make a cardstock paper case for my razor as a replacement. Ive read, in these forums, mention of making paper boxes but couldnt find either tutorials or templates for them. Drawing from past experience in packaging manufacture, I felt this was something I could give to the straight razor community.
Materials:
The templates Ive drawn are primarily for 2 different repurposed materials, empty Puffs brand tissue boxes and hanging/manila folders. Each material has a different thickness and the templates have been adjusted for a good fit in the completed case.
The tissues boxs printed side will tend to crack when folded as an outside edge, so it is best to have the plain side as the exterior.
Templates:20120306074407029.pdf20120306074420553.pdf
The attached templates are in .pdf format and have been sized to print on letter sized paper.
The cases consist of 3 separate pieces that friction fit together and the material thickness is critical to a proper fit.
They have been designed to hold my 5/8 razor and will not fit all razors.
If you want to make a different size case, using this tutorial, there are 2 options; if you are familiar with CAD software, pm me with your email address and I will send a .dwg file you may modify to suit your needs, if you go this route, please consider posting a .pdf for others to use.
Option 2, you can send a pm to me with your desired outside dimensions and the thickness /type of material you plan to use in making your case along with your email address. Subject to my availability to design your case, I will email you the template as a pdf and post it for others to use as well.
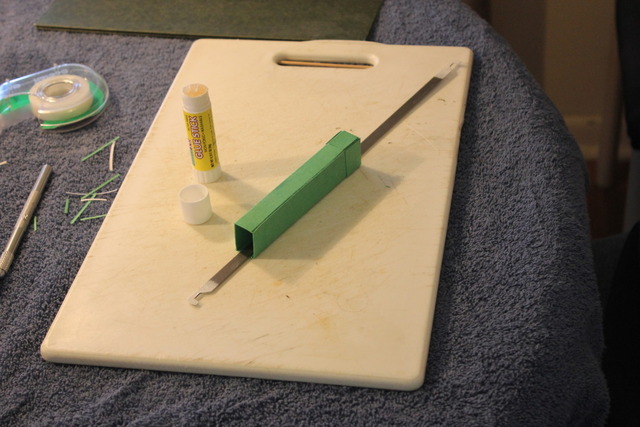
Tools needed:
Cutting board, scotch tape, Exacto knife, straight edge, creasing tool and glue.
The creasing tool Im using is a section of bamboo skewer used for ke-babs, with the point rounded off and smoothed. Many other items could work as well. Im using glue stick, but other glues could be acceptable too. You probably will not want to use your razor instead of the Exacto knife.
Tutorial: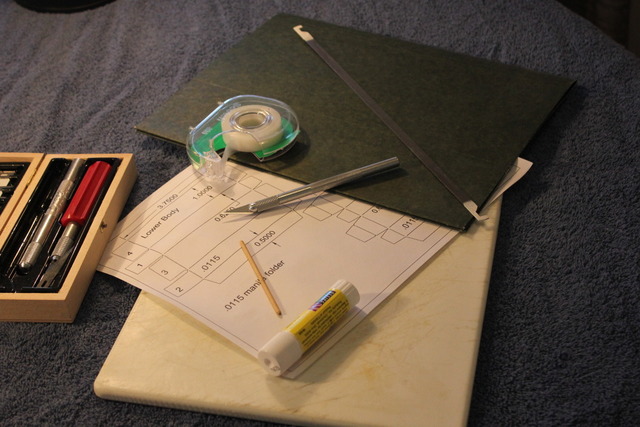
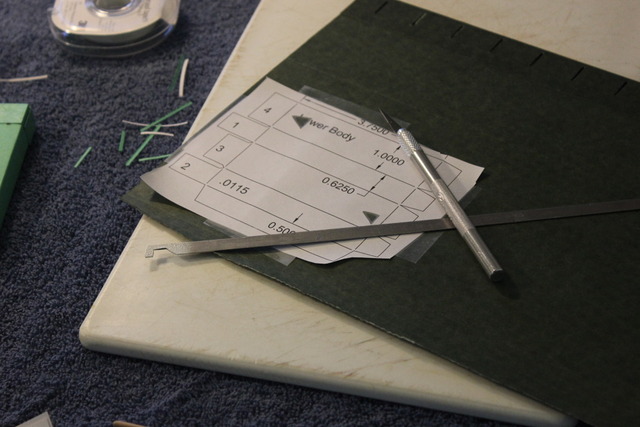
Choose your material and determine which side will be the interior. This is the side you will cut and crease. Print the template onto regular letter size paper and cut out each piece leaving a good sized border. Cut two triangular pieces from each template as shown and tape across them. These will hold the template in place even after the perimeter has been fully cut. Secure the outer edges of the template to the material using scotch tape.
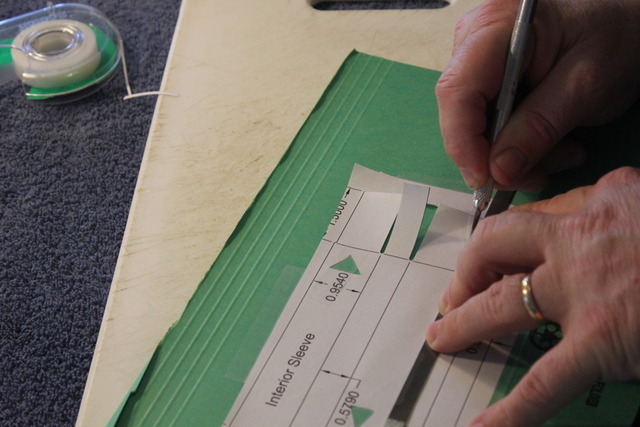
Using the straight edge and Exacto knife, carefully cut out the entire perimeter.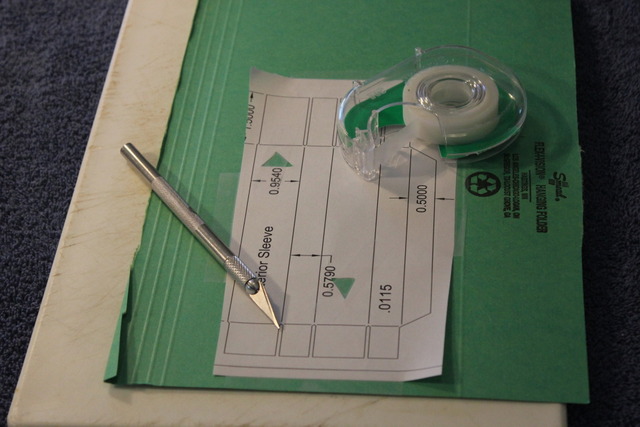
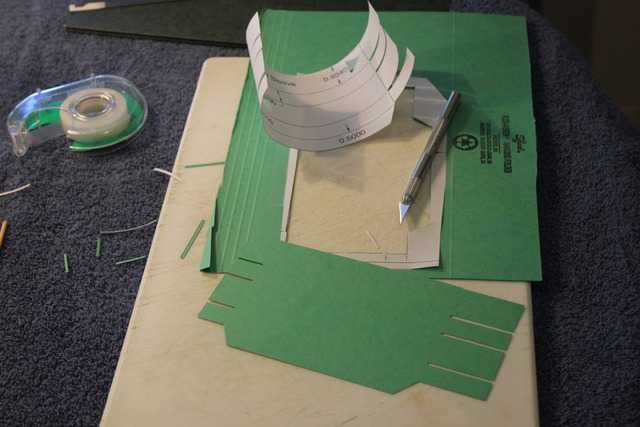
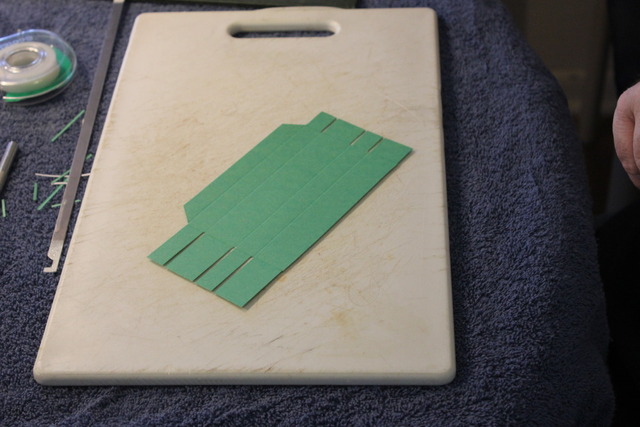
Remove the template and set it aside for reference while creasing and folding.
Crease using the straight edge as a guide, this will take some pressure, youll want to leave a noticeable depression. Try to have the center of your crease lined up with the outside notches. Youll need to set your straightedge back just a little to accomplish this.
Once the entire piece has been creased, fold, again using the straight edge as a guide for a crisp, straight bend. Note that the interior sleeve piece will have folds going to the opposite side on one end. The long flaps fold towards the creased side (inside) and the short flaps fold opposite (outside).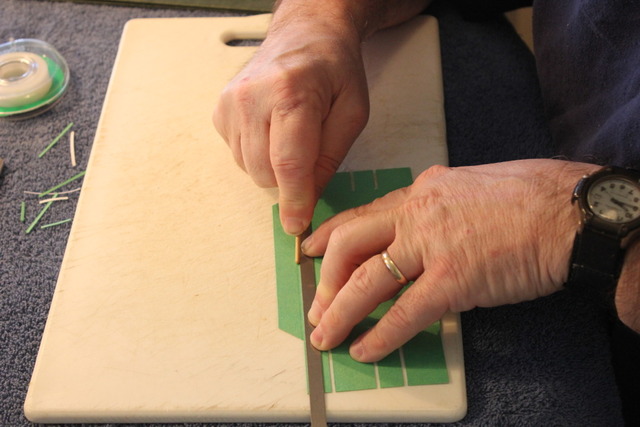
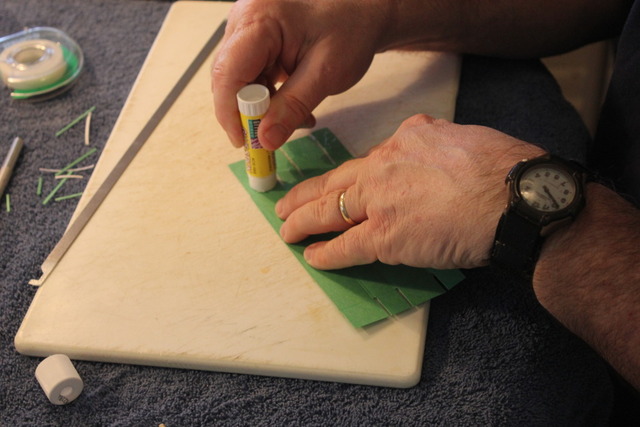
Glue the flaps as shown in the photos, ensuring there is enough glue to hold them in place without being messy. Clean any excess. Glue the long side flap and make sure the edges line up nicely, straight edge to creased edge. You may need to hold or clamp these together for a short time.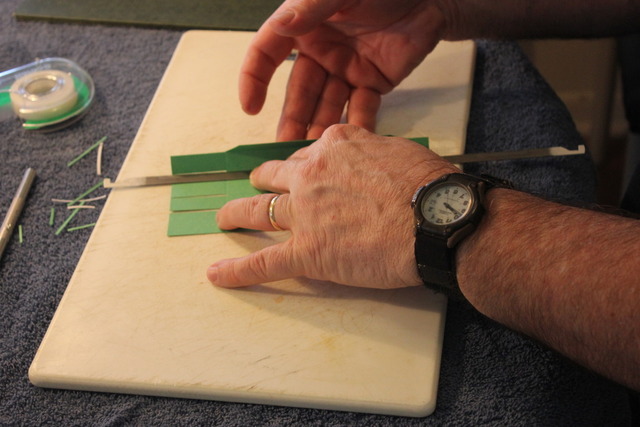
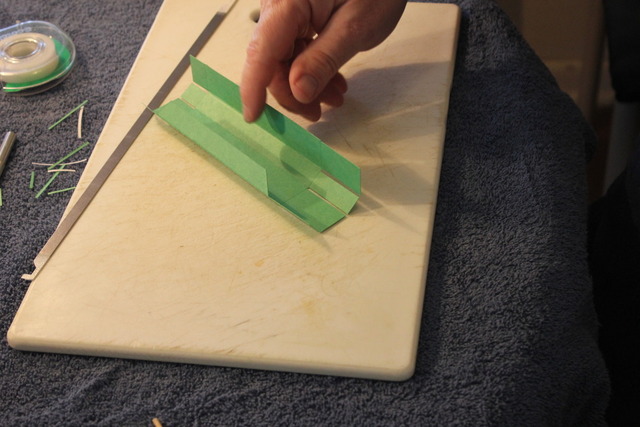
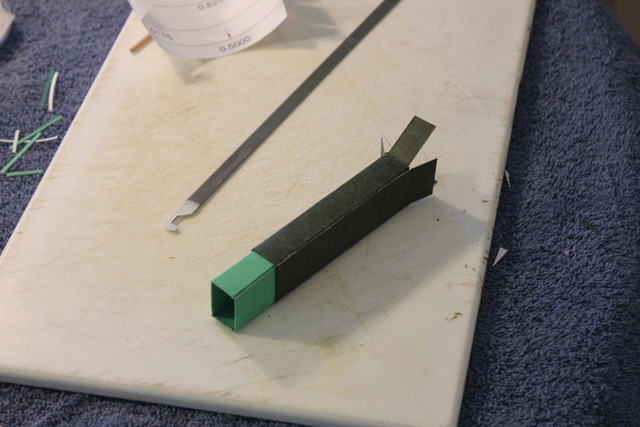
The lower body and upper body will cut, crease, form and glue in the same manner. After gluing the long side of the lower body, spread some glue on the reverse (outside) folds of the interior sleeve and insert it through the bottom of the lower body. Set it just past the score lines of the flaps. The end with the interior folds will extend an inch past the top of the lower body and should be a snug fit. Now finish the lower body by folding and gluing the flaps down over each other in the numbered order.
The top, where it slides over the interior, has some double folds to increase the friction, ideally, the top should retain the razor if turned upside down but not be difficult to remove.
You are now the proud owner of a self made, paper razor box, made of repurposed materials. You may choose to decorate it with a custom sticker, a drawing or leave it as is.
-
The Following 14 Users Say Thank You to joamo For This Useful Post:
benjamin2515101 (04-14-2017), briarup (04-08-2014), deepweeds (02-22-2014), Double0757 (02-17-2014), HARRYWALLY (11-04-2012), Prahston (10-30-2012), randydance062449 (04-08-2015), Slamthunderide (02-18-2014), Speedster (04-04-2012), STF (07-12-2020), Substance (02-10-2014), Tarkus (06-19-2016), tinkersd (05-03-2012), Trimmy72 (02-18-2014)
-
03-14-2012, 11:51 PM #2Senior Member
- Join Date
- Dec 2011
- Location
- Omaha, Ne
- Posts
- 482
Thanked: 263
Additional photos illustrating making the case.
Last edited by joamo; 03-15-2012 at 05:31 PM. Reason: replaced duplicate photo
-
The Following 38 Users Say Thank You to joamo For This Useful Post:
32t (03-29-2012), Adam G. (11-09-2012), alb1981 (04-02-2012), badboris (04-06-2012), bartds (05-18-2020), Bonbon (04-04-2012), briarup (04-08-2014), chay2K (03-15-2012), Chevhead (02-18-2014), coachschaller (04-02-2012), deepweeds (02-22-2014), Double0757 (02-17-2014), Durhampiper (04-04-2012), Gasman (05-17-2020), Geezer (10-29-2014), HNSB (03-14-2012), hoglahoo (03-15-2012), jamesm (12-03-2012), jaswarb (04-06-2012), Lynn (03-15-2012), Maxi (03-15-2012), mrpatches115 (10-31-2012), nipper (04-03-2012), Phrank (02-18-2014), Prahston (10-30-2012), randydance062449 (04-08-2015), rolodave (11-04-2012), sinnfein (10-29-2012), sleekandsmooth (04-03-2012), spazola (04-03-2012), Speedster (04-04-2012), str8fencer (11-04-2012), Substance (02-10-2014), Tarkus (02-17-2014), Terje K (04-02-2012), UK2TX (05-30-2020), vvti713 (03-15-2012), WillN (03-15-2012)
-
03-14-2012, 11:57 PM #3Senior Member

- Join Date
- Sep 2011
- Location
- Chicago, IL
- Posts
- 565
Thanked: 75
Those look nice! I'll have to give it a shot!
-
03-15-2012, 12:01 AM #4This is not my actual head.


- Join Date
- Nov 2009
- Location
- Middle of nowhere, Minnesota
- Posts
- 4,624
- Blog Entries
- 2
Thanked: 1371
Thanks for putting this together. I will put it in the wiki later.
Strange women lying in ponds distributing swords is no basis for a system of government.
-
03-15-2012, 12:08 AM #5Senior Member


- Join Date
- Dec 2011
- Location
- I'm Gonna Spend Another Fall In Philadelphia
- Posts
- 2,010
Thanked: 498
Wow!!! That is ingenious, looks factory made.
-
03-15-2012, 05:07 PM #6Senior Member
- Join Date
- Mar 2011
- Location
- Washington DC Metro Area
- Posts
- 468
Thanked: 114
That's pretty darn cool. Thanks for taking the time to post this. I love the creativity.
-
03-15-2012, 05:22 PM #7..mama I know we broke the rules...


- Join Date
- Feb 2010
- Location
- Toronto, Ontario, Canada
- Posts
- 2,895
- Blog Entries
- 8
Thanked: 993
This is one of the coolest things I've seen. I'll definitely be trying this. Thanks for the tutorial.
-
04-02-2012, 10:14 PM #8Senior Member

- Join Date
- Oct 2010
- Location
- 50 miles west of randydance
- Posts
- 9,694
Thanked: 1354
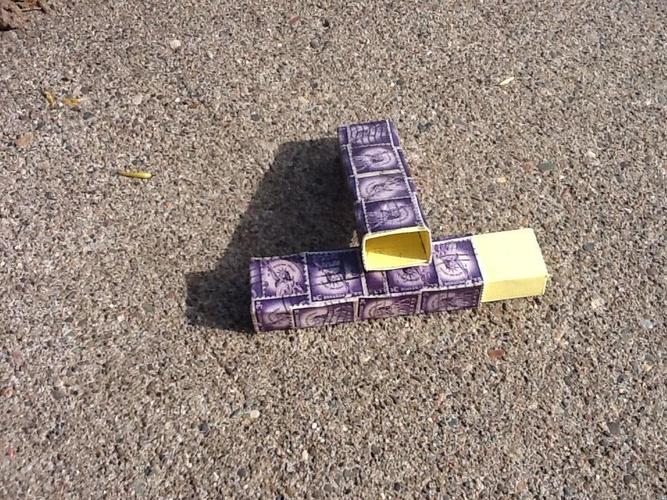
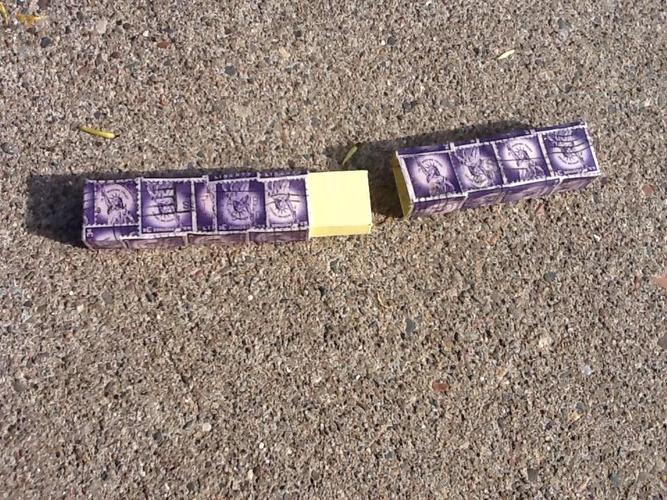
I used this pattern to make a box yesterday. I had some .008 card stock handy by the printer and made it out of that. The pattern worked for that thickness but I wouldn't recommend it because it is to fragile. So if you try this don't use less than the .0115 shown. I decided to take this experiment one step further and make it a little thicker. I took some Modge Podge and stamps to it. Attached are the results. The stamps were to close to the dimensions of the box so the edges were to short to fold easy.
Overall I am happy with this project and when I do it again I will use thicker paper and larger stamps.
Tim
-
The Following User Says Thank You to 32t For This Useful Post:
joamo (04-03-2012)
-
04-03-2012, 01:29 AM #9Senior Member
- Join Date
- Dec 2011
- Location
- Omaha, Ne
- Posts
- 482
Thanked: 263
Thanks for posting your carton!
Good use of the stamps for both strengthening and adding a decorative touch! Another possibility could be sticky back shelf liner applied after construction.
Both of the material thicknesses I listed will give a carton that will keep your razor clean and dry but won't stand up to crushing, they will definitely not be shipping containers They were the most suitable materials I had available but I would love to be able to source some inexpensive and readily available, thicker paste boards. I may be wrong, but I don't believe a corrugate would work as well and it might be difficult to find a good flute size. Oh well, there is lots of room for experimentation.
My eventual goal would be to recreate the "toe pincher" style coffin cases. 32t likes this.
-
04-03-2012, 01:37 AM #10< Banned User >
- Join Date
- Feb 2011
- Posts
- 1,256
Thanked: 194
holy @^&$....thats awesome
 thank you so much!!


 Reply With Quote