
Results 71 to 80 of 356
 880Likes
Thread: Bruno's Blade Club
 LinkBack URL
 About LinkBacks
-
04-21-2014, 02:40 AM #71Senior Member


- Join Date
- Aug 2013
- Location
- New Zealand
- Posts
- 268
Thanked: 75
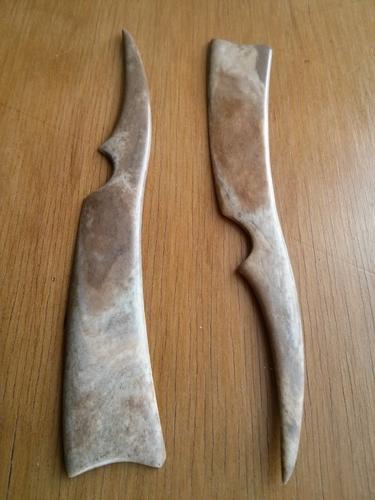
Pictures don't quite do them justice, but I have the shape and thickness sorted - these are the thinnest bone work I've done so far and I'm really liking the natural markings of the bone.
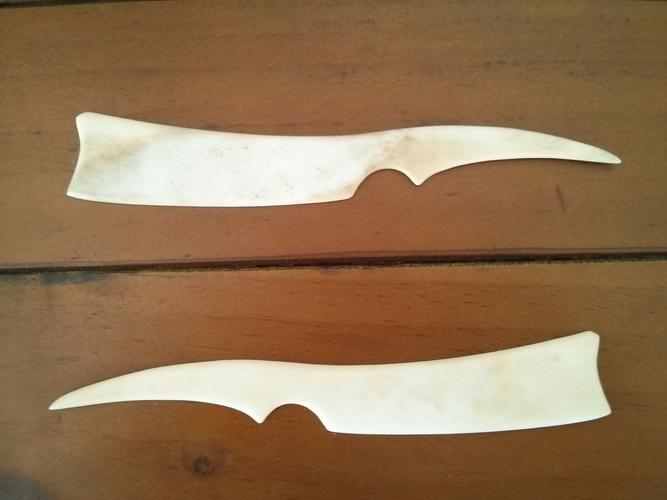
Now just waiting on some tests with stain to see if I'm going to darken these or keep them light...
-
04-21-2014, 11:19 AM #72Senior Member

- Join Date
- Feb 2012
- Location
- West Midlands, UK
- Posts
- 1,263
Thanked: 360
I admire your nerve in making these - I'd be very nervous that the long tails will break off. I'm really looking forward to seeing the blade fitted.
-
04-21-2014, 04:18 PM #73Senior Member

- Join Date
- Dec 2013
- Location
- Paramount California
- Posts
- 366
Thanked: 31
I'm sorry if this a dumb question but what does bread knifing mean? Originally Posted by Substance
 -David
All Out, All Game, All Season
-
04-21-2014, 07:30 PM #74Senior Member
- Join Date
- Feb 2012
- Location
- West Midlands, UK
- Posts
- 1,263
Thanked: 360
It's a way of reducing the edge by using a sawing (breadknifing) action at about 45 degrees on wet&dry paper - not in the same spot but moving the blade across the paper. Originally Posted by dexter90723
-
04-21-2014, 09:41 PM #75Senior Member


- Join Date
- Jun 2013
- Location
- Gladstone QLD AUSTRALIA
- Posts
- 3,245
Thanked: 804
breadknifing is to remove a curve weather a frown or an unwanted smile on the edge to make it straight again
Saved,
to shave another day.
-
04-21-2014, 11:00 PM #76Senior Member
- Join Date
- Jun 2013
- Location
- Gladstone QLD AUSTRALIA
- Posts
- 3,245
Thanked: 804
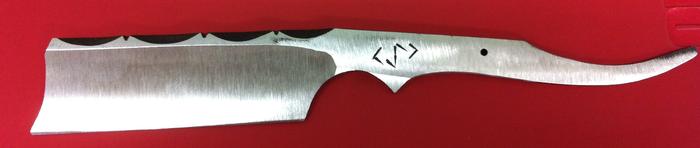
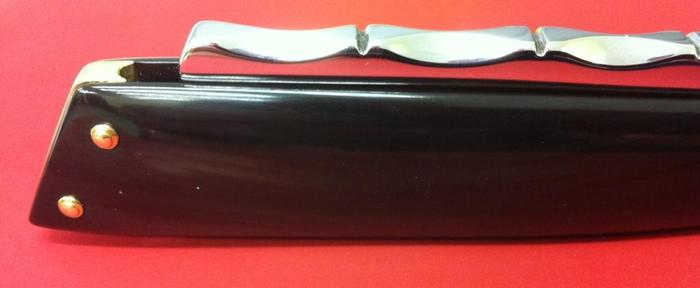
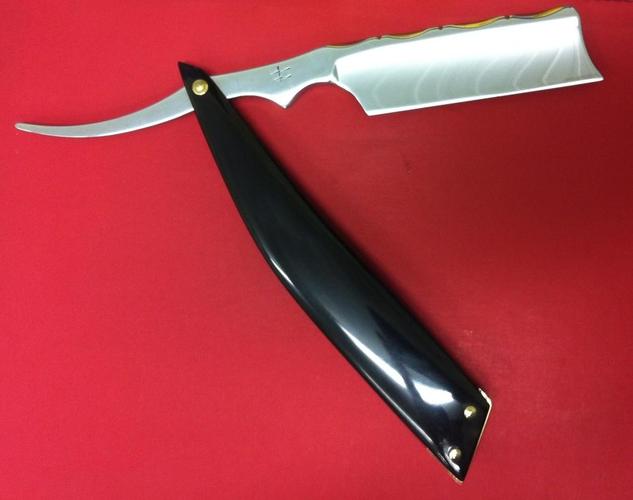
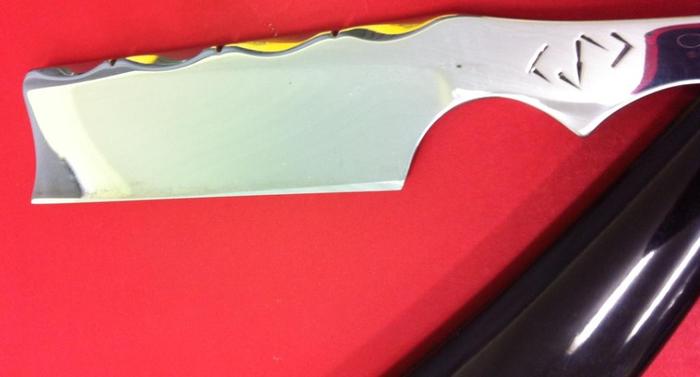
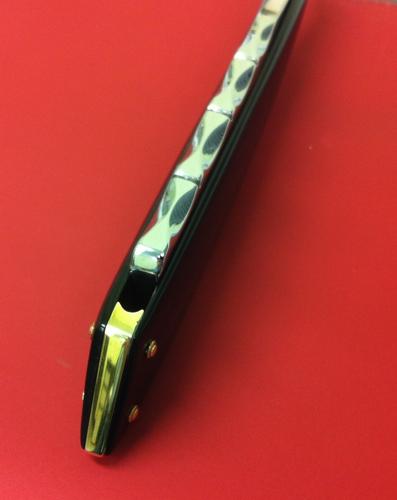
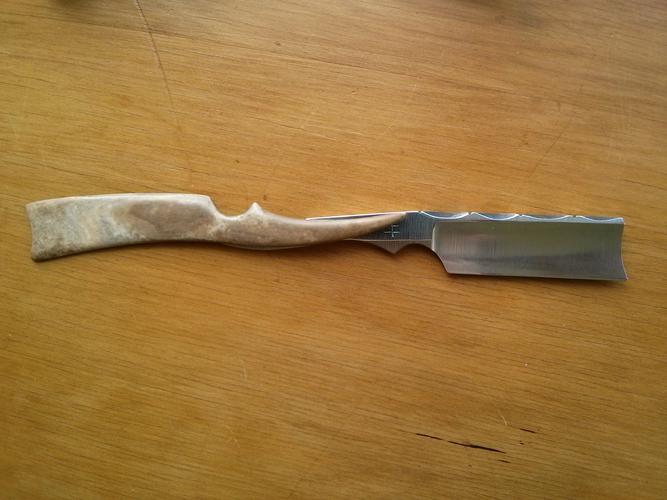
I finally finished my BrunoBlade off.
After much deliberation on adding an inlay which I just couldn't get right to match my imagined idea,
I decided I didn’t want to screw up the nice work so far so ditched the inlay for now (so I could use it) until I can get the cutting process right
I hope you enjoy & are inspired to complete your own
Original
Finished
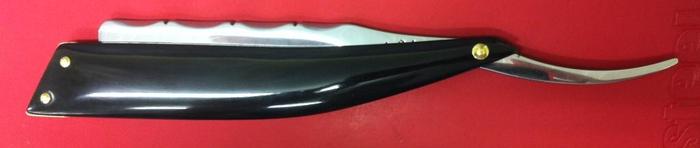
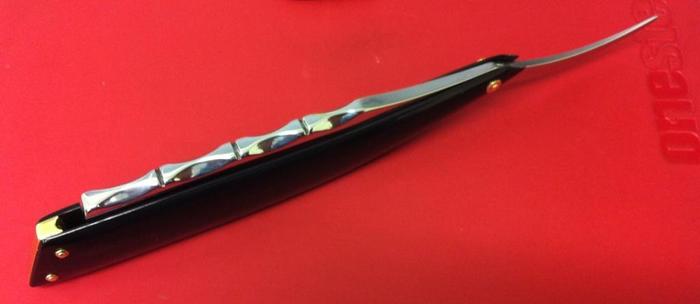
sorry for the photo quality they were all taken post shave this morning
Final size is a mickey hair over 15/16” after re straightening
Blade – BrunoBlade O1 Spanish point monkey tail
Scales – Black Buffalo horn
wedge – Brass
Thrust washer, Pins & washers - Brass
Total of about 27 hours spent to date with 95% hand sanding & tooling
Blade shaping & sanding - an easy 18 hrs (could have saved a couple of hours odd with lessons learnt)
Scales - about 5 hrs
Wedge - 2 hrs
pinning - about 0.5 hrs
honing - 1.5 hrs
Honing – I used a combination of the 40 Circles, 40 X strokes & tried a bit of pyramiding for the finish
Bread knifed - Norton 360 oil stone @ about 30-45º (needed to remove a frown I managed to sand into the edge as my bevel shows)
Bevel set - Naniwa 1K - 4 layers of tape then dropped to 2 layers of tape for final set
Main polishing - Norton 4/8k
Finisher - Naniwa 12K
Stropped – Big Daddy – 100 laps of Felt then about 150 on leather
My intention is to later re-hone it done to a single layer of tape & keep it that way the same as the rest of my blades.
The first shave went very well on Easter morning with about 5 days growth
I am quite chuffed & happy with the finished product
would I do it all again?
Yes but definitely not fully from 80 grit by hand, as my fingers start cramping just thinking about the hand sanding
I would invest in a buff with compounds long before I do it again LOLLast edited by Substance; 04-21-2014 at 11:11 PM. Reason: added materials
Saved,
to shave another day.
-
04-21-2014, 11:25 PM #77Senior Member


- Join Date
- Dec 2013
- Location
- Riverview, FL
- Posts
- 787
Thanked: 202
Originally Posted by Substance
Wow, you nailed it! Your hard work shows through-Well Done!!! Enjoy the exquisite taste sharpening sharpening taste exquisite smooth. Please taste the taste enough to ride cutlery.
Mike
-
The Following User Says Thank You to entropy1049 For This Useful Post:
Substance (04-22-2014)
-
04-22-2014, 11:01 AM #78Senior Member
- Join Date
- Aug 2013
- Location
- New Zealand
- Posts
- 268
Thanked: 75
Beautiful finish, you really nailed the horn and brass combination! To see them both shined up so nicely is fantastic, bravo!
Substance and dexter90723 like this.
-
The Following User Says Thank You to Suavio For This Useful Post:
Substance (04-22-2014)
-
04-22-2014, 04:20 PM #79Senior Member
- Join Date
- Nov 2010
- Location
- Pequea, Pennsylvania
- Posts
- 2,290
Thanked: 375
@ Substance - Great job! You definitely have way more patience than I. Mine lacks refinement (didn't spend near the time sanding) and at some point I will have to invest the time to make that happen, like it should have the first round. But hey I just wanted to shave with it

The steel has a nice feel, it's a very forgiving blade, almost a "soft feel" comparable to my Double duck.
-
The Following User Says Thank You to Trimmy72 For This Useful Post:
Substance (04-22-2014)
-
04-23-2014, 03:55 AM #80Senior Member
- Join Date
- Aug 2013
- Location
- New Zealand
- Posts
- 268
Thanked: 75
Okay, so despite my best efforts and various combinations of natural tannins and stain recipes (including ones that seemed jet black), I've decided that a mottled brown is as good as I'm going to get with this pair. And to be honest, I actually like the result even more - it looks like a dark marble or petrified wood, with the grain and markings in the bone really showing through.
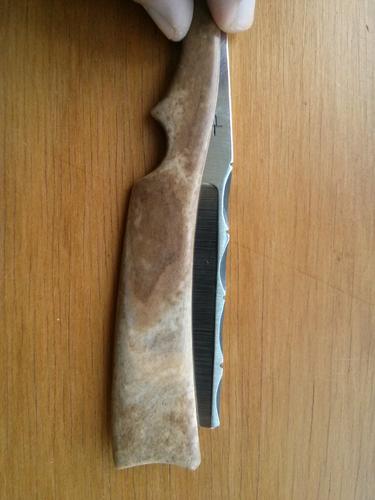
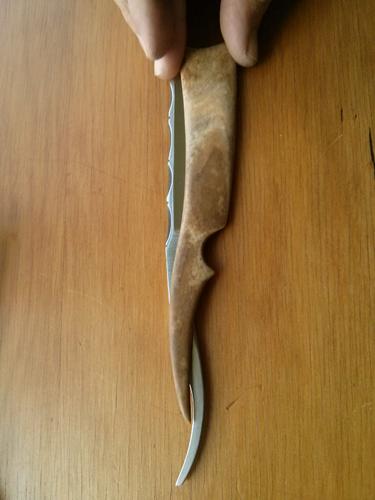
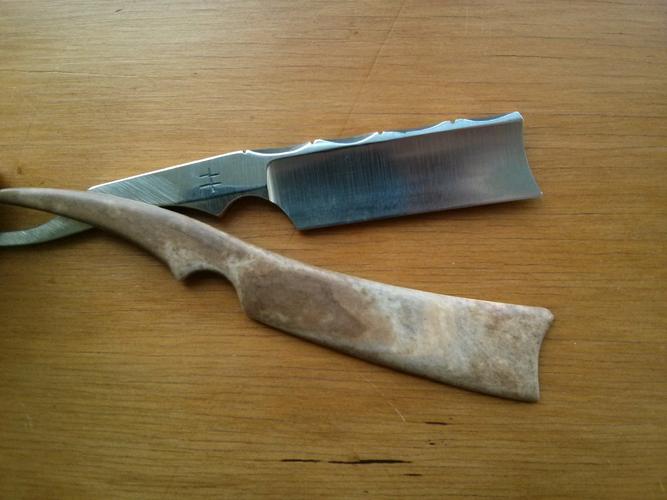
I've taken some pictures holding the blade underneath so that you can see how the shape works... A wedge is still in the making (I'm thinking dark horn, possibly with copper lining, which is what I've done on another bone pair recently). Any thoughts / comments / critiques welcomed.


 Reply With Quote