
Results 1 to 10 of 28
 10Likes
 LinkBack URL
 About LinkBacks
Hybrid View
-
04-27-2011, 05:16 PM #1Trailing along the leading edge


- Join Date
- Jul 2010
- Location
- Earth
- Posts
- 327
Thanked: 107 Magnetic Table-top Strop with rubber feet, and 2 Hanging strops
I had a few days to myself and decided to make myself some more gear.
First off, I made a table-top stropping hone with a metal top surface for various magnetic pads, and mounted some rubber feet to the bottom for a non-slip grip to any surface.
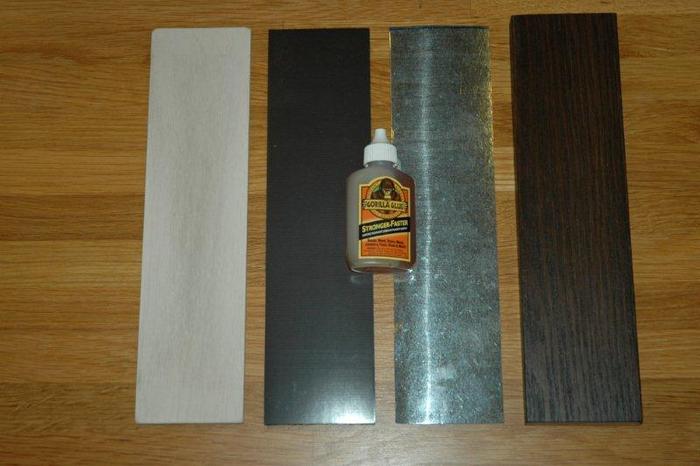
I used Gorilla glue (excellent stuff) to mount a thin piece of sheet metal to a piece of 3"x12" wood, and clamped it for a couple hours, and then mounted the 3M rubber feet to the bottom of it.
Then I made some various magnet pads to experiment with. I used an A5 magnetic sheet that I bought from a stationary shop, and cut some 3"x12" strips from it. I used my trusty Gorilla glue again to mount & clamp the first one with balsa wood (coated with 0.5 micron diamond spray). The second and third pads I made with some top grade leather that I bought for strops. I empregnated one of them with 0.5 micron Chromium oxide, and the other one I just left as-is for a perfect finish.
The raw materials cut to size & ready for the Gorilla glue!
Pad materials cut, treated & ready to be glued to the magnetic strips.
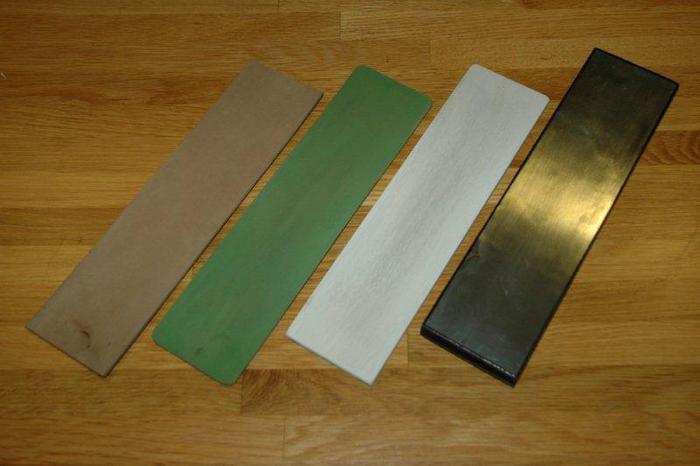
All done. Chromium oxide leather on the left, balsa pad mounted on top, and plain leather on the right.
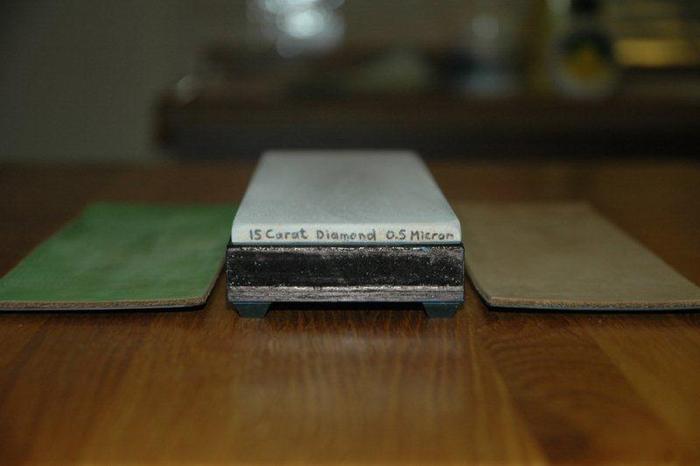
The whole set neatly packs together.

Next up, I decided to make myself some more strops (a man can never have too many strops, right?)
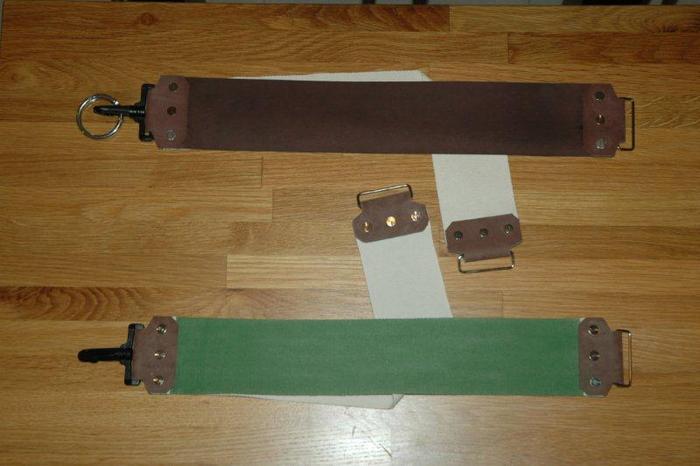
Got hold of some absolutely phenomenal top grain leather from a leather supplier, and bought some extra bits and pieces(clips, hooks, 2-sided leather screws etc.) from leather craft shops. It took a fair bit of time, but they came out really nice, and they work really well.
Leather & plain cotton weave strop at the top, and at the bottom is a twin cotton strop with diamond spray on one, and Chromium Oxide on the other one.
After all of this, it was time for some serious honing. I honed these babies up to 12K Naniwas, and finished them off on my newly made table-top stropping hone with the diamond balsa wood, ChrOx leather pad, and then finally the plain top-grade leather pad.
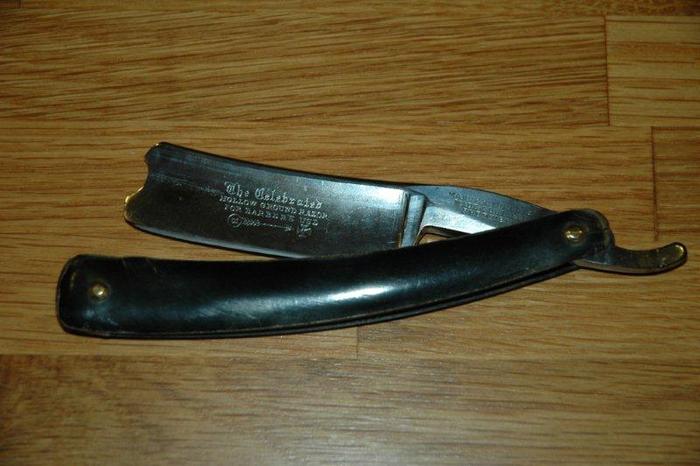
A beautiful Barber's use only 8/8 Wade & Butcher with original horn scales. (Jaw-dropping shave!)
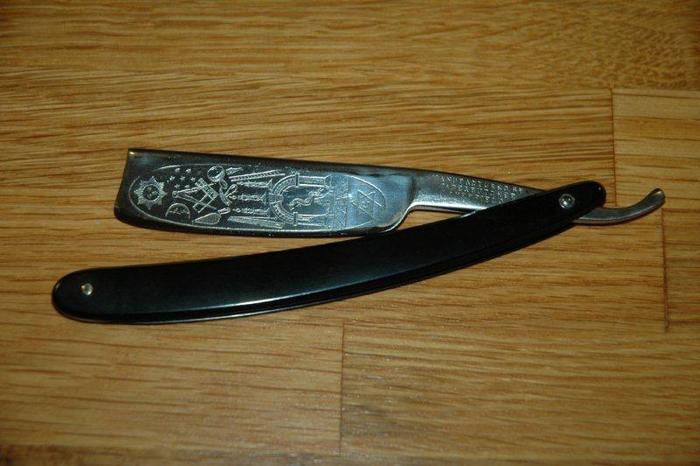
My 9/8 Wade & butcher wedge that I have not restored because of the faded masonic markings on the blade and the horn scales in great condition. (Also a beauty to shave with)
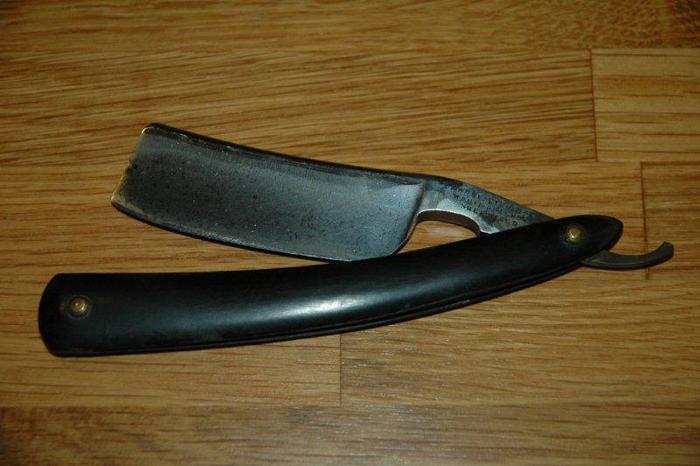
A masonic Wade & butcher 6/8 full wedge that I spent a heck of a lot of time restoring. I removed all the pitting, hand-sanded for about 15 hours to a mirror and then went back to a satin finish. I re-pinned the rear pin with stainless steel washer and pin, and re-seated the worn-out pin pivot hole inside. She's a real eye catcher and a great shaver now!
Last edited by JimmyHAD; 05-05-2011 at 03:45 PM. Reason: Changing title at author's request
-
The Following 4 Users Say Thank You to leadingedge For This Useful Post:
baldy (04-27-2011), gllh17 (05-27-2011), MileMarker60 (04-28-2011), wukong (04-27-2011)
-
04-27-2011, 06:12 PM #2Customized


- Join Date
- Feb 2010
- Location
- Oslo, Norway
- Posts
- 5,079
Thanked: 1694
My word, you are right. You have been very busy indeed.
Looks like some really neat stuff!
Hope you get lots of good use from all those fine products!Bjoernar
Um, all of them, any of them that have been in front of me over all these years....
-
The Following User Says Thank You to Birnando For This Useful Post:
leadingedge (04-28-2011)
-
04-27-2011, 06:48 PM #3Senior Member

- Join Date
- Mar 2011
- Location
- Wilkesboro, North Carolina
- Posts
- 121
Thanked: 33
Good stuff!
-
The Following User Says Thank You to Moonshine For This Useful Post:
leadingedge (04-28-2011)
-
04-27-2011, 07:02 PM #4Razor Vulture


- Join Date
- Oct 2010
- Location
- Lone Star State
- Posts
- 25,896
Thanked: 8590
Great work! You are certainly a multi-talented person! Kudos!
 "Don't be stubborn. You are missing out."
I rest my case.
-
The Following User Says Thank You to sharptonn For This Useful Post:
leadingedge (04-28-2011)
-
04-28-2011, 03:53 AM #5Junior Member

- Join Date
- Mar 2011
- Location
- Zhuhai, China
- Posts
- 21
Thanked: 8
Very impressive work.

Thanks for pictures and words of explanation, highly beneficial to novice like me.
Will try to make my own leather paddle based on this.
-
The Following User Says Thank You to wukong For This Useful Post:
leadingedge (04-28-2011)
-
04-28-2011, 04:49 AM #6Trailing along the leading edge
- Join Date
- Jul 2010
- Location
- Earth
- Posts
- 327
Thanked: 107
No problem Wukong, glad to help out where I can!
As requested by some guys, I will try and create an article in the wiki section on the paddle & strops in the near future when I get a chance.
-
The Following User Says Thank You to leadingedge For This Useful Post:
wukong (04-28-2011)
-
04-28-2011, 10:48 AM #7..mama I know we broke the rules...

- Join Date
- Feb 2010
- Location
- Toronto, Ontario, Canada
- Posts
- 2,895
- Blog Entries
- 8
Thanked: 993
Love the look of the new strops and bench hone. Nice stuff!
-
The Following User Says Thank You to Maxi For This Useful Post:
leadingedge (04-28-2011)
-
04-28-2011, 02:53 PM #8Senior Member

- Join Date
- Sep 2010
- Location
- Oslo Norway
- Posts
- 1,848
Thanked: 438
Very innovative and a great ideas there, especially with the benchtop strop.
It looks very handy indeed, I love it. How does it work, does the magnetic pad hold well?
And where did you get the cotton for the other strops?
Nicely done, thanks for posting.
-
The Following User Says Thank You to str8fencer For This Useful Post:
leadingedge (04-28-2011)
-
04-28-2011, 03:35 PM #9Trailing along the leading edge
- Join Date
- Jul 2010
- Location
- Earth
- Posts
- 327
Thanked: 107
Yep, it really is very handy, as it is about the same shape & size as my hones, so it is quick and easy to just move the hones out of the way, stick a pad onto it, and carry on refining the edge. It's also really handy for experimenting with, because all I need to make now are pads to stick onto the holder. Originally Posted by str8fencer

The magnetic pads stick like grease to a white shirt, they really do not budge when I am using them. The thin galvanised steel surface that I used really works incredibly well with the magnet pads.
Initially I thought of just using magnets on both the pads and the holder, but due to the alignment of the magnetic fields and it all being too difficult to line up properly, it got too hard, and was not a good grip anyways, so I decided on the galvanised steel, and it works perfectly. I think the only trick was getting the surface nice and perfectly flat while the epoxy hardened, so the tight clamping I did between 2 other wood pieces worked really well to get the galvanised steel to set nice and flat.
Mounting little rubber feet to the bottom also really makes the whole thing grip nicely on any surface, and gives it that extra height off the table to just make the stropping/honing very easy. (Gives your hand more than enough clearance from the table surface when you strop)
As for the woven cotton belt that I used on the hanging strops, I got some from a material/fabric shop. They had various widths and weaves and it is normally used to make clothes, belts, etc. I just picked out a 3" wide roll, and asked them to cut me off about 9 feet or so of it. I used my leather hole punch tool to make some holes in the fabric, and mounted them inbetween 2 leather strips for extra "hold".Last edited by leadingedge; 04-28-2011 at 03:50 PM.
-
The Following 3 Users Say Thank You to leadingedge For This Useful Post:
MickR (05-05-2011), str8fencer (04-28-2011), wukong (05-05-2011)
-
05-04-2011, 10:19 PM #10Senior Member
- Join Date
- Sep 2010
- Location
- Oslo Norway
- Posts
- 1,848
Thanked: 438
I made myself a bench strop like yours today, and I am glad I did. I made 5 leather pads and one webbing, so I can have some fun testing some pastes as well. Just took it out of the glue press, I'll test some pastes and stuffs later. Mine is just a tad under 12", and works fine. Thanks for the idea, it's both compact and handy, yet very versatile.


 Reply With Quote