Results 11 to 20 of 81
Thread: 10Pups restores a Reaper.
-
10-28-2013, 10:55 PM #11
-
The Following User Says Thank You to Chevhead For This Useful Post:
10Pups (10-29-2013)
-
10-28-2013, 11:11 PM #12
Where did u get the piece of rubber for sanding block Home Depot?? Just starting cleaning out garage.. Next building my work bench..
-
10-29-2013, 12:29 AM #13
- Join Date
- Nov 2012
- Location
- Across the street from Mickey Mouse in Calif.
- Posts
- 5,320
Thanked: 1184Well actually that is a piece I cut out of a roll I found in the Home Depot parking lot. My work bench is covered in the same thing. Real handy to hone on and everything else having to do with razors. If I drop something it has a soft landing or set something on it and it doesn't move. My hones kind of stick to it. This material is not that cheap as I have purchased it before for screens and stacker belts. If you have an asphalt plant nearby or someplace they are mining you maybe able to get a big piece for free. For a smaller piece I would check with the local auto parts store and ask for gasket material. The thicker the better for the sanding block.
Good judgment comes from experience, and experience....well that comes from poor judgment.
-
10-30-2013, 01:03 AM #14
Any updates?
Ed
-
10-30-2013, 03:13 AM #15
10Pups thanks for sharing your restoration tips. BTW you can pick up some low tack photographic adhesive used to dry mount photos to spray the back of any piece of sandpaper to give it some tackiness. Just spray let it dry and put it in use.
Also if you take down the circumference of your sanding sticks further then attach your leather you will maintain the same diameter.Still not a big issue.
-
10-30-2013, 03:32 AM #16
- Join Date
- Nov 2012
- Location
- Across the street from Mickey Mouse in Calif.
- Posts
- 5,320
Thanked: 1184That might work out for the other papers. Good tip. I hate real sticky anything is why I love this paper. It's just right and there is no mess using it.
Actually the smaller diameters work very well. The wider ones are better from spine to edge while taking out the previous grit lines. I am sure anybody that makes and uses them will find their own preference after making a few. A lot of guys use erasers and other things I found to floppy. Then there are the little belt sanders which I stayed away from because of the cost of paper. I know one thing is....the farther your fingers are away from that edge the less cuts you will get. Now stay tuned for what happens when you press too hard.Good judgment comes from experience, and experience....well that comes from poor judgment.
-
10-30-2013, 04:51 AM #17
- Join Date
- Nov 2012
- Location
- Across the street from Mickey Mouse in Calif.
- Posts
- 5,320
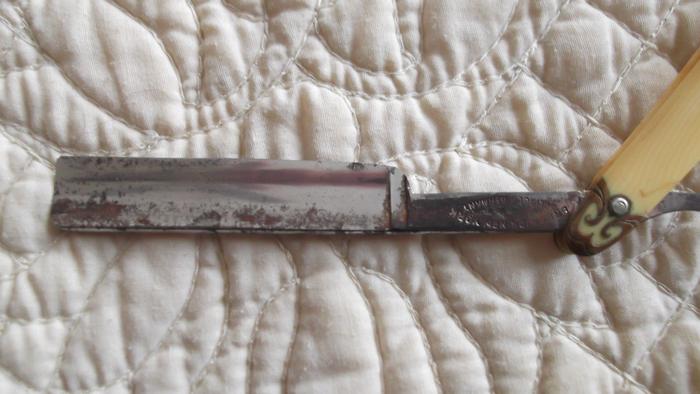
Thanked: 1184Well today I was home because the truck wouldn't start this morning. Another story I wish to forget right now. But it did leave me with some time to finish the 400 grit step on the far side and I did get out all I was going to leave in the video. I needed the therapy today so I went for it. Then I went to the 500 grit and here is what it looks like. There are no lines going toe to heel at this point and that is what you want before you move on to the next grit. I took 200 pics trying to show some micro blemishes but after the 500g I couldn't see them. We will see if they show up again.
Anything left behind now will show up later. I have tried several times to fool myself into thinking something left behind would disappear by the time I got through all the progressions. It doesn't. I learned that I hate going back 2 grits and starting over so I know if I can see it now I will always see it. Your lowest grit is where your craftsmanship either goes up a notch or downhill fast.
Here is the near or show side still at 400 and before I finished getting all the blemishes out.
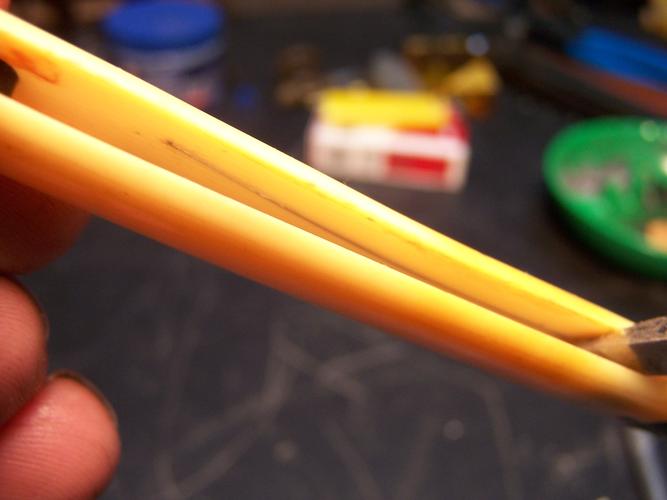
Now the edge tells 2 stories in this picture. 1. When you flip the blade over, the surface you just finished all perfect is going to look like you missed it. These are small and keeping the surface you lay it on clean helps a lot. Any loose grit you lay your razor in is going to get worked on the blade while your sanding the other side. These are small and will come right out with the next grit. The other thing about the edge you might notice is how high the scratches go up the blade from the edge near the ends. This is from the blade bending under pressure from sanding the other side. To much of that and you get this.
There is nothing worse than the crack/snap sound you hear just before you realize you want to cry. Like a potato chip snap the sound will live with you forever. This razor is not a complete wreck as I could still make it a shorty with nice scales. I have seen them cracked a lot worse but this is the mistake I will never forget.I wanted to show what happens when you get to aggressive which is not hard to do with these home made sanding blocks.
Now back to the Reaper
Here is a 400 finish and ready for 500 on the near side.
It maybe a few days before I get much more done. I am preparing for war with a 6.0 diesel. I will win if it takes all week :<0)Good judgment comes from experience, and experience....well that comes from poor judgment.
-
The Following User Says Thank You to 10Pups For This Useful Post:
32t (12-29-2018)
-
10-30-2013, 08:40 AM #18
Oh you BUTT!
I thought you snapped the Reaper.....
Ed
-
10-31-2013, 03:32 AM #19
-
10-31-2013, 08:54 AM #20