
Results 11 to 13 of 13
 15Likes
Thread: Fixing the Gap on Inlay
 LinkBack URL
 About LinkBacks
-
12-09-2013, 11:31 PM #11Senior Member


- Join Date
- Apr 2009
- Location
- Boulder County CO
- Posts
- 1,004
Thanked: 127
Back in from the shop now - kinda cold even with the heater. The CA is on and trying to set - I'll have to bring it in for the night I guess. I'll let you know tomorrow how it worked after I can sand it.
gssixgun likes this.
-
12-10-2013, 05:17 PM #12Senior Member
- Join Date
- Apr 2009
- Location
- Boulder County CO
- Posts
- 1,004
Thanked: 127
I think these scales are possessed! The CA dropped in nicely last night, cured well overnight in a heated room, and after sanding this morning the gaps are back. Damned little gaps that just won't go away. This tortoise shell piece is not really inlay, they're the same depth as the scales, just slipped into the hole I cut in the scales and epoxied on the sides and bottom.
So I'm thinking I left a hole somewhere in the epoxy on that side and any CA drips down to the bottom of the hole and leaves a shell on top - so after sanding, the top layer is removed and there's still a gap that has to be filled until it's up to the top of the inlay. My best guess anyway.
OK I give up on these for now. I kinda like this idea and the look of the scales so I'll play with it after I get some other blades done. Thanks for the ideas and techniques guys. I'll approach inlay using those ideas next time so that I avoid this headache.
...upon further reflection... I decided to give this set one more shot. Using the "hole in the epoxy" theory I cleaned it out again and went inside where it's warm to wick more CA into the gaps. Now cured and sanded, and ...only one small gap left! Woohoo! The one remaining still needs a tad more CA to fill up the gap but I can see how it needs to be addressed now. Just for kicks I test fit the Dahlgren I'm working on and it fits - so once this set is right, I may have scales for another project as well. Pics later tonight or in 2 days (some stuff I need to take care of).Last edited by AirColorado; 12-10-2013 at 09:03 PM. Reason: Decided to give it one more shot today
-
12-13-2013, 12:09 AM #13Senior Member
- Join Date
- Apr 2009
- Location
- Boulder County CO
- Posts
- 1,004
Thanked: 127
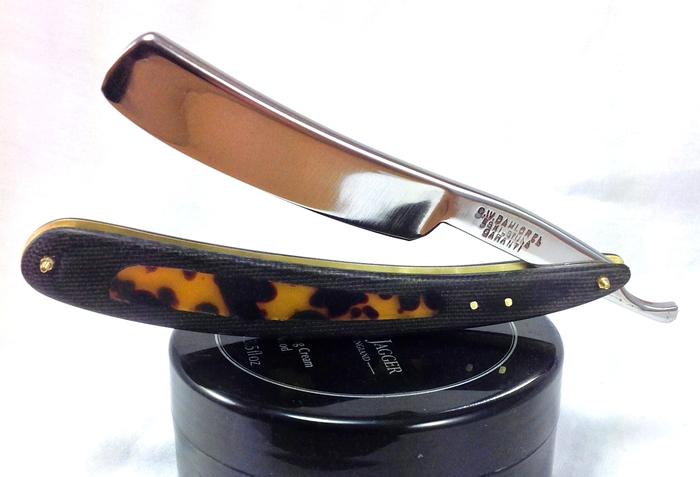
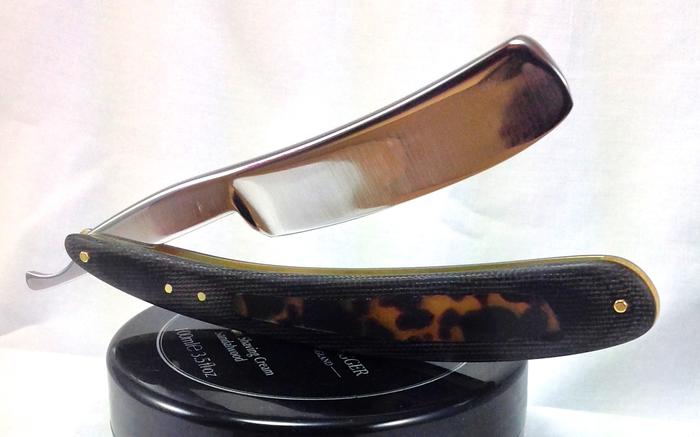
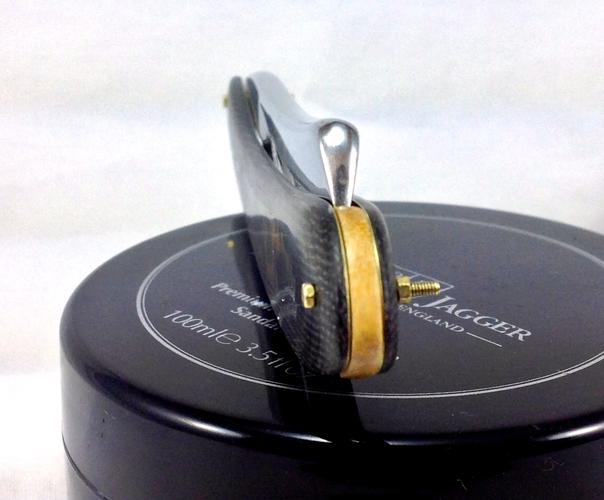
Well here we go! The theory about a hole in the epoxy may have been correct since it's all filled up now. As mentioned I wicked CA into the gaps but this time did it inside where it's warm. I guess wicking is more effective above about 40F and it's certainly easier to cure when its warm.
Cured, sanded at 800 and 1K in the photos. Now I need to go back and do some higher grit sanding to clean it all up and then finish it. Normally I leave Micarta "as is" after about 1K but this time I may try something different. Any ideas how to get these shiny after about 3K sanding? They'll be glossy but I may want to see high gloss like they are when wet.
These are pics of the scales with a Dahlgren I'm working on inserted into them with micros fasteners. The wedge is from a Lignum Vitae scrap that I noticed had a bit of yellow in it that I thought might look good with the tortoise shell yellow.


 Reply With Quote