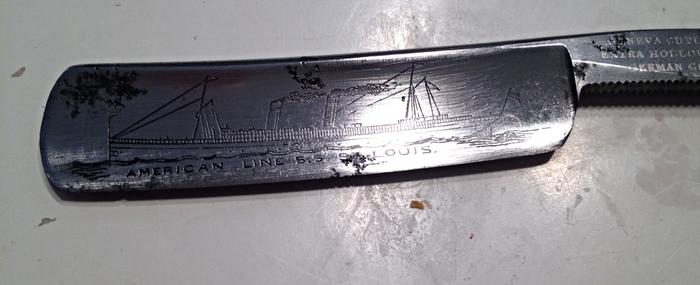
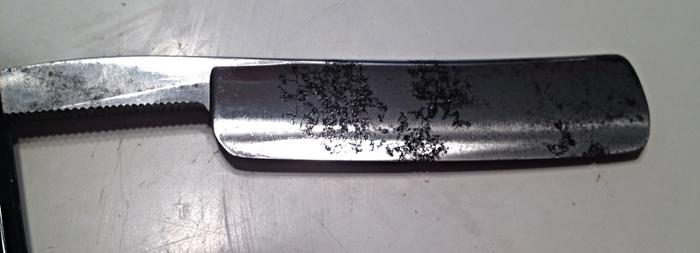
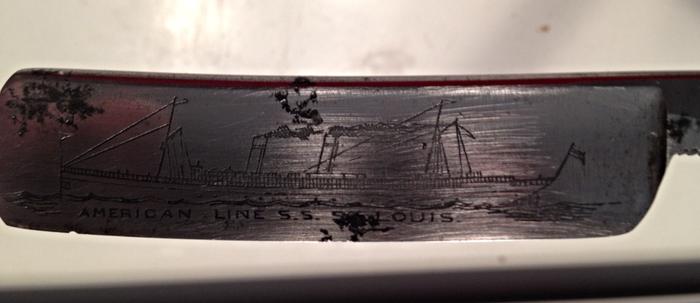
Curious on how to clean this old girl up without damaging the awesome etching...
Attachment 174877Attachment 174879Attachment 174880Attachment 174881
Printable View
Curious on how to clean this old girl up without damaging the awesome etching...
Attachment 174877Attachment 174879Attachment 174880Attachment 174881
Hard to be sure from the picture, but that etching looks pretty deep. Also, the worst of the pitting does not overlap the etching. I've seen threads in which people describe using transparent nail polish to cover an etching, then sand around it, later removing the polish with acetone. If I were working on this razor, I might try that method. The reverse side wouldn't present a problem--just ordinary buffing or sanding, over the whole blade, would do the trick.Quote:
Originally Posted by DickWhitman
Joe
Thank you Hart, I greatly appreciate it!!!!
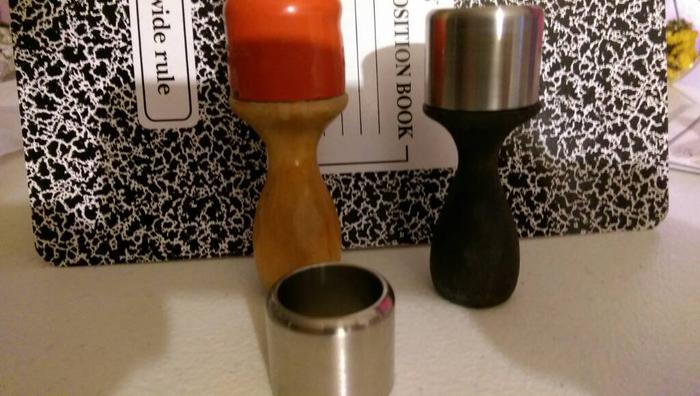
last few days for me were around making of this ring,.. concrete composite and polished ebony.. took me some tricks to get to the end (concrete isn't very cooperative, but i had to use it..)
http://shrani.si/f/8/jw/4Zih2Reu/mih...oj-078098a.jpg
http://shrani.si/f/2R/qe/2myXLeP7/mi...oj-078104a.jpg
http://shrani.si/f/1W/NL/1Hd2JJMY/mi...oj-078106a.jpg
http://shrani.si/f/3r/ja/3q3j54c7/mi...oj-078108a.jpg
Quote:
Originally Posted by DickWhitman
That's a very nice etch... and probably some very deep pitting under the black. It depends what kind of end product you are looking for. If you want to get rid of the pitting AND save the etching then send it out to a pro. If you are ok with some pitting and want to the black gone, then put it in a vibratory tumbler with walnut media for a few days. There is also a pretty good chance the rust wont be spreading very much more, so you can polish, oil, sharpen and shave and call it good. I would love to see how it turns out, keep us posted.
Matt
Will do! Thanks
Rough turned a Box Elder burl I cut a while back, post #152. Very happy with what I found underneath. Tons of red going through this box elder. Socked the wood hardener to it to try and save some punky areas. Should turn out to be a nice bowl once it dries a bit more.
My wife already told me she's keeping it. :rofl2:
Attachment 174951Attachment 174952
I'm a FIRM believer in starting High and working low to see what you have! Those that start Low tend to end up destroying the heart and soul of a razor. Here's an example of what I mean by starting High.Quote:
Originally Posted by DickWhitman
I'd scuffed the blade with some 1K grit W&D sandpaper then worked lower and then back up to 2K then Mothers Mag Wheel Polish the scales were cleaned up with Bumper Black and 3M Hard Plastic Polish.
http://straightrazorpalace.com/custo...n-cleanup.html
While the etching does look deep there is no need to erase anymore than need be to clean up the blade to your specs :tu
Personally, I'd start with the Mothers and see what you have. Remember, you can always go lower but IF you go TOO LOW then you have to work much harder to remove the heavy scratches :shrug:
I hope this helps.
I agree with the above. I usually start with some mothers polish to see what I have to work with. Sometimes I will start with 1k if it looks like mothers won't do much. If I have to I will go lower than work my way back up, but like said above the lower you go the more you will have to do to work your way back up. I find that most times I had to compromise and leave some pitting in order to save an etch or lose an etch to get rid of pitting. Those nice deep etches give you more room to work with, but I try not to make them too shallow because I find them to look better deep with some pitting rather than shallow or gone with no pitting. In the end though it comes down to what you want the end result to look like and what you are willing to do to get to that result, but the very first thing I always do now and I learned this the hard way is to take the razor to some stones and make sure I can put an edge on it. I spent alot of time on cleaning up some razors just to find out that the edge was so badly pitted or corroded that it wasn't worth the effort so now the razors hit the stones just to make sure. Good luck.
making a CA coated Meranti pine box for a B'day present str8 & cleaning up an old strop to go with it,
& a W&B wedge restore for me, a mystery hardwood 3 blade box for the hell of it & about a dozen or so other Str8s in line to still do.
Here's another example of starting High and working Lower;Quote:
Originally Posted by cudarunner
The owner was very firm about keeping the etch. I honored his request and this is what I received and what he got back and he was very happy. So was I as this was the very first straight razor that he'd ever used and it was with my clean up and my hone on the blade :tu
Here's the before:
Attachment 174980
Here's the after:
Attachment 174981
Attachment 174982
The pics are the owners and he apologized for the cat hair in the pics.
Haven't we seen that cat hair before cudarunner?
About to take apart a King Cutter. The Rust in the pivot needs to go. Hopefully get it back together tonight, and honed.
Attachment 174995
Well I gave it the old college try and it cleaned up nicely after going from 100grit up to 2500. However, upon inspection under the loupe after a quick couple passes on the dmt 325, the pitting is just too extensive to ever give a decent shave :(
Attachment 175107Attachment 175108Attachment 175109Attachment 175110
sorry to hear,just another reason to see if the blade will hone before a resto.
It's too bad about it not making it back into the rotation but could still be a nice shadow box piece.
It's a nice looking piece after you worked on it. I guess we can't see all the pitting from here but it's ashamed it won't hone to be shave ready!Quote:
Originally Posted by DickWhitman
You did a great job!
Thanks gents. I'm going to send it to cudarunner to let him try it out. However I do have my doubts.
While my father's been dead for 14 years as of 5:20 pm last February 4th one of his favorite sayings was;Quote:
Originally Posted by DickWhitman
Ya Never Know Till Ya Try.
Stay tuned! :w :shrug: :w :shrug: :w :shrug:
Just got these two finished, by hand while ignoring the TV.
Started with this, chips and light corrosion:
Attachment 175137
Chips gone and a fair finish on both.
Attachment 175136
honed and shaved today
~Richard
Nice work Richard :bow:
Ya get an 'Atta Boy' from Roy Boy!
Way to go Richard. They look more than fair!!! A big difference than the other day. You did one hell of a job on them!!!
Thank you, I posted to make a point;Quote:
Originally Posted by engine46
The use of hand work is sadly ignored. A so-so TV show is usually long enough to go through one grit series.
Here is what I started with some time back and posted a couple years ago. Most of the things are still in use, even though I have a well equipped shop in my basement.
http://straightrazorpalace.com/works...storation.html
Have fun!
~Richard
Richard, nice postings. :bow:Quote:
Originally Posted by Geezer
As I stated when I started my thread about my variable speed buffer I wanted the 'help' that a buffer could provide.
http://straightrazorpalace.com/works...-part-one.html
I don't intend to abandon my hand work as the buffer will be used at the End of the Road/so to speak.
I've gotten some really nice complements on my cleaning up of blades and basically all with either hand tools or the help of a palm sander.
I'm looking forward to seeing how the buffer works on some blades that need some work AND after some hand sanding and other work. :tu
Richard, I am envious. Those are gorgeous razors. All I am working on now is trying to find a photo hosting sight so that I can post pictures of the eBay haul that just arrived so that every one here can be envious of me. Photobucket insists on uploading e v e r y s i n g l e p i c t u r e that I have on my phone and I take a lot of pictures for work and such.
Good idea! I find that the two inch hard felt buffs from HF with ¼ hole are great if you have a tapered spindle on the buffer. 6 in a pack for them.Quote:
Originally Posted by cudarunner
Another good tool, no longer made, is the Dremel straight line sander with the contoured backing shapes. Even the single speed model works well with a router speed control. They are often found on Amazon and the 'Bay
DREMEL VARIABLE SPEED CONTOUR SANDER MODEL 6000
I like to use them with a sanding film and clean it often to keep from widening the etched lettering. Won't help much with a light etch though. It is nice to have a scratch pattern along the blade length to finish with a rotary buff across the blade width.
Nuff thread hi-jack; Mea Culpa!
~Richard
Have you thought about transferring the pictures to a computer and just posting from there??? I make no claim to my intelligence and in fact proudly proclaim myself a 'Mastodon' with computers. With that said, even I can post pictures from my computer and only the pictures that I want to post/not everything on my computer/which is quite a lot of pictures.Quote:
Originally Posted by guitstik
Posting from my files on my computer works for me, perhaps it will work for you :shrug:
Attachment 175228
Hmmmm I just did it again. :w
To think that from the days of cassette tape programming in which I used to do proficiently to today with the almost limitless computer capacity I have become computer illiterate. Apparently, my smart phone is smarter than I am and I am constantly telling people that they need to be smarter than the tools they work with. I am a Luddite and I know it. It has only been the last three years that I started shooting digital cameras instead of film. To be honest, I still shoot more film than digital. The problem lies in the fact that my wife will not let me call on a friend of ours to come fix my computer so that it will let me load all of the digital pictures I have taken but now CAN'T even get on the computer:banghead: because for some reason the computer won't take them now even tho it used to. The gadgets are conspiring against me.Quote:
Originally Posted by cudarunner
My flip-phone just lets me email the photos to my computer and then I open the emails and process from there. There was a cord but i also lost the software to download directly.Quote:
Originally Posted by guitstik
Luddite I am also!
~Richard
While my shaft is 1/2" I still wanted to look at what you said were 'Harbor Freight' 2" hard felt wheels for a 1/4" shaft. However I can't find them at HF's site. Any help would be appreciated such as a direct live link? :shrug: :tuQuote:
Originally Posted by Geezer
OH! About the difference between a 1/4" and 1/2" shaft and fitting the buffing wheels/never tell an old redneck country boy that it won't work! :nj :nono: :tu
Thanks for any help. It is truly appreciated.
Cassettes???????? I could talk about 8 track tapes, however I'll go a little further back in time and say that I had 4 track tapes and the player for them in my first car. However I only plugged a tape in and didn't 'program' them. :wQuote:
Originally Posted by guitstik
While normally I always recommend to keep SWMBO happy, have your friend come over and help you whether she likes it or not. If she questions why you did do so against her will tell her the truth; that you Needed to be able to use that Technological Terror known as a Computer as you can't use the F***ing phone to do what you want and that you couldn't even get on the computer to use it without your friends help.
If you end up needing a good divorce lawyer, I know one. :shrug:
N/A In store only....Quote:
Originally Posted by cudarunner
~Richard
If that scenario ever played out at my house, I wouldn't need a divorce lawyer and all she would need would be a good defense attorney.Quote:
Originally Posted by cudarunner
They'll do that when ya least expect it to!!!!!!!Quote:
Originally Posted by cudarunner
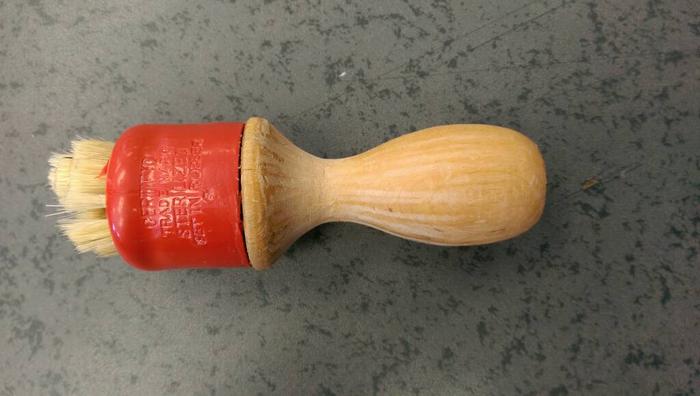
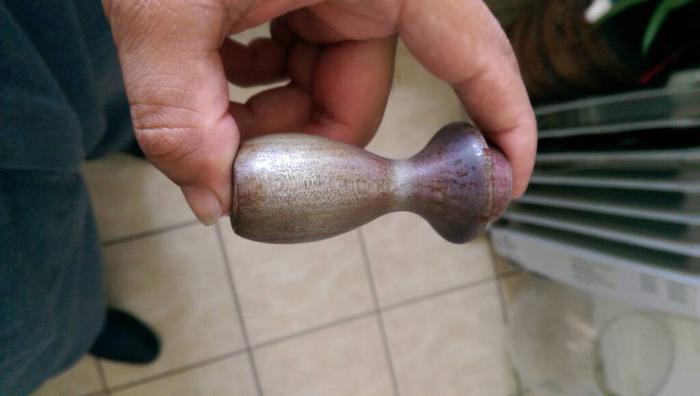
I will be restoring this two Rubberset brushes. The first one has been stripped and stained with black oak stain, and the second one will get a stained with cherry wood stain.Attachment 175655
This is how the first one turned outAttachment 176912Attachment 176913Attachment 176914
Well, I gotta hand it to him...cudarunner was able to get this thing shaving nicely. Somehow managed to get a bevel set between the rows of pitting. Very impressive indeed!Quote:
Originally Posted by DickWhitman
Attachment 177264
My hat goes off to Cudarunner!!!
Thank You!
Here's the links and post #'s to the razor in question;
http://straightrazorpalace.com/works...orking-45.html
See Post 441
http://straightrazorpalace.com/works...orking-46.html
See Post 454
When the razor landed at the Boars Nest the pitting was far worse than the pictures had shown, I applied 6 layers of plastic electrical tape to the spine and went to my DMT 325.
(Yes things get 'squiggly' with that much tape but I wasn't honing/I was trying to find good steel and not too much at a time)!
Here's the Regime:
(X Strokes with lots of pressure back and forth on the edge and Grind, Grind, Grind; Change the tape; Grind, Grind, Grind; Check the Edge etc. Once I found solid steel after ALMOST removing some pits and before entering others I removed the tape and used two layers of tape on the DMT to start to get the razor ready for honing instead of Restoration.
There was still a very, very little amount of the last pit left so I switched to one layer of tape and started on the King 1200. Once the last of the pit was gone, the bevel was nicely set so I proceeded to finish honing on the Norton 4/8K and finished with the Naniwa 12K.
All in all I'm pleased with the way it came out. It should shave for quite awhile longer but there is more pitting that more than likely get exposed with too many bevel sets.
I'm glad that I was trusted to give it a go! :bow:
Roy
Yes, I saw those post's when they first came out. I just got a DMT 325 for lapping my hones but I have a few razors that have slight chips & pits & a couple frowns. That diamond should cut thru it quickly. Good idea, I'll have to try that. I might have to get another DMT 325, for razors & keep the other for my stones. I have a DMT 95 lapping plate but I just bought some DMT's from SRD. I also have the 600, 1200 & 8k but Lynn told me he tried honing with the 1200 & the 8k & that it was too abrasive on the blades, so unless I find a use for them, I'll be listing them in the classifieds.