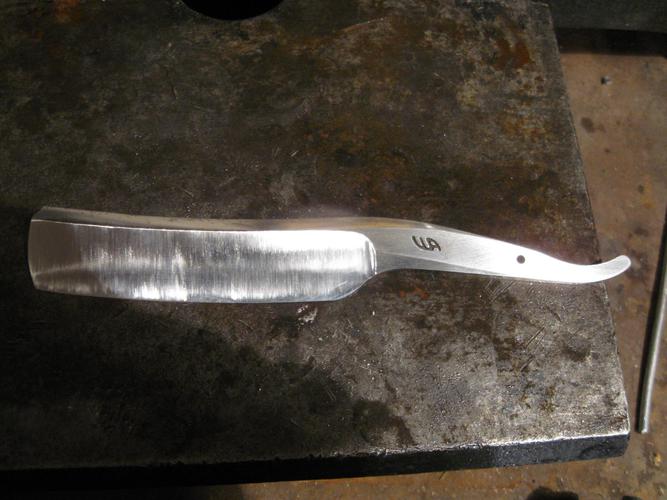
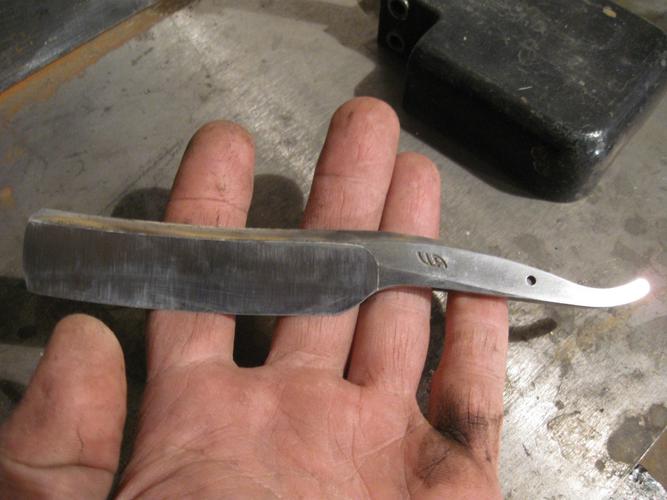
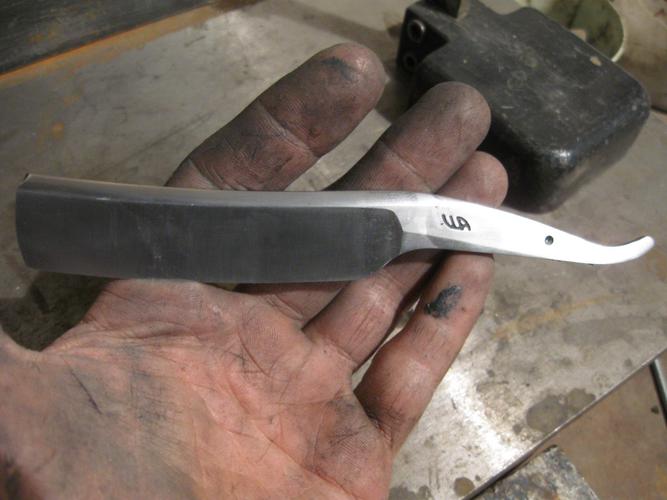
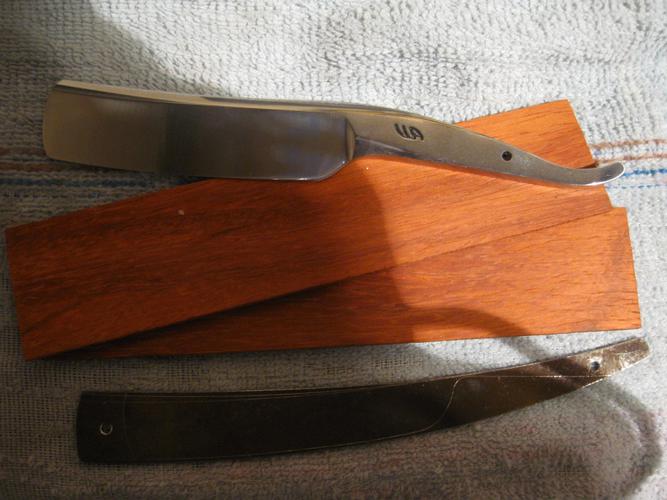
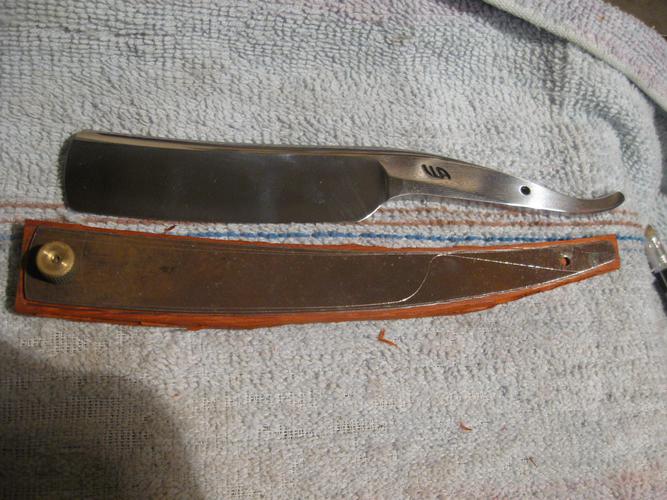
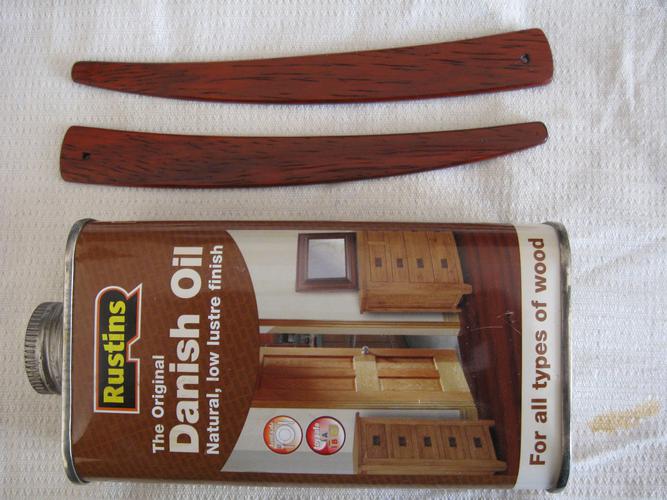
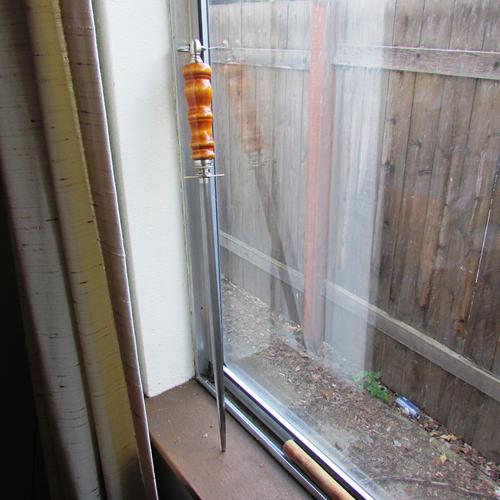
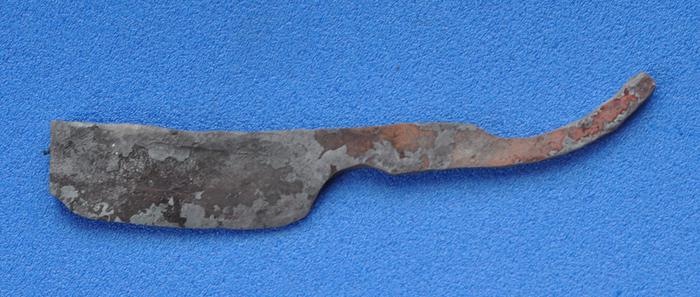
Continued work on the blade...
Attachment 196321
Attachment 196322
Attachment 196323
Printable View
Continued work on the blade...
Attachment 196321
Attachment 196322
Attachment 196323
Very nice shape !
Yes, a very nice shape indeed! That shape is one of the reasons that a Sheffield of similar shape is often my daily shave.
~Richard
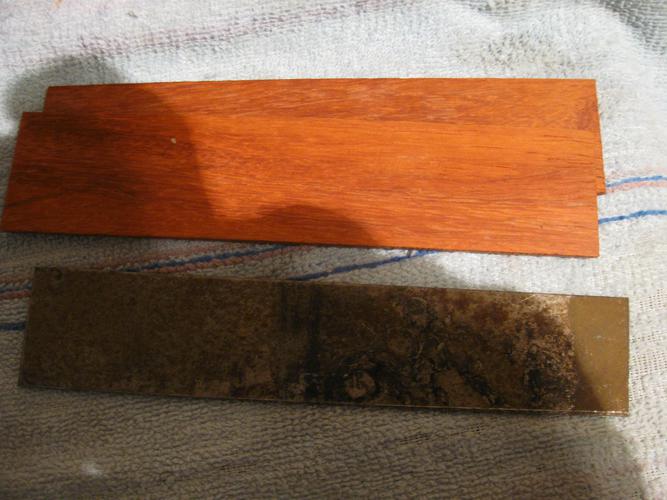
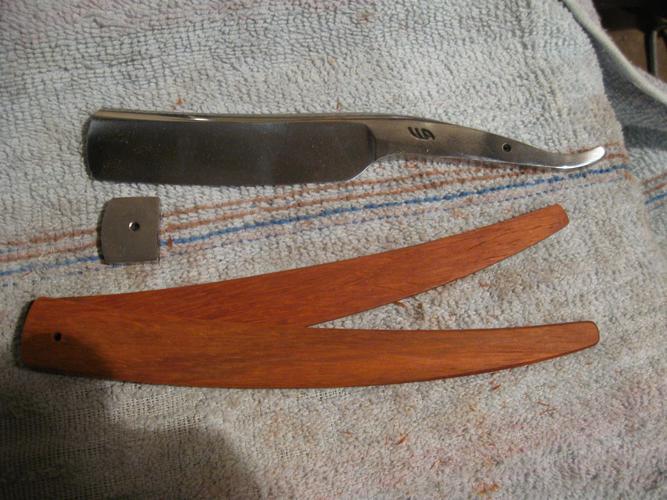
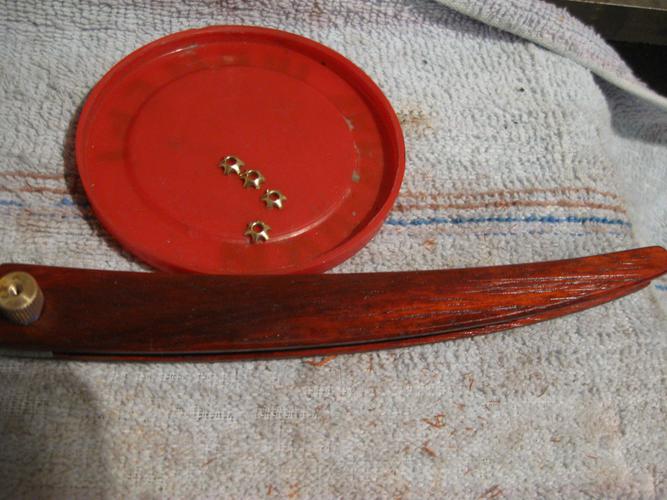
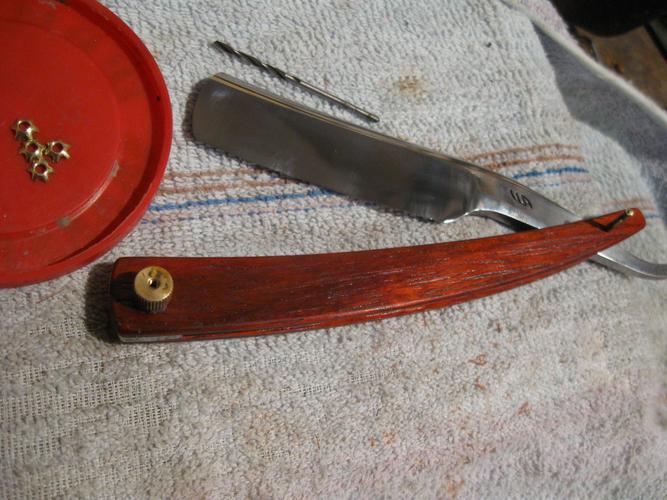
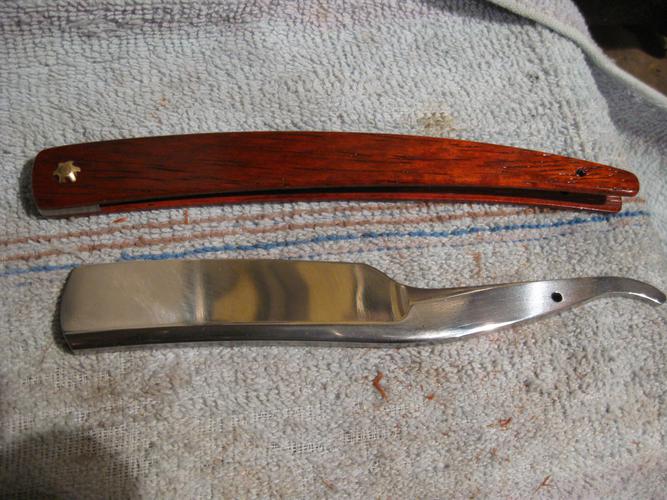
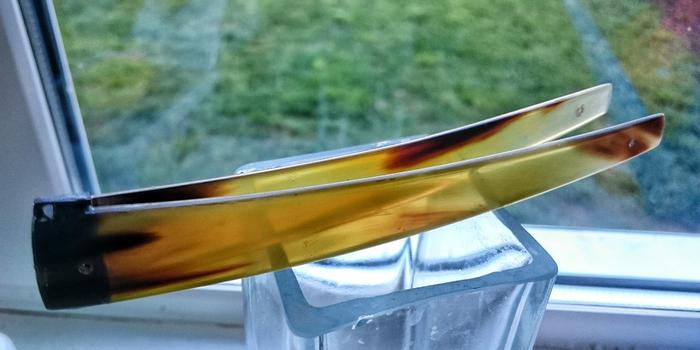
Finished blade, start doing the handle. Handle will African Padauk.
Attachment 196401
Attachment 196402
Attachment 196403
Attachment 196404
Attachment 196405
Very Nice! :y
I can't wait to see the final razor and scales and hear how she shaves. :tu
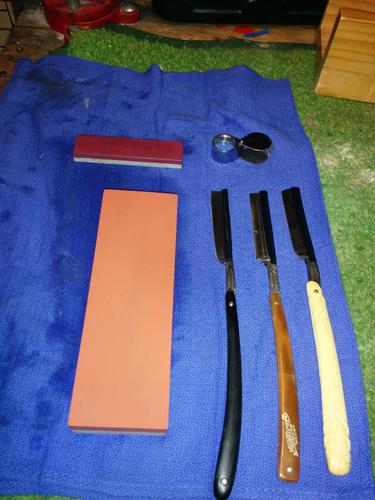
quiet Sunday afternoon hone
Attachment 196499
razors left to right 'bostwick braun, toledo' (a b, j Eyre razor) a ' dubl duck satin wedge edge' ( silkcraft wedge scales) and a 'Clauss, Freemont. O.
Continuation....
Attachment 196735
Attachment 196736
Attachment 196737
Attachment 196738
Im working on some new scales for my de pew whose original ebonite scales broke two days ago. Today i got some "glow in the dark" plexi :D
Glo in the dark Plexi on a Depew???Quote:
Originally Posted by Rockabillyhelge
Yes, as an Experiment :-)
The Blade isnt shiny but dark from the last decades and id like to test if i can get it some kind of Flying Dutchman Look, but as i said, its
and Experiment and if the scales dont look nice ill rescale it into Horn Scales with the same Design like the Original Ebonite Scales.
OK, I finally got her done and all honed up, including the test shave. I was so excited that she held an edge. Required a layer of tape, but shaved great. So the scales are walnut with several unsanded coats of CA. I made some 'flowery' looking 'silvery' collars that are sitting on top of a brass washer, with brass pins. The wedge is deer antler that i had to 'hollow out' and put some lead into it for better balance. Any how..:o here she is. Thanks for letting me show 'er.
Even though I have more pressing jobs to finish, I felt the need to try an asymetrical grind. I am waiting on an ebay kamisori to use as a reference for geometry, so now I have to wait and see if this is ends up as a letter opener or a razor.
Attachment 197312
That is a great job of forging!Quote:
Originally Posted by Thisisclog
~Richard
Some may have seen where I had purchased a vintage set of Henckels kitchen knives for my son for last Christmas. Since he was living with me he didn't need a Steel as I have a nice vintage F. Dick that was my uncles.
Since then he and his girlfriend have decided to give living on their own a go so I bought a new but small steel for him.
Well he has a birthday coming up so I purchased a F. Dick Steel that needed some work for him.
Here's the link to the seller's pictures/I think that you will need to scroll down to see them.
Vintage F Dick Made in Germany Honing Steel Sharpening Rod Wood Handle Large | eBay
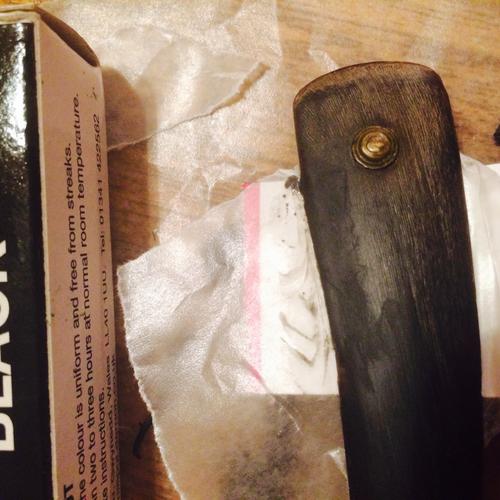
Here's what it looks like now:
Attachment 197359
I allowed the polyurethane to cure for a few days in low room temps then off and on would allow it to cure in the window in the sun to help set it. Boy does it feel nice in hand.
What the seller called 'light rust' wasn't light at all, however it didn't look like the picture in fact it was kind of black and 'sticky' but I paid it no mind. I did lose the factory grooves in about a 1" long piece 90% toward the tip but after testing it on several knives, it's fine and with care will last him a lifetime.
I do wonder where he's going to keep it in that small apartment? :hmmm::shrug::w
Very nice! So you made those flower collars? Hmmmm..... I need a few brass ones for one of my razors. Not having any luck finding a good match...... Again great job on that razor!Quote:
Originally Posted by JimBC
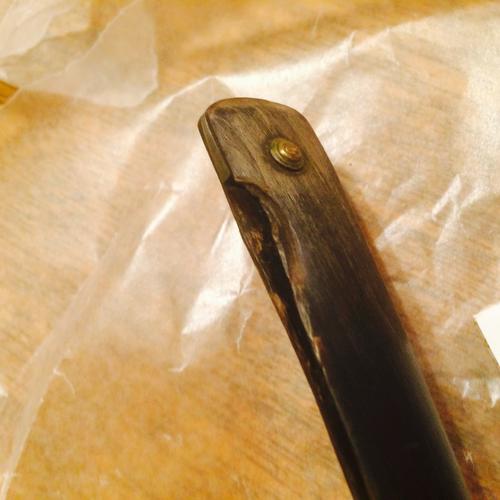
Recent work on treatment.
Attachment 197405
Those collars were little metal 'beads' that I got from hobby lobby. If I can get a picture off this crazy phone I'll show you what it was before I sanded the heck out of it to make them. Probably won't use the again like that since they tend to split open. Shame ..Cool look though.Quote:
Originally Posted by Willisf
Hmmmm.... I don't think we have Hobby Lobby" store here in Canada.... I have a razor that needs just one flower.... And eBay doesn't have the exact match and yours were pretty darn close!Quote:
Originally Posted by JimBC
Here is the bead that I used. After hand sanding untill half thickness, I gave it a small amount of a dome to sit on top of a dome brass washer that takes most of the stress.Quote:
Originally Posted by JimBC
If you have crafting stores that cater to the Beading Necklace craze, they would have them.Quote:
Originally Posted by Willisf
~Richard
A Google search for "Beading, Canada" will get you to telephone distance.
Thanks for showing the flower collar, Jim. I'll have to keep an eye peeled for some of those. I need brass ones.
Ummmm..... I pretty much live in the middle of nowhere, Geezer. Not many craft places where I am at. I have a 2 hour drive to a bigger city (Regina, SK) or a 3 1/2 hour drive to another, Saskatoon... for any kind of variety of crafts stores. We do have a Wal-mart, Canadian Tire, and a few other box stores....which the selections are "not too great". I guess I'll keep hunting online (I'll look at that suggestions uyou posted, Geezer) for the time being or maybe find someone who makes them ( I know....good luck....lol)
Thanks again guys!
check Here,they have all that stuff and a catalog 2 in.thick.Quote:
Originally Posted by Willisf
Argentium Sterling Silver Round and Oval Disc Stamping by Rio Grande Jewelry Making Supplies
First Time Trying a New Type of 'Pinning'.
While my pinning of razors has progressed to where I"m fairly confident there is a pinning that I've been really reluctant to have a go with. :banghead:
Well as I've posted before I've been collecting some vintage F. Dick Steels for my kids and some vintage Henckels knives for them and myself and some have needed some 'Help'.
I also already possess some heritage knives and other kitchen utensils that need new handles. Some are just items that with a little loving care would continue to serve not only me but once I'm gone one of my children.
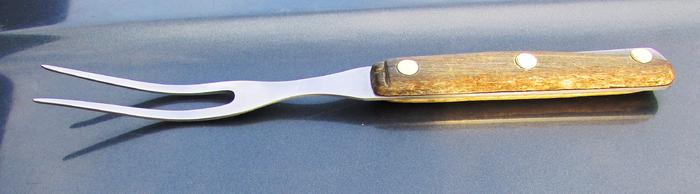
Here's a simple serving fork that was my father's oldest sister's. I have no Idea what it cost her but to me it's 'Priceless'.
Attachment 197494
As you can see the old wooden handle is broken and needs replaced.
Well I've never dealt with something like that but I did some research and found that a thing called a 'Cutlery Rivet' had been used to secure the wood to the fork.
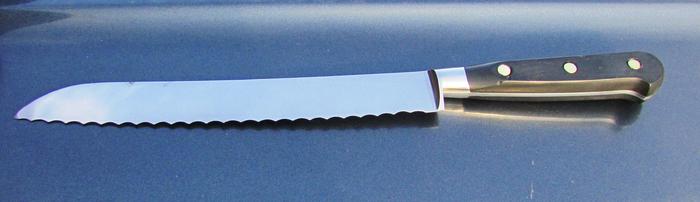
I recently acquired a Henckels serrated knife to clean up and use as a bread knife but the original cutler rivets were 'Semi missing'. I got the knife for a very reasonable price and the handles were still secure but I thought what the hell! I'll see what I can do to remove the broken rivets and replace them.
I used my Harbor Freight table top drill press to drill out what remained of the factory rivets so ---------
Sorry about the Tale of Two Cities but here's my first attempt at using Cutler Rivets
Attachment 197499
I didn't mess up the original countersunk holes that's just the way they were. However I'm Very Pleased with how it came out.
I will say that I found that by grinding the ends of the male shaft to a steep taper made installing much easier! :tu
Also as my friend Glen says when pining a razor it's 'tap tap tap' with installing these cutler rivets it's BANG BANG BANG!!!!
Well off to work on cleaning up the Boars Nest!
Attachment 197500
Very nice job Roy!!!Quote:
Originally Posted by cudarunner
Honey horn scales for lovely little ERN.
Attachment 198266
NICE! VERY NICE!!!!!Quote:
Originally Posted by macrob
:bow :bow :bow :tu
Thanks man. There's something in honey horn. It's always look beautiful.
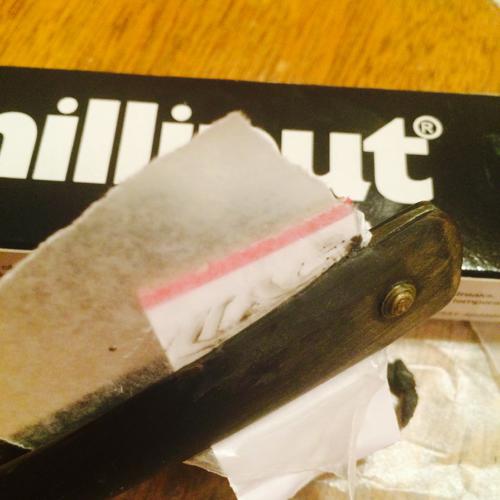
Trying to rescue some scales on a Wade & Butcher FBU using Milliput. They need a good oil soaking, but I figured I better get the putty to adhere first. Attachment 198500Attachment 198501Attachment 198502
I'd really like to see how that finishes up. If only they made a dark brown of some sort.Quote:
Originally Posted by BeJay
Straightening scales with the hair dryer method:
Attachment 198889
and soaking some others in neets foot oil:
Attachment 198890
I like all sorts of devices and ways of working.
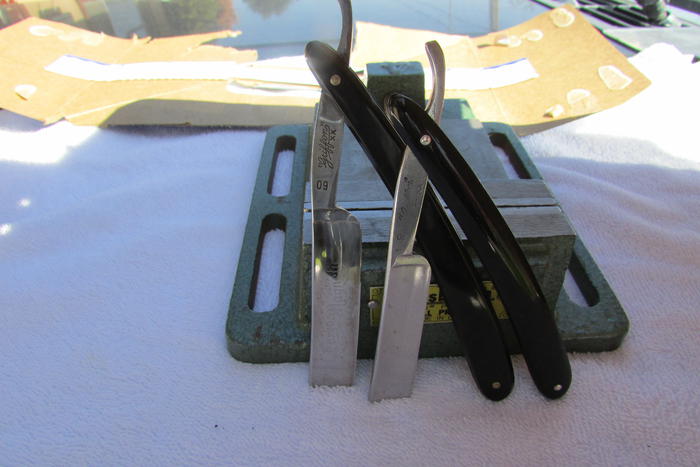
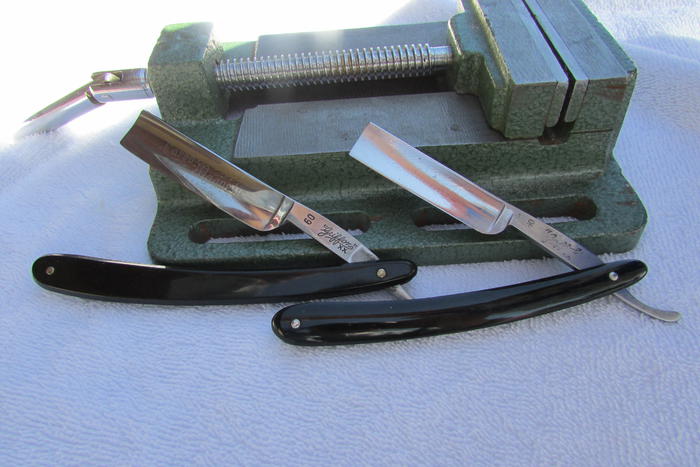
I recently received 3 razors from a friend that he'd just purchased. Two of the three had cracked blades. I donated a similar blade for a minimum fee for the one and asked that I keep the other as I thought that I knew of someone who could use the scales as a donor and I would just pitch the cracked blade.
The two that were salvageable have landed at his residence. I'm waiting to hear how he likes the work.
That brings me to today when I thought 'What the F! Lets see if I can salvage this razor.
The end result is a 'Shorty' Griffon Magnetic that the shaving edge is about 2 and 5/16" long. While the '
Square Point' isn't perfectly 90 degs, for my first attempt I'm pleased with it.
I reused the wedge, friction washer and of course the Bakelite scales. After some very careful layout/drilling and then sanding I'm Very Pleased with how the razor looks. After sanding with 2K Wetndry I used Mothers Mag & Aluminum Polish on the scales and then after a careful washing and drying I used 'Black Again' and after a bit of exposure to the sun and UV to set the product.
Here it is along with my Full Sized Griffon/This pics don't show how nice this all came out!
I hope all will enjoy;
Attachment 198912
Attachment 198913
I just hope the owner doesn't see this as It's supposed to be a surprise when he gets it next week. :w
Have bought my eyelet washers, .999 silver wire and buckets loads of the brides crystals and currently building another list from RIO no problemsQuote:
Originally Posted by pixelfixed
those silver disks look like great idea also.
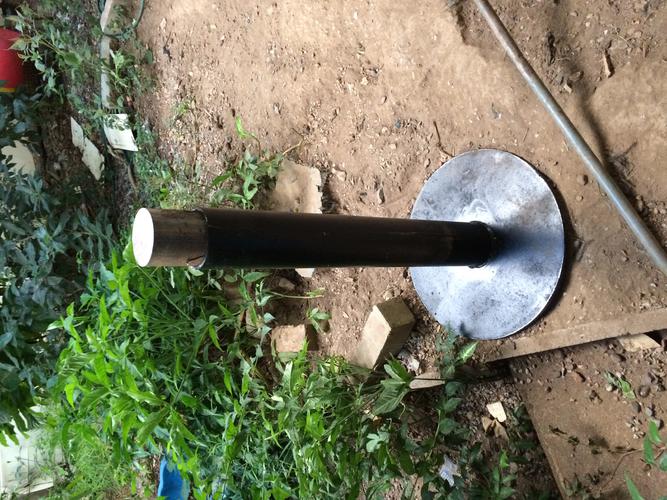
Finished my post anvil today
Pics tomorrow when my phone syncs
Anvil is 100mm (4") 4140 quenched and tempered bar
Post is 4" schedule 40 steel pipe post
Base is 6mm (1/4") plate 600mm (2') diameter
wedges are from 3.2mm 316SS electrodes
Ground a 1" & 1/2" diameter flat & 1/4" on 1 curve with a sharp 90 degree curve also
Edit pics added
Attachment 198959
Attachment 198958
Top to bottom:
a tool steel hammer finish razor
another suminagashi predator
another suminagashi talon
an O2/L6 Damascus chopper.
The Damascus was custom made for me by Howard Clark
Attachment 199479
Come, now, Mr. Bruno, you have to give that Clark damascus blade a quick dip and a close up. :)Quote:
Originally Posted by Bruno
Hit a nice exotic wood store for some mottled Ebony and a few other chunks of joy.
Attachment 199486
Hoping to be able to cut the 7 scale sets for my non XLL kit out of these pieces, maybe a matching brush as well..
Cheers.
Nope. For 2 reasons.Quote:
Originally Posted by JDM61
1) it is still covered in firescale so it won't etch properly.
2) you don't dip Damascus (or suminagashi) without protecting the edge, or the edge steel will corrode. At this stage that would be easily fixed by grinding a bit from the edge, but it's one of the things that I don't like. Everything in due time
This one was forged yesterday and annealed last night.
It'll end up just shy of 10/8, and was forged to finish. It will retain the hammer finish surface. It is the first time I tried hammering out this design to finish. I think it went well. The only grinding will be the blade hollows and the point of course. This is SC145 steel, and will be differentially heat treated to feature a hamon.
Attachment 199496