I've hung mine to dry with two small chunks of wood as wide as the strop and a C-clamp on each end. One end goes on a hook and the other gets a 10-lb. weight tied to it. Even so, still shrunk a little, but I think not as much as they might have.
Printable View
I've hung mine to dry with two small chunks of wood as wide as the strop and a C-clamp on each end. One end goes on a hook and the other gets a 10-lb. weight tied to it. Even so, still shrunk a little, but I think not as much as they might have.
Ya, there are a few threads where guys had some downright interesting ways to do that.Quote:
Originally Posted by xiaotuzi
Seems like you were in on that?
Anyway...Stubborn me. This works too, I suppose! :rofl2:
Attachment 279437
Attachment 279445
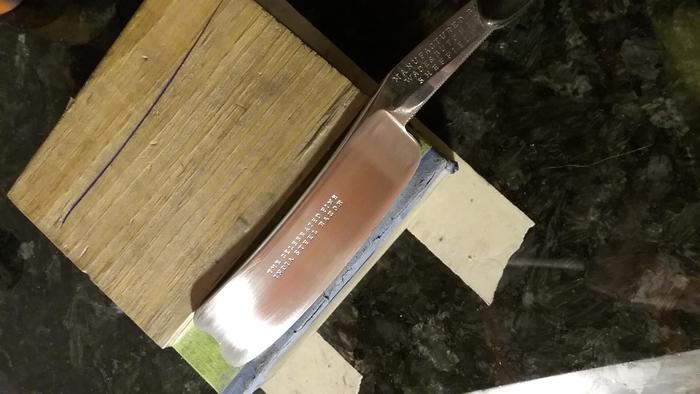
Fine India steel, gonna try and get this sucker in line. Had this blade awhile now and tried to get a decent bevel to no avail. Hopefully this does the truck.
Eric. Add a layer of tape. Instead of concentrating on the area lacking, concentrate on the adjacent areas. You have to bring it all in level...
I assume a swooping stroke on this one?
What is wrong with the bevel? All over the place?
It was huge and all over. Plus when I get it at some point it had been knife honed. I didn't do it any favors trying this that and the other to set a bevel. So I'll see if I can redeem my past :)Quote:
Originally Posted by RezDog
Yes Tom I do believe a rolling swoopy stroke will be the order of the day :)
That can be a tough one to leave alone. It is also easy to create a wavy bevel when hand sanding by doing short stokes while trying to work out pitting. The high spots where the bevel is wide need to come down, and I find longer sanding blocks to be helpful. I find it easier to leave dark spots and pitting than a wavy bevel.
I agree Shaun, long blade lengtlength strokes and due to the blade etch I am not getting agressive. Trying mostly to bring the bevel straight again. In reality I likely could have left it the way it was but since I had tried to set a bevel a couple different ways I wanted 1 bevel not like 3. Covering my tracks I guess I could say.
Nice selection, Jerry. Don't forget to get a bottle of Tru- Oil, to finish them with. It will bring the best, out of the grain. :tuQuote:
Originally Posted by Gasman
I got some of that and the kitchen wax and a few other things. Figured when i got a chance to work on them i was going to hit you up for some slight directions as ive seen what you can do. If i can do half as well as you ill be happy.
Thanks.
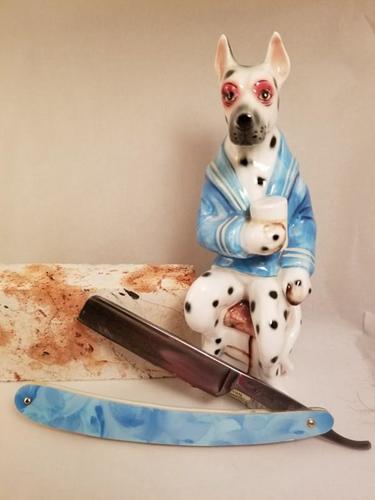
Another of my little experiments, a heavy vinyl tray from the Goodwill with a yellow wedge made from a pill bottle cap. The old seadog here is contemplating this Clean Clipper over a hot cup of joe.
Attachment 279462
I suspect the stuff in question is sizing.Quote:
Originally Posted by Leatherstockiings
As anyone that wears linen knows linen wrinkles shrinks sags and droops (lacks dimensional stability).
Canvas for painting is often treated with sizing for some of the same reasons.
It (sizing) can be a blend of glue and starch (cooked flour, cornstarch). It can be mixed
with chalk or pigments.
https://en.wikipedia.org/wiki/Sizing
The Trouble with Oil – Preparing a Canvas for Oil Painting
https://en.wikipedia.org/wiki/Gesso
Silverpoint artwork is interesting as a short length of silver wire is used for drawing.
The abrasion of the wire on the prepared board or canvas is close to a pasted strop.
Some chalk is extra fine and polishes a surface (or edge) better than all but the
best modern hones. Perhaps better because most hones are made sharp and
compounded to remove metal more than polish it.
https://www.naturalpigments.com/art-...technique-art/
Pigments... a green pigment is CrOx...
a very common white pigment might be softer and less abrasive
like TiOx https://en.wikipedia.org/wiki/Titanium_dioxide
The most common household sizing is spray starch for the ironing board.
Applying enough following by wiping the surface strongly with a trowel, towel or squeegee could produce
a tight surface for a strop. Diluted white latex paint on the back surface of fabric intended for
a home made strop. Fabric firehose has a bonded internal waterproof hose internal.
The gesso thing is a lot like the Illinois brand strop canvas. Gesso applied from the back in layers
could be the trick for home made strops made from cotton denim (like bluejeans).
Elmer's white or carpenters glue mixed with chalk used in a string line... might be fun to try.
I have not done any of this... in the context of honing or stropping.
Now I am tempted to go and play some more...
I have a dandy home made Tandy leather strop that needs a canvas back half and a
nearby fabric store with nice canvas. Hmmm....
Wonderful information, thank you for all the links!:chapeau
~Richard
My friend, I must compliment you on your sense of style. That is a cool color-coordinated razor and pooch and would be fun to see when shaving in the morning!Quote:
Originally Posted by joamo
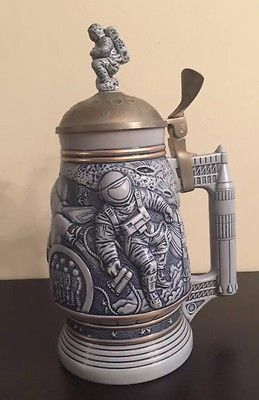
The only thing I own that could possibly compare is my treasured Avon Collectibles Conquest of Space Beer Stein.
Attachment 279464
This one isn't mine. I think mine is in the china cabinet in the dining room. But I'll retrieve it if I can just get an Apollo program themed razor!
Thanks! My wife has several hundred animal figurines that will be sharing the stage with my future razor pics. Sure adds to the fun. :tuQuote:
Originally Posted by jmabuse
You are welcome...Quote:
Originally Posted by Geezer
Now I need to explore some of these bits in the specific context of making a great fabric strop.
I suspect the mix used by some is a company secret today and then now lost to time.
A family I grew up operated a cotton fabric mill and my mom was an art teacher so I saw
and heard about some of these things in passing. I can think of a lot of ways to get it wrong.
The reason I spent the time figuring it out is I have some OLD strops where the fabric
side needs work and I have yet found a sane way to soften old crusty strops beyond
rubbing with my finer DMT and rubbing with the spine of a kitchen scraper to worry the
surface.
The last thing I tried was wiping the mud generated from lapping a 10K hone flat
on the strop. It works but I got too much on the strop. I have been scrubbing it clean every two
weeks with water and an old tooth brush. Each time it gets slightly better and
I am continually impressed with the Illinois 827 strop for the price as a result.
I got this Wosty Celebrated IXL in a set of broken celluloid scales.
Attachment 279539
I thought it needed some honey horn scales, so I started from blanks, bandsawed them out oversized, and got this:
Attachment 279540
I did some very rough shaping with a file, but everything else I did with hand sanding. Took quite a few hours. And this is what I got:
Attachment 279541
I don't know if you can make it out, but there are light areas in several spots around the edges especially, like on the tang end of the bottom one. That's the horn delaminating a little.
It makes me a little nuts after all the hand sanding. I've never made honey horn scales before, just dark horn ones, so I wouldn't have seen any delamination in those. Is this just to be expected with honey horn? Anything to do about it?
Here I've put the original wedge in and some screws to check fit.
Attachment 279542
...and ... the scales are too long. I'm going to have to bring the end in some and make another wedge with the pin a little more towards the toe. I used the original broken scales as a template but now I'm thinking they might not have been original, because they were clearly too long. I didn't notice because the blade had come out of them when I got it.
BTW the look I was hoping for is on that big W&B hollow ground underneath. The blade on that guy is longer though, and this horn isn't that transparent. The W&B also has a big chip in the edge (you can just see it through the scales about a third of the way from the toe) which I will work out when I get to cleaning it up soon.
Horn is a funny one to work with and I never cut it on the bandsaw. Mostly because I feel that none of the bands I have are really great for cutting it. I mostly try to use the router. I have several aluminum templates I have made, I then attach the horn to the aluminum with double sided tape and use a router bit with a guide bearing and cut the scales that way. Then I put the two rough shaped scales together and use primarily a scraper to shape them.
The last bit of shaping is with 220sandpaper and then I finish them to 1000 grit wet sanding and them buff them. I had a lot of tearing with both my bandsaw and my scroll saw on the sets I tried that way. I still do some roughing on thenscroll saw but I still leave a full 1/8” all the way around before going to the router.
Attachment 279543
Finally! I got a day in a shop, on one I felt capable to do something! Been a long time:cry:
Cut and contoured but fitting and finishing will be later.
Attachment 279653
Sometimes the coincidence does work out!
~Richard
Good to see you back in a shop working on a project my friend! :tu
ATTA BOY, Richard!! :D
Attachment 279684
Nice work around here lately, everybody! Love that Packwood blade, Richard.
Jmabuse - I like using honey horn too and have also had pieces that were delaminating. I hear you about all the hand sanding. Sometimes you can see potential delaminating problems before you even get started, or early in the project. I've had blanks that I could normally get two scales out of but because of delaminating I could just get one, or even none. That's the deal with natural products I guess.
I've took a break from horn for a change and have been working on making some acrylic scales from a 6 inch pen blank. The razor is an A. Feist & Co, Lunawerk that I picked up at a flea market last summer. It had bad scales and some rust. I'm almost done with cleaning up the blade, still needs final polish. I kept the wedge and third pin spacer to reuse with the new scales. I got the scales done now so after final polish on the blade I should be able to put 'er back together.
Attachment 279689Attachment 279691Attachment 279692Attachment 279693
Nice work Tuzi! Very nice work indeed! :bow:Quote:
Originally Posted by xiaotuzi
As far as some online ordered overseas supplied blanks, I bought some and within a couple months, they were delaminating. The horn seems not to have been processed as well as the horn I bought from Knife suppliers in this country.
JMO
~Richard
Richard, it is good to see you back in action. The Kirinite you have there and the Acrylic that’s Tuzi is using are some crazy colours and patterns. Some day I may take a walk on the wild side.
While I know exactly what you are talking about I just had to post this 'Walk on the Wild Side'.Quote:
Originally Posted by RezDog
Please forgive me my friend.
https://www.youtube.com/watch?v=MxixFZZUBwE
LOL
I was referring to my scale making Roy. To date my scales have been very traditional in design and material. Conservative you might say. If I were to use the funky Kirinite or acrylic that would be a walk on the wild side.
:-)
I knew that my friend, I was just having some fun! Life is way too short to not enjoy a little humor along the way. :tuQuote:
Originally Posted by RezDog
Well I am glad that it was me being humoured over not being understood.
However I’m sorry I missed the joke.
..............HAR!.......
It's a JOKE, Son!Quote:
Originally Posted by RezDog
Attachment 279696
First try on the Wild side for me, Rolodave passed on the blue wet dream material!! The torti is Kirinite also. Nice stuff to work with, scraper is all that is really necessary after cutout ! The white is bone same thing there.
Thanks for keeping my dreams alive!
~Richard
I just knew that looked familiar, Richard! :)
Wake up Rez! Lol, Roy was kind enough to send me a blank of acrylic that while I'm on leave I might delve into using for scales. Should be fun having a wild razor in hand:)
Remember my friend---No Pictures----:hmmm:Quote:
Originally Posted by ejmolitor37
That boy! Attachment 279697
Attachment 279698
(sorry, Rez!)
Great to see you back into the shop Richard :tu and some great looking work there.
This, I like that scale material as well.
I enjoy my razors that are a bit on the wild side. But that’s just me, normal blends in. I like things that pop!!
Richard and Tuzi you fellas are going to have some sweet blades back in action. Good work!
[QUOTE=xiaotuzi;1791188]Nice work around here lately, everybody! Love that Packwood blade, Richard.
Jmabuse - I like using honey horn too and have also had pieces that were delaminating. I hear you about all the hand sanding. Sometimes you can see potential delaminating problems before you even get started, or early in the project. I've had blanks that I could normally get two scales out of but because of delaminating I could just get one, or even none. That's the deal with natural products I guess.
I've took a break from horn for a change and have been working on making some acrylic scales from a 6 inch pen blank. The razor is an A. Feist & Co, Lunawerk that I picked up at a flea market last summer. It had bad scales and some rust. I'm almost done with cleaning up the blade, still needs final polish. I kept the wedge and third pin spacer to reuse with the new scales. I got the scales done now so after final polish on the blade I should be able to put 'er back together.
How big are the pen blanks your using.
I can get them near my house, but they seem kinda small for scales.
Definitely not going to fit the larger blades.