Probably scalped her Bill.
I've heard similar about people with long hair working on a lathe! My hair is below my shoulders but I will put it in a pony tail.
If working with a machine, I will put it in the back of my shirt.
Printable View
When we got married my wife had the jeweler cut relief lines all around the periphery of the ring in diagonal slashes spaced evenly around the outside of the ring. He liked the finished look so much he started to market some that way. Caught the light in the slashes and looked spiffy. And if I were to get it crushed it would crack at one of, or a few of those relief cuts and be easily removable.
It stays in my watch winder box on the dresser now, and like the watches in there, never gets worn, cept for fancy events. No watches, rings, or chains in the Dairy world so I got used to wearing none.
As 40+ year lineman I can tell you rings and electricity and climbing do not play well together. :jedi:
I put my ring in my watch pocket. To this day I do not understand why power/electrical business allows rings. :banghead:
I've had to deal with crushed, skinned/de-gloved and, torn off fingers followed up with a "I told you so DA." No electrocutions from rings thanks goodness. The real biggy is a ring will wear away the rubber inside LV/HV rubber gloves and they "WILL" fail.
Fully understand when working around mega volt systems,but some have mentioned automotive work,Never seen that.
12v car batteries can smoke you just as fast and bad. When I was trying to find a photo of a wrench welded to a wedding ring that was always around on safety posters back in the day I found way too many car battery smoked hands. Fault current on car batteries can go over 1000 - 1500 amps. That's a lot of smoke trust me. ;)
And as I learned in college, it's not the voltage. but the amperage that kills you. In an AC (alternating current) system the power drops off momentarily (60 times a second) and allows you to pull free, in a DC (direct current) system, no such chance unless sheer willpower does it for ya. Only straight from the battery or alternator will you see, as jmercer mentioned, 600-100 amps potential. And as an extra factoid, 30 amps can stop your heart they say.
Cheers!
Sorry to drift us off topic. :gaah:
Posted hopefully fun thread here to continue. :nj
http://straightrazorpalace.com/conve...ml#post1514192
Funny story,back in the late 60sWas no real cure for atrial Fibulation,We had one old patient that when he went into AF, would call his wife out to the garage,pull the coil wire,tell her to give the car a couple cranks,was enough to get his ticker working again.
It can be anywhere that has a battery terminal like at the alternator or starter 12V, 24V or whatever! Mike is right, it's all in the amperage too. If a battery is dead or almost dead, you're pretty much ok but a good hot battery will do you some harm & I'll have to check out that 30 amp thing but it could very well be possible.
My dad had an alternator, starter, generator rebuilding shop when I was younger & I worked for him. We also rewound electric motors & worked on huge dc forklift motors. When I would test an alternator on the machine after rebuilding, I would give myself a small jolt of current by jumping from the field terminal on the older alternators, (w/o built in voltage regulators), to the positive terminal. It wasn't much but it would make my arms twitch! I think that would be the same principal kinda.
Rescaling and pining back some of my previous works :
http://i18.servimg.com/u/f18/13/33/95/13/captur25.jpg
Th two on top are custom scales, the two under are restored ones.
That sounds like a good project. About the Baltic amber, I hadn't seen anyone ever suggest using it (but never looked) and I was wondering if it would work. Ordered some amber chunks a month ago and it finally arrived yesterday so I'm getting ready to try it for a wedge. Happy to see someone else trying it because I've been worried it may be too brittle and chip easy. Guess we won't know until... The stuff I received is more golden color, I thought it would be more reddish. Shouldn't be too hard to work with. But the jade you mentioned... I can imagine you will be hard at work on the grinder with that! Good luck:)
Wedge material is something I've been putting some thought to, still looking for good ones, there's gotta be many options.
Thanks ! :)
All of them are in tortoise, silver collar and pins (well, all of them but the pin in the center of the big silver collars).
I didn't have the silver (or the skills^^) to copy the silver end of the empire razor, so I used MOP :)
I first only carved the MOP and a piece of tortoise to assemble it as a puzzle, but it was too thin and fragile. So I made a veneer on some synthetic material (I didn't decided yet if it is an heresy or not ^^).
Attachment 205614
30 amps will broil you. 30 milli amps will stop your heart.
But those amps only exist in the short circuit. You can grab a car battery with naked hands, because the current (amps) is voltage divided by resistance. And for 12V, the amps are way too low to do any damage, even if a short circuited car battery delivers 600 amps.
Electrothermal Ring Burn From a Car Battery | Orthopedics
Google is your friend... :) Found page after page with gore. ;)
https://search.yahoo.com/search?p=El...ttery&ei=UTF-8
13kv would turn the head inside out and burn limbs off and set them a blaze. More like 2kv.
Voltage of an Electric Chair
I got a kick out of the article mentioning mechanics using stainless steel wrenches.:rofl2: Alright they're doctors not mechanics.
Other than that. This is no laughing matter.
The electric chair article mentions 7-12 amps in the 2kv range. My bad about the voltages, but the amps are well below 30.
I had to laugh at this one...................
"Blood appeared to pour from the mouth and ooze from the chest of Allen Lee 'Tiny' Davis as he was hit with 2,300 volts at 7:10 a.m. But the governor's office said it was simply a nosebleed."
Hah! Nosebleed my a**
Been cleaning up this Viscount Rolls Razor, came with all the box and paper work in great shape.
The body is aluminium, hone is intact but the strop needs some work the glue stuff that was holding the leather in place is all,hard and crumbling so need to work on this till.
Attachment 206000
Attachment 206001
Attachment 206003
Attachment 206002
At least I know where the tarnish went
Some after pics
Attachment 206005
Attachment 206007
Attachment 206008
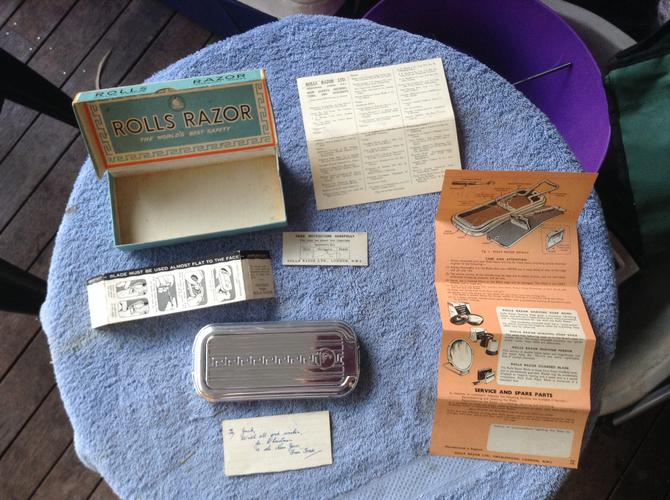
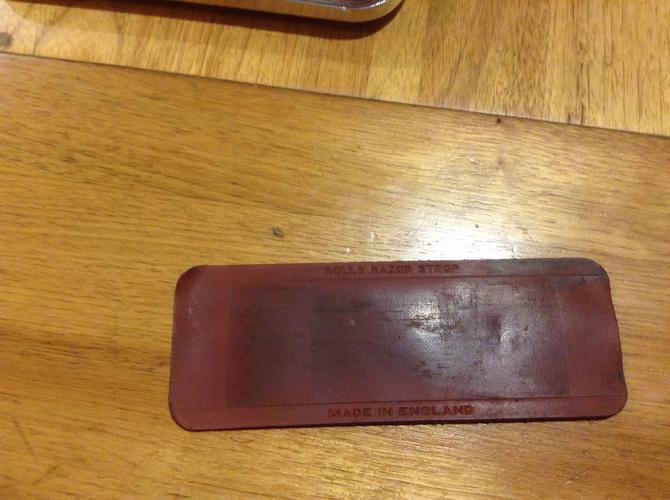
I have a couple of them & they are in pretty good shape with the instructions but last year, I got lucky & found these, a replacement hone & strop for a Rolls:
Attachment 206009 Attachment 206010
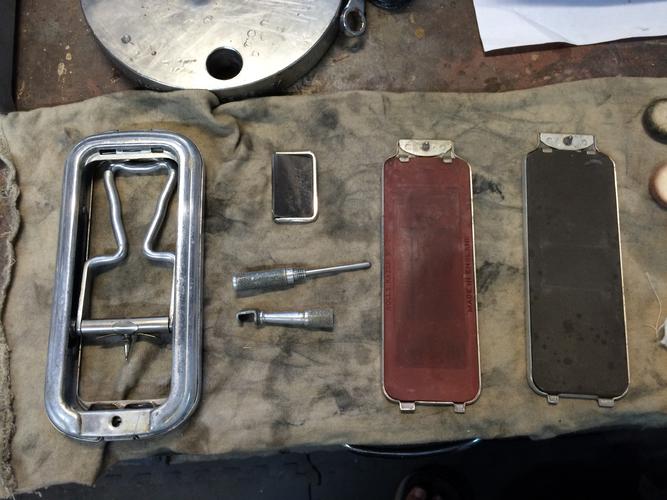
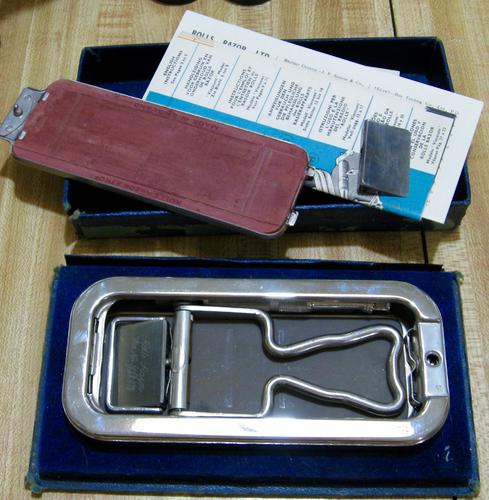
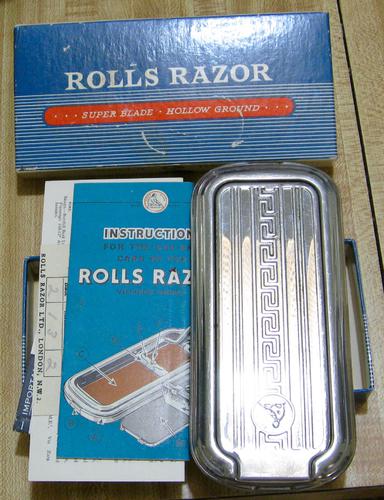
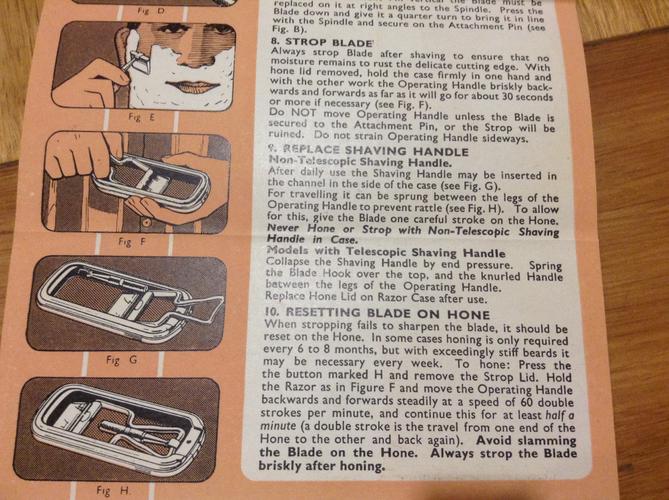
Here are my Rolls, 2 different styles. One has round buttons on the ends & the other has long buttons marked S for strop & H for hone.
Attachment 206011 Attachment 206012 Attachment 206013
Attachment 206018 Attachment 206016
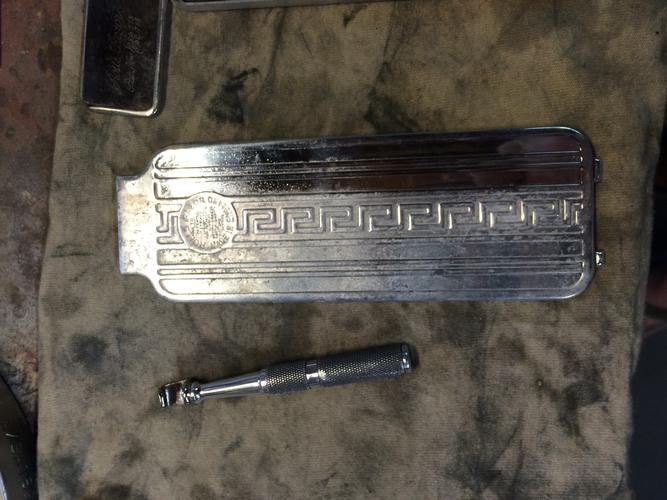
Substance, also there is a slot in the side & yours has it too for a place to put the shaving handle:
Attachment 206014
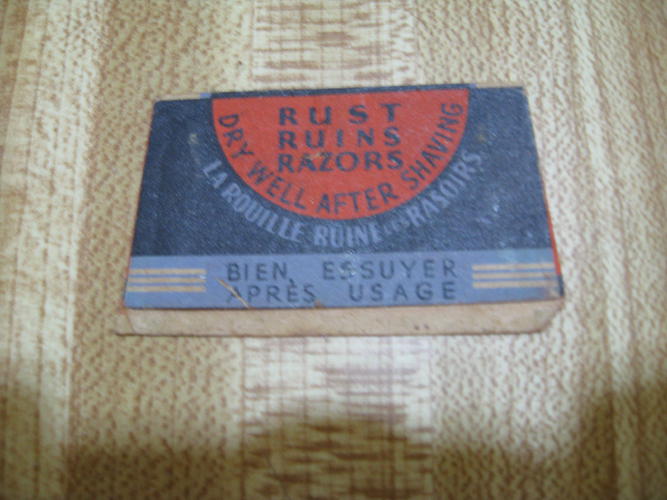
I also found this tag in the bottom of one of them:
Attachment 206015
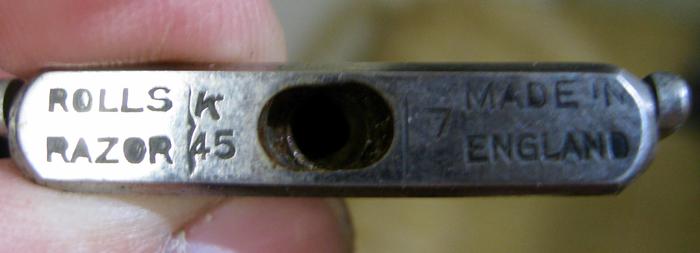
Also, most of them have the dates of the blades on the back side, this blade is 1945:
Attachment 206017
I have seen some as old as 1927 but people want a lot for them unless they don't know. I got one of mine off eBay for $11 plus shipping & the other from an antique shop but it was more but not as much as some ask on the bay.
G'day Steve, mine has the square type buttons and my blade has F A & 7 the A could be for Aluminium? But no year
Attachment 206022
What's on the back of the new leather, is it clean or does it have a glue patch of some sort?
Attachment 206023
Attachment 206024
I cleaned the glue of the back of mine as it was crumbling apart and was thinking about using a foam type double sided tape on it to get about 1mm thick, also I could use a piece of Roo leather as its about the same thickness as the original.
Here's a pic of the storage instructions I mentioned also
Attachment 206021
Attachment 206026Attachment 206027
Just restored one of my first razors. Blade was broken. Unpinned, used stop pin location and re pinned. Working on honing it and try to shave. Anybody ever used a razor this short to shave with?
That must have been a fun job, seeing such good results us always nice! You and engine 46 just made these razors look so cool! Seen them at antique stores, never got one, now I'll keep my eye open for them and also the replacement leather and hones, maybe at least to pass on..
Once the pivot and spacer pins were removed, I taped the scale together. Measured and marked the same length(1/2") for the end. Used a hacksaw to cut. Shaped the end of the scale(while still taped together) with rotary sander.
Roll's info
Last thing on the page was
""Avoid slamming the blade on the hone!""
The hone will breakdown over time and there will be a little crater under the blade edge, coming and going. That reallydoes a number on possible smoothness of shave.
Do a lot of stropping strokes after honing, the hone is quite coarse!
~Richard
Substance
The back side has something like a pad under it. It isn't sticky in any way. If it were a glue pad, it might have dried up over the years. I took the strop from one of my others & it didn't seem to stick as it is made exactly to fit in the lid portion. That is one question that remains unanswered but it could just be a pad because if it were removed, it might sit lower in the lid but at the same time, it could have been a double sided sticky piece to hold it in place.
Attachment 206076
Attachment 206329Attachment 206330Attachment 206331Attachment 206332
Okay. So this is a new one for me. Typically I work construction yada yada. I enjoy refurbishing knives swords guns furniture what have you. My friends say i have a particular knack for sharp objects. But this is my first straight razor restoration. I didn't take any pictures before, which typically is my S.O.P. Please forgive me I dropped the ball on this one. Its not perfect. You can still see a couple divitts near the blades edge. had you seen it Before you would have seen the rust that had taken over nearly the whole blade and the edge that was. Well it looked like some with turrets and Parkinson's took a dermal to it using the coarsest wheel they could find. as you may tell it's still not perfectly straight. I used a series of wet/dry sand paper ranging from 400-1000. hit it with the buffer for a little bit. Followed by a few wet stone I have the final one being 3000. Then to finish i have a very finely lined synthetic strop that I believe did justice. I used this razor right after completion. Now Im sure i will get yelled at for this, so here it goes. Using soap and water only it didn't tug, cut dig or pull once. That being said I believe it turned out nicely.
Scott133
Okay. So this is a new one for me. Typically I work construction yada yada. I enjoy refurbishing knives swords guns furniture what have you. My friends say i have a particular knack for sharp objects. But this is my first straight razor restoration. I didn't take any pictures before, which typically is my S.O.P. Please forgive me I dropped the ball on this one. Its not perfect. You can still see a couple divitts near the blades edge. had you seen it Before you would have seen the rust that had taken over nearly the whole blade and the edge that was. Well it looked like some with turrets and Parkinson's took a dermal to it using the coarsest wheel they could find. as you may tell it's still not perfectly straight. I used a series of wet/dry sand paper ranging from 400-1000. hit it with the buffer for a little bit. Followed by a few wet stone I have the final one being 3000. Then to finish i have a very finely lined synthetic strop that I believe did justice. I used this razor right after completion. Now Im sure i will get yelled at for this, so here it goes. Using soap and water only it didn't tug, cut dig or pull once. That being said I believe it turned out nicely.
You did well enough for a beginner. Like I always say, you never know unless you at least try. It will only get better the more you do it.
Hey! I work construction too.
It may be the shadows or angle but the blade looks like it has a bit of a frown. If it's shaving as it's supposed to then that's all that matters but I'd think about grinding back the blade edge to eliminate what looks like thinned out spots on the edge in the fist pic, if they don't go much further toward the spine.