Dang..... why do I feel as though this isn't going to be easy.Quote:
Originally Posted by sharptonn
Printable View
Dang..... why do I feel as though this isn't going to be easy.Quote:
Originally Posted by sharptonn
Well, the guys who make them of wood coat them with CA. Seems to work good. After Christmas, I am going to experiment with the bar top epoxy. It worked well on another project I did.Quote:
Originally Posted by HARRYWALLY
Sounds a little odd to me that if the scale material was poured as a hot liquid into a mold with the inlays set, that said liquid would not have moved the fine inlays in some way.
I'd better go back and read the coticule link again. I read it once some time ago.
my money goes to the scales poured into a mold with part of the mold being a brand, so to speak of the inlay. Then the inlay was set and the scales polished to grade (height of inlay)..........
Hey, it's fun making stuff up.
Here's the one I used the bartop on. My old Christmas razor! What a mess! :rofl2:
Although, I totally forgot that I did do scales out of canvas micarta that I coated in gloss poly and it adhere very well. Probably a better surface to bond to than a smooth plastic.
Attachment 221825
Maybe my idea just might work with the micarta. Think this or wood, like you said Tom, might be my best shot.
That's very cool Tom, and I also have access to the same coating just made by another company, so this would also be an option. What the heck are these made from? They look great.Quote:
Originally Posted by sharptonn
Yeah. Some stiff material and you are in with most anything. I may have allowed the poly to cure a few days without bending it as well. The scales on that Christmas razor were old, thin Novelty liners with a few 'flip-flop' decorations.Quote:
Originally Posted by HARRYWALLY
Pretty much fabric with beads glued on. I was impressed at how it filled and leveled with no bubbles. It also was quite flexible, at least as I assembled, honed, and used the razor once a year for a few years on Christmas day!
Don't discount the G-10, Andrew. Toughest stuff ever. Experiment with that as well?
Has anyone ever suggested that the inlay was poured as a liquid into a negative space on the surface of the scales?
Man! That's DEEP! :hmmm:Quote:
Originally Posted by WW243
Don't think the metal would flow at all if poured onto the scale. Would be all ripply like hot magma I'm thinking..Quote:
Originally Posted by WW243
https://www.youtube.com/watch?v=8MYAFfeNO00
Here is a set that I tried to use layers of poly to build up the coats to match the onlays. Hard to see, but around the bolsters it has a warped, ripple like effect that just didn't look good to me. I ended up scrapping the scales and keeping the inlays. It took forever to remove the poly that stuck to the inlays. I am still waiting till I work up the courage to try to carve out the space for the inlays. I have somewhat gotten the hang of doing simpler designs, but the more complicated ones can be a pain. I started keeping fine sawdust of different types of woods to use to fill in gaps around inlays if there is any.
Attachment 221828
Hahaha Mike B classic line. I love it.Quote:
Originally Posted by MikeB52
1. e4.......Quote:
Originally Posted by JSmith1983
Have been working on pretty much nothing the last few months, life has gotten in the way. Have 2 weeks off starting Wednesday, so hoping to clear up some of the queue.
Chipping away at a new Christmas Day Razor since I sold my last one to a friend who just had to have it.
An old Bradford Case EkSeb with Christmas Tree Celluloid scales and a trashed blade.
Have not been able to find an acceptable EkSeb blade, so I settled on a nice Bradford Case wedge blade.
Should turn out nice. Anyone know what 'EkSeb' was about?
Attachment 221895Attachment 221896Attachment 221897
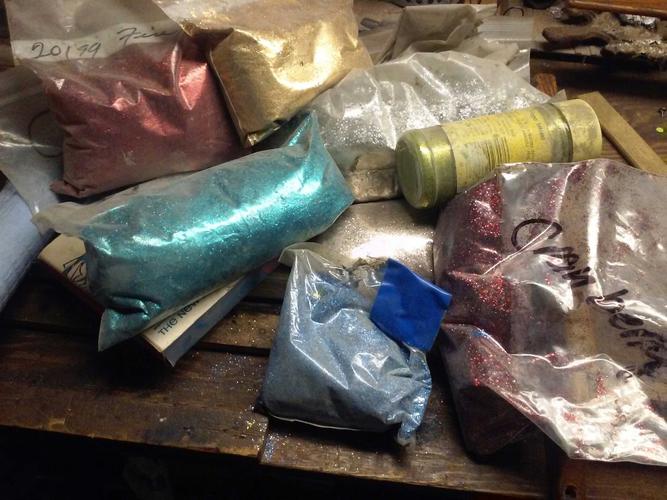
Tom... If ya ever need more glitter, I got ya covered.. [emoji6]Quote:
Originally Posted by sharptonn
I got a whole bunch of it here from fixing gel coat in bass boats.
Its funny cause I've been thinking of making a set of scales that way.
Maybe a red white and blue for the 4th of July... [emoji631]
Attachment 221902
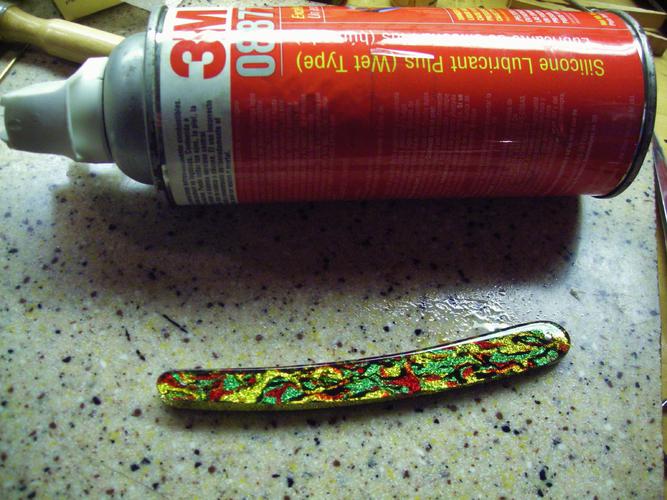
Oh yeah! That bartop epoxy and some of THAT! Interestingly, these EkSeb scales seem to be based with gold glitter, designs in colored glitter, and a pile of clear over it.
The epoxy is a bit stinky and doing it in the cold is not optimal, I think.
I have cleaned and polished the scales as much as I want to, so I have just slathered them with wet type silicone.
Soaking this stuff in is awesome for old celluloid, Gents. Makes it pop and last, I think.
I have had great success with it.
Attachment 221904
Sounds about right.Quote:
Originally Posted by sharptonn
Always work it from the brightest to the darkest color.
Same way when painting camouflage. [emoji106]
You WOULD know that, outback! So what type of clear do (or did ;)) they use on the boats?
That would be cool. :tuQuote:
Originally Posted by outback
Send me some Red and white, I'll do ours too!
I have 8 razors to restore. One is good for nothing more then a letter opener so I'm going to make it a really cool letter opener. The other 7 might come out well. I'm starting on a Wostenholm.
http://i2.photobucket.com/albums/y36...151218_012.jpg
http://i2.photobucket.com/albums/y36...151218_013.jpg
And the wood that will become scales. I haven't decided yet which piece this will get scales from.
http://i2.photobucket.com/albums/y36...151217_003.jpg
Don't mind the scribbles on the wood. I changed my mind about a project.
Been busy making various items for Christmas presents of late so not a lot to post shave related.
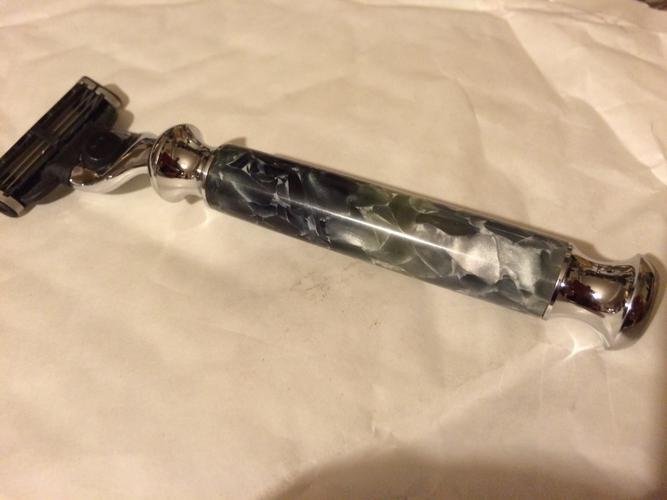
But I did make up a couple of mach3 kits. One for my lad as he's not really taken to the DE I got him last year. His I made out of some 'shark fin' acrylic.
Attachment 221915Attachment 221916
And a full set for the daughter's boyfriend. The stand and razor out of African Anigre, and the brush out of mottled Ebony just cause it has such a glorious finish. Plus I didn't have a big enough chunk of anigre handy. ;)
Attachment 221917Attachment 221918
Cheers.
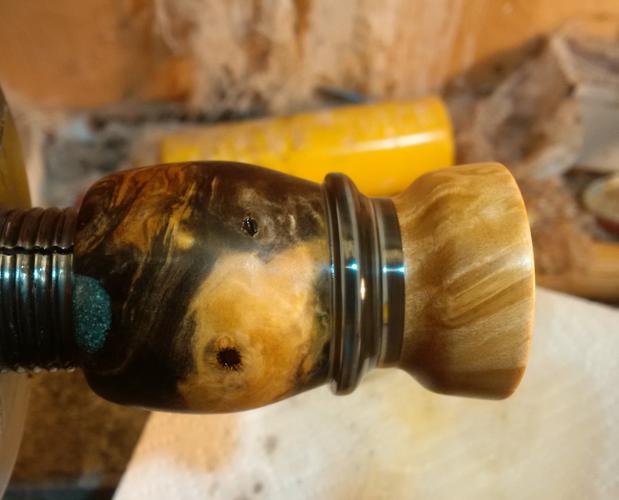
Trying a combination of wood and acrylic. I also filled a void with real Turquoise dust.
Attachment 221947
I had a whole bunch of info typed and my phone lost it all..AAAARRRGQuote:
Originally Posted by sharptonn
Just google... How to repair metal flake boats. DAMMIT THIS THING [emoji35] [emoji35] [emoji35]
Dont have white.Quote:
Originally Posted by MikeB52
Possibly at auto refinishing stores though.
How bout ya make your leaf out of red then your white could be paint. Its going to be covered in clear anyhow.
So paint the scales white, then your leaf in red glitter, then clear the livin bejesus out of it, then sand and buff.... Viola!!
Mike I got a store down here that has all the different pen and razor kits like you've been doing.Quote:
Originally Posted by MikeB52
If your ever looking for a particular piece let me know, I'll see if they have it. They've even have the acrylic and wood blanks too.
Just sucks their not big enough to cut scales from. Well maybe a shorty set. [emoji6]
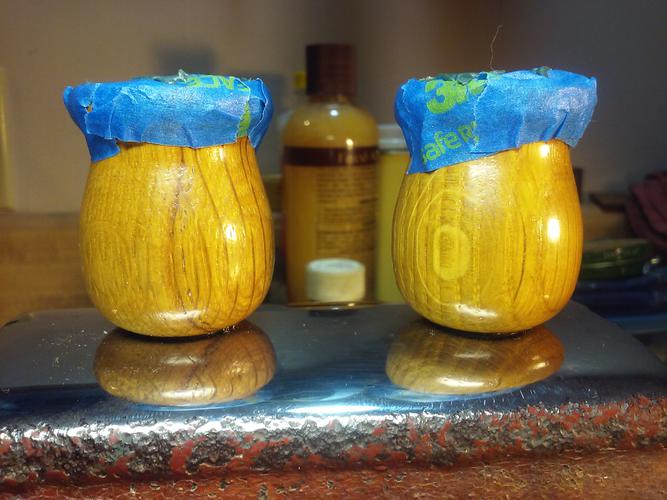
Making a wedge for the scales I made and coating a couple candle holders with spar urathane, that will be used for handles for a couple badger knots I have.
Hope ya dont mind Mike ,
But I'm using your idea of the magnets in the handles on these two. One is going to my cousin who uses a DE, and has only one synthetic brush.
The other....hmmm
Maybe I'll put some names in a hat for a random draw
Nice to use other's ideas, outback. That is why we share them. We need to acknowledge where our ideas come from, IMO.Quote:
Originally Posted by outback
Good to see a Brother give credit where it is due! :tu
Glad to give ideas life, and shared ones get stronger Mike. Makes the forum and all us mad tinkers stronger for it.Quote:
Originally Posted by outback
Your idea on the flag scales will wait till I find a Canadian made razor. They are out there. Few makers in Hamilton back in the day. Hopefully my search will bear fruit eventually.
Got me a NOS Wapi coming so I can cross Poland off the list finally as well. ;)
Hell, Yeah! Certainly some will take credit for inventing something they have seen posted.
We all know better....
Thanks, Guys! :bow
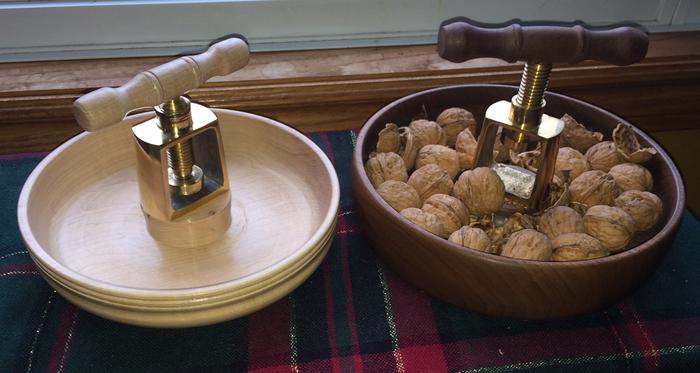
Not shave items, but these brass nut cracking press mechanisms from Lee Valley 'turned' out OK as well.
One's Walnut, the other maple. I get nearly all my kits from them, or an outfit in Guelph called Williams.
Attachment 221985
Walnut seems more appropriate!Quote:
Originally Posted by MikeB52
Agreed. Nicer looking finished product too. Walnut's one of my favourites to work with.Quote:
Originally Posted by RezDog
My Mom has a Maple Hutch and that one's destined for her so figured I'd match it up.
:beer1:
Perhaps you could have made a series of them from walnut, pecan, brazil nut and some other nut woods. Something for future projects perhaps.
That's a great idea that is. Haven't turned any Brazil nut and only a few small kitchen handles out of pecan.
Thanks for the project idea. :tu
They both look "Cracking" Mike! :) Buuuuut, I do prefer the Walnut as well. Walnut just has that rich look to it.
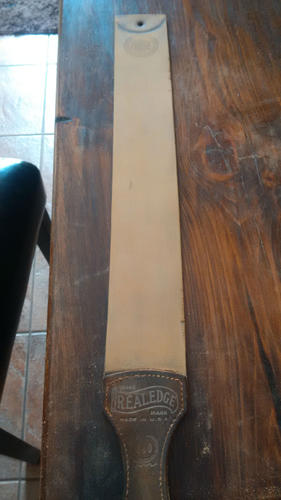
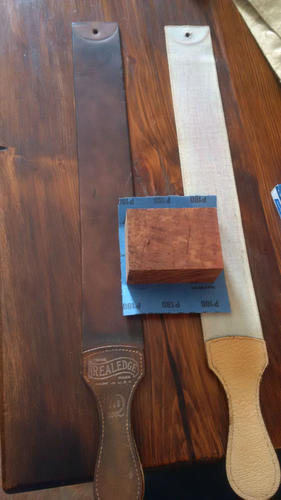
Jumping one project to the next. I sanded an old strop today that was glazed over, and very hard. I used instructions from Ken Rup to sand with 150 grit sideways, and once the shiny or "glazed" hard surface was removed, then sand along it's length. I did this until the shiny areas were gone and then moved to 220 grit. Worked perfectly and the stroping surface is back to where I want it to be. Thanks Ken for the advice!
Aaaaand of course, I was palm rubbing it and the threading holding the handle on the linen side decided to just pop off....... Schmidt. I'm sure the old threading must have been dried out, it didn't take that much effort. Now it's a waiting game for the leather side.....
Now time to bust out the leather sewing awl.
Attachment 222020Attachment 222021Attachment 222022
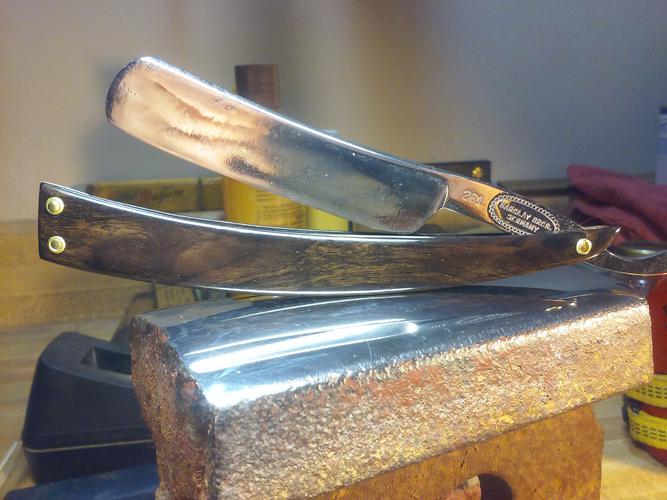
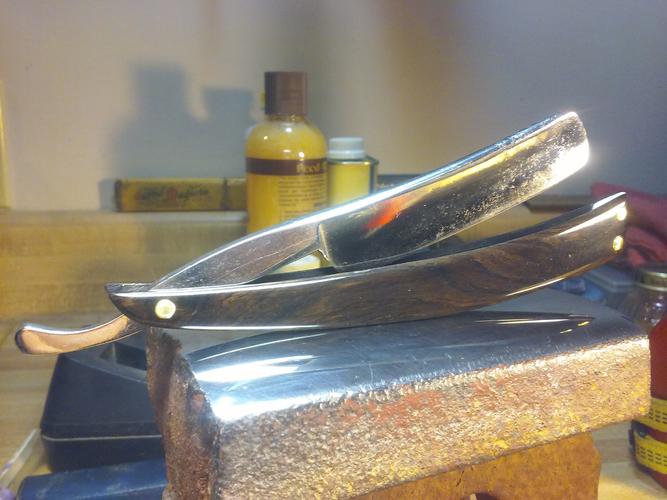
Finished wedge last night, and gotter pinned up today with the Barkley Bros. blade that was sent to me by Sharpton. Thanks Tom !!
The scales are African Blackwood
Sent by Mike T. Thanks Mike, where ever the hell you are ?
The finish is Minwax polycrylic, gloss water based finish, being any oil base finish wouldn't dry on this very dense and oily wood.
Pinned with brass collars and pins.
Attachment 222029Attachment 222030Attachment 222031Attachment 222032Attachment 222033
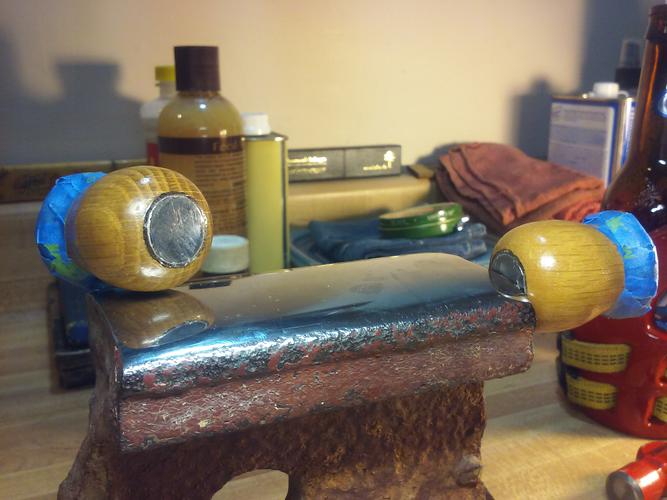
Ive also finished the candle holder brush handles in urathane, installed the magnets, and filled the inside of the handles with duro glass (autobody filler) since the cavities were quite deep.
Only thing left, is to grind out a bit of the filler to the desired depth for the knots, and get them epoxied in.
Wich will be done here shortly [emoji6]
Attachment 222034Attachment 222035Attachment 222036
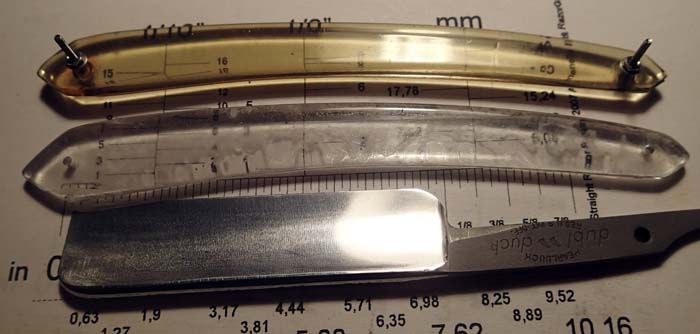
Finishing up assembly proofing and almost ready to pin.
By not thoroughly thinking through what I was working with during assembly proofing I instantly learned aluminum oxide blasted satin finish carbon steel scratches clear polished see-through Lexan. :roflmao
Attachment 222038
Can any one tell me if the original scales for this model were clear no color like the fancy bolstered models or were they clear yellowish colored? Having trouble finding accurate information on these older models. My goal is to try and get it OEM NOS looking as I can but the more I look at it I'd like to change the wedge to something more eye catching. Maybe something complimentary to the copper spacer color. That could add weight for better balance.
Attachment 222039
I found a DD SW with fancy bolsters the other day and is on the way. Waiting to compare blades