Here's an easy plan which I used.Quote:
Originally Posted by engine46
Ana White | Build a Sturdy Work Bench | Free and Easy DIY Project and Furniture Plans
Printable View
Here's an easy plan which I used.Quote:
Originally Posted by engine46
Ana White | Build a Sturdy Work Bench | Free and Easy DIY Project and Furniture Plans
That's nice Tony.....................but she's taken!
Just kidding, all bs aside, that is about what I need, maybe a couple. That way, if I ever have to move, they will be easy to get around corners & such. One of them would be my honing table, that is if not honing with stone in hand. It will also serve as the rock table.
Cleaning up an old Ellicottville Blackie CMon to gift to a friend. Have blued the tang and spine.
While I am at it, giving MikeT's Herder shortie some love. Will pin it up with some of Babur's domes, big's and littles.
Then both get honed, tested, and sent home.
Attachment 241624
Finished off my workbench this evening.
Attachment 241629
Ya know Tom.. Mike will be too scared to shave with it. He shakes like a dog crapping razor blades, when he gets close to your edge's. Then does the weirdest thing. He curls up in the fetal position on the shower floor, a bottle whiskey in his hand, and begins wetting himself...!!! So ya better cork the edge for him. [emoji23] [emoji23]Quote:
Originally Posted by sharptonn
HAR! Let's hope it won't get that bad, outback! :rofl2:
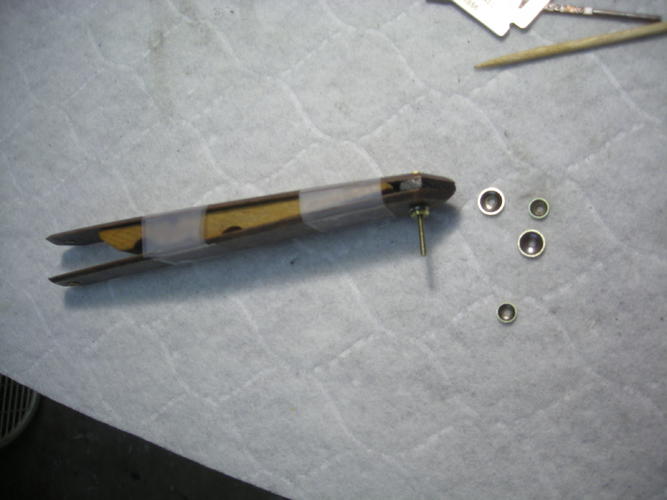
So my boy MikeT had the blade barely poking out the bottom, so I thinned his wedge a bit.
I oversized the pin-holes with a round file so that my undercollars barely pushed through and I sanded the top ones down to the scales. This will put the peening load on the brass spacers/tang and I can get it tight without busting any fancy wood.
Attachment 241636
On the bottom, I am leaving one alone and sizing the other a bit till they just meet in the middle of the wedge.
If I break a scale here, MikeT might hit the shower........:eek:
Attachment 241637
Just out it back together with Popsicle stixs then
Nah. Gotta do him proud.
So the outer domes come with some 'sharp' edges on the bottom due to the stamping. I like to rub them on some sandpaper a bit to flatten them out, like the ones on right
Attachment 241643
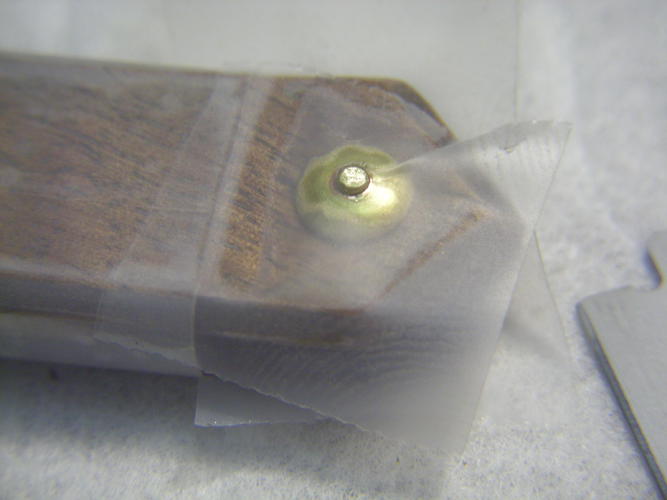
All mocked-up to pin the bottom.
Attachment 241644
A few bits of tape keep the domes on and comes off after peening a while.
Very little pin protrusion is necessary with these.
Attachment 241645
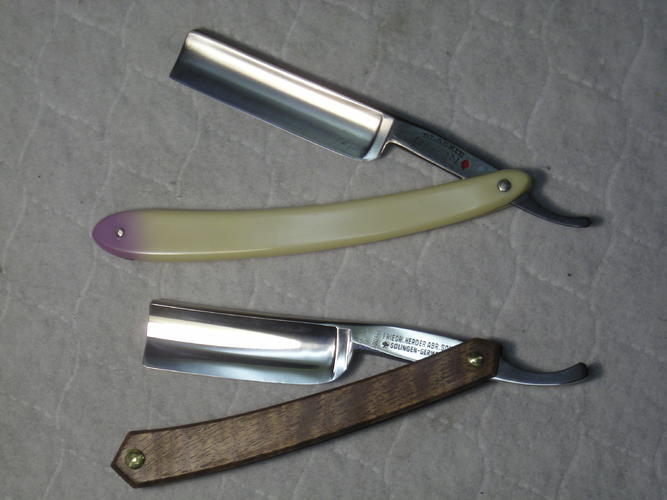
Did not turn out half bad. I will try to hone these 2 and my swastika razor tonight, if I can. I DO need a shave! ;)
Attachment 241646
Nice work tom!
Neat trick to keep the domes on as well.:tu
Finished a Ever-Ready, Barber's handle. A first in brush restorations.
http://uploads.tapatalk-cdn.com/2016...8f6bdfa8a4.jpghttp://uploads.tapatalk-cdn.com/2016...2b5f3b3ba6.jpg[IMG]http://uploads.tapatalk-cdn.com/20160721/732c17e74b7dd4aef23071267b9cc79b.jpg[/IMG
After disassembly I repaired a few small cracks in the cup, with epoxy and bog oak sanding dust. (Its black!). Then sanded and stained the handle, and applied three coats spar urethane, in semi gloss. Once dry, taped everything off, including the knot, marking the depth of the knot, as well as protecting the surfaces from errant epoxy.
http://uploads.tapatalk-cdn.com/2016...8307f492bd.jpghttp://uploads.tapatalk-cdn.com/2016...57cbf2003c.jpg
Epoxied all together, let set up.
Remove tape....!!!
http://uploads.tapatalk-cdn.com/2016...2fb1257e1a.jpghttp://uploads.tapatalk-cdn.com/2016...baf2dfa3de.jpghttp://uploads.tapatalk-cdn.com/2016...bfa5d2e0a6.jpg