-
4 Attachment(s)
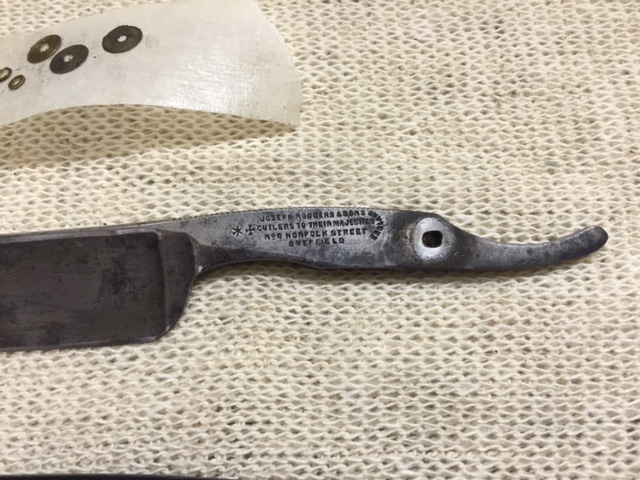
Re-pinned the JR earlier and it wasn't as hard as I thought it would be. I didn't rush things and managed to get the blade nice and tight and it centres perfectly in the scales. Now to get it honed.
So this is a before shot of the patina / tarnishing:
Attachment 241104
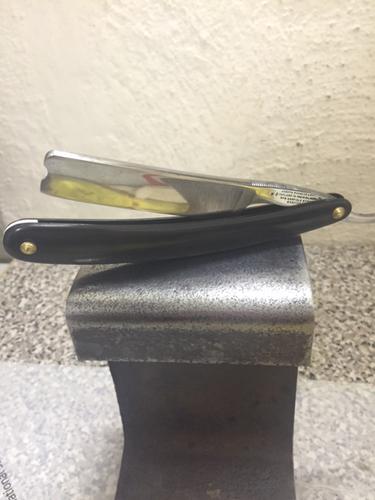
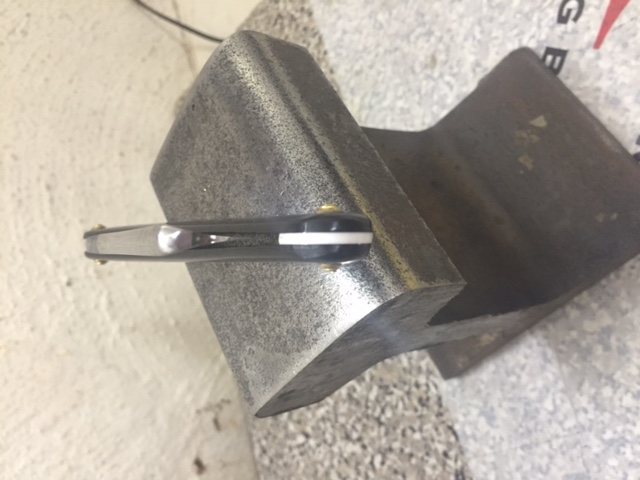
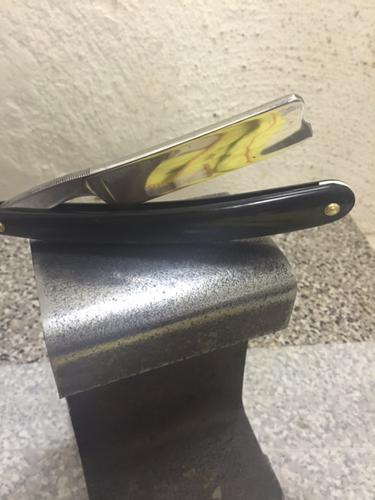
And this is the final pre-honing result:
Attachment 241107
Attachment 241108
Attachment 241109
Far from a 100% refurbishment as there are still a couple of darker patina/rust spots as well as some light sanding scratches but I'm happy with the result being a +- 100 year old razor.
-
Boy! That turned out nice, Tony! :nj
-
Darn tootin that's sharp lookin Tony.
Nice job.:tu
-
http://youtu.be/JxV1pqXUNsY
Mike T, be safe, Bon voyage, and remember, in about 6 weeks or so, Brokeback Mountain was not a love story, hehehe.
:tu
-
Thank you gentlemen!
Yep its gonna be nice to get out and work on the ocean again.
Mike B52 I haven't heard that song since I was a young sailor with a full head of hair and could sleep through the night without back pain and a trip to the head!
-
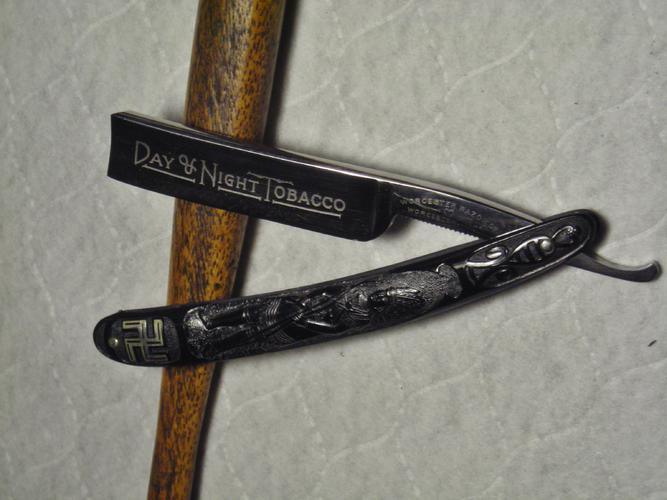
4 Attachment(s)
Finished-up my razor! Pretty fast for me, I suppose. I sorta feel badass.....Like outback! ;)
The blade cleaned-up nicely using gentle methods, some light, fine sanding on the tang and spine, a bit of light buffer.
Did the silver rubNbuff on the Indian and surrounding area and rubbed and polished it off 'til I liked it.
It got down in the details and seems to make them easier to see. I know someone had added the bottom pin as I am certain the bottom was glued as-made, so I stacked a few old silver collars on both sides on the pivot and pinned it up so it has a collarless look as the originals were. Added some thin brass spacers and, as-peening, it got nice and tight.
I never shaved with a Worcester before, but it seems a likely blade. Off to the hones!
Attachment 241131Attachment 241132Attachment 241133
BTW, kept the blade etch nicely!
Attachment 241144
It will be cool to have this in my collection so I can explain to others about the 'good' swastika.
Lots do not know about it.
-
1 Attachment(s)
I just put this one together yesterday.Attachment 241136
-
Get us a shave test soon,,, nice looking razor.
-
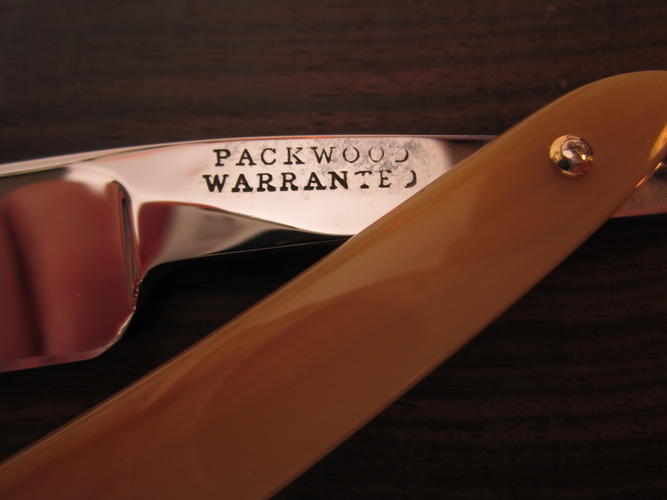
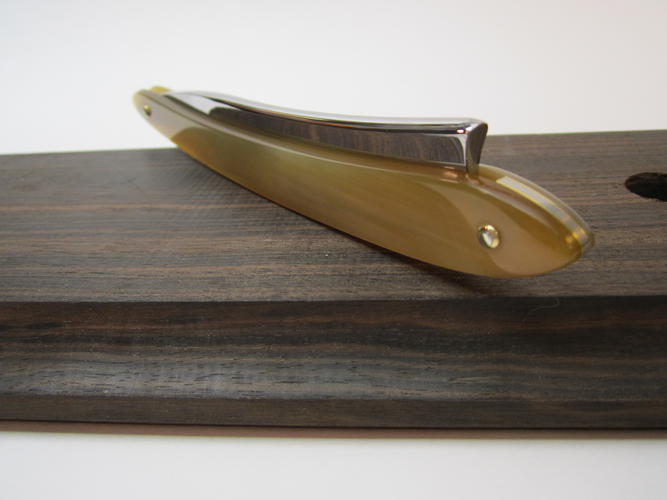
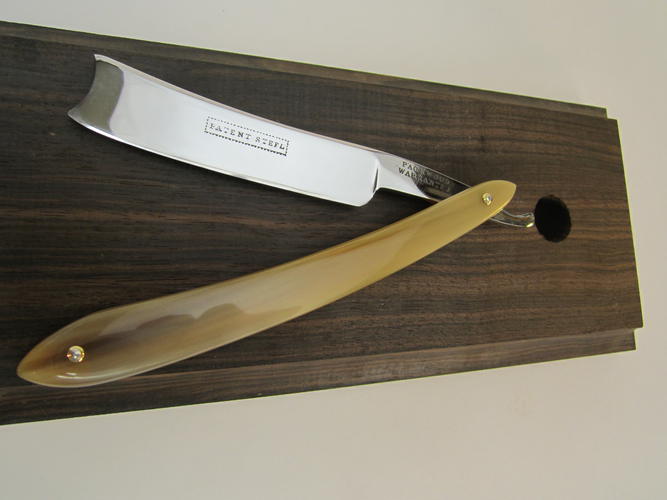
5 Attachment(s)
I've been working on restoring a Packwood. It seemed there were setbacks every step of the way but I stuck with it and figured it out. I wanted to reuse the lead wedge and floral collars and replicate the shape of the scales but with a lighter colored horn. Well, when I was almost finished with the new scales one of them started to peel away in layers and I discovered a sort of hollow part that spread and that was it - had to remake that scale. Then at test fitting I found that I didn't like how high the blade sat in the scales when closed. I could have removed material from the inside of the scales to get the blade to close deeper but I chose to add thin brass to either side of the wedge to open it up a tiny bit. OK, all set but then I found the collars were not going to work as one of them was falling apart around the inner hole and another had some damage too. So I made new collars from brass and used nickle silver pins to sort of match the wedge with brass liners. The whole process yet again reaffirmed my respect and admiration for the many folks around here who overcome restoration troubles much greater than these.
Attachment 241176Attachment 241177Attachment 241178Attachment 241179Attachment 241180
-
4 Attachment(s)
More Packwood: Attachment 241182Attachment 241183Attachment 241184Attachment 241185
Sorry so many pictures. Thanks for looking, it was a lot of work and it's nice to have people to share it with.