Results 1 to 10 of 19
Thread: First Restoration Project
-
01-16-2014, 04:31 PM #1
 First Restoration Project
It's still fairly shiny, I can't feel any of the dark spots with my fingers and only faintly when pressing hard with a finger nail. The metal at the edge is clean but chipped. I'll be hand sanding it. Pretty bone scales with a lead wedge I would have been tempted to reuse if they hadn't been damaged. Maybe bone again or blond horn. What worries me is the huge taper from the spine to the tail 1/4 - 1/16 ! I think this is what lead to the broken rear scale as when the razor is fully rotated the thicker tang section moves behind the pivot pin to where there is only 1/16 clearance and flares the bone out. I can see leaving the scale a little thicker behind the pivot and flaring it wider on the inner faces. Anyone else have to deal with this?
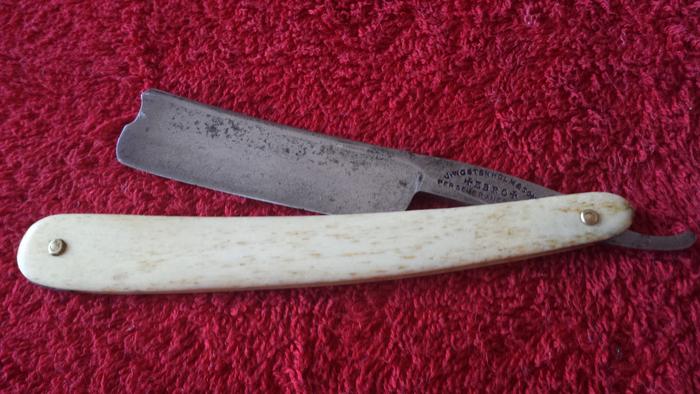
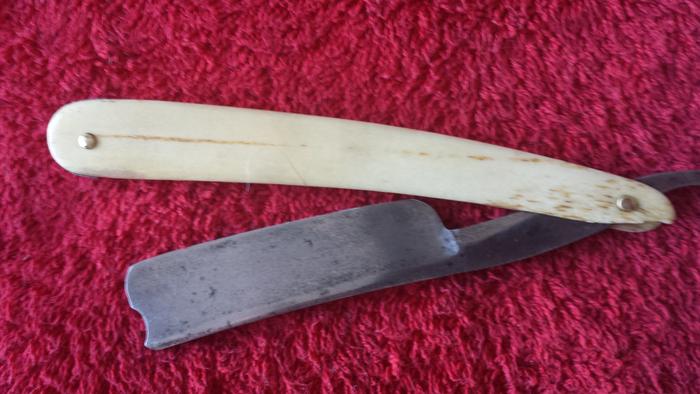
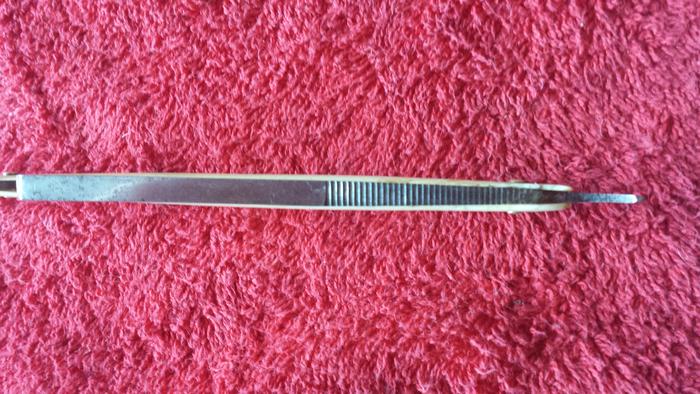
I haven't started any work on it and will make use of all the great info on SRP.
Any advice or suggestions welcome!Last edited by Hart; 01-16-2014 at 10:02 PM.
-
01-16-2014, 05:56 PM #2

You have a really nice razor there! It is in great condition!
The broken off piece is often caused by over tightening the pivot with the blade closed. When you rescale, use a couple very thin thrust washers on the inside, that will help in the future. Only finalize the pin peining with the blade open. Get it centering and smooth before the final tensioning.
Have fun!
~RichardBe yourself; everyone else is already taken.
- Oscar Wilde
-
The Following User Says Thank You to Geezer For This Useful Post:
Hart (01-16-2014)
-
01-17-2014, 03:58 AM #3

Looks like it should turn out nicely. One thing I would recommend though is not sanding with a really low grit paper to start off. Try something like metal polish to see what you are working with cause it doesn't look that bad just patina for the most part. If you decide to sand go with the highest grit that you can to remove what you need to remove. The lower the grit the harder it is to remove the scratches which just makes for alot more work. Don't forget to post after pictures cause I am thinking that is going to be a beauty when done.
-
The Following User Says Thank You to JSmith1983 For This Useful Post:
Hart (01-17-2014)
-
01-17-2014, 04:46 AM #4Senior Member


- Join Date
- Feb 2013
- Location
- Haida Gwaii, British Columbia, Canada
- Posts
- 14,457
Thanked: 4830
I like to start with a good cleaning with polish and steel wool. Wet sanding can be done using wd-40 or similar oil and wet dry sandpaper. It is less scratchy that way. JSmith1983 has already said the rest of my thoughts.
It's not what you know, it's who you take fishing!
-
The Following User Says Thank You to RezDog For This Useful Post:
Hart (01-17-2014)
-
01-17-2014, 11:14 AM #5

Thanks guys. Unfortunately, as smooth as it initially felt, there are a couple of deeper pits under the dark spots. Started with 320 then 100 and now 60. It's still taking a lot of effort (time) to make any progress.
-
01-17-2014, 01:01 PM #6Historically Inquisitive


- Join Date
- Aug 2011
- Location
- Upstate New York
- Posts
- 5,782
- Blog Entries
- 1
Thanked: 4249
+1 for Richard statement.
I cant tell from the pictures but does the scales have a wedge or spacer?
Using a wedge instead of a spacer will relieve some pressure at the tang, and also will make the razor open and close easier then a spacer.
Its definately more work to make a proper spacer, but there a reason for them and its not only that they look better. Keep us posted on your progress.
-
The Following User Says Thank You to Martin103 For This Useful Post:
Hart (01-17-2014)
-
01-17-2014, 03:26 PM #7Senior Member


- Join Date
- Feb 2013
- Location
- Haida Gwaii, British Columbia, Canada
- Posts
- 14,457
Thanked: 4830
As you progress up in grit each taking the scratch marks of the other out and leaving a finer finish, it takes a little while. It is going to take forever to get those 60 grit scratched out. Wet dry cuts the hard steel the best out of anything I've tried. I cut it into strips and wrap it around a wine cork to give my finger something to grab. It also make the surface sand flat.
It's not what you know, it's who you take fishing!
-
The Following User Says Thank You to RezDog For This Useful Post:
Hart (01-17-2014)
-
01-17-2014, 04:46 PM #8

It had a thin lead wedge. I didn't know that some razors use what I assume is a flat spacer instead of the tapered wedge? Just a thought, wouldn't widening of any sort at the opposite end make the scales closer together behind the pivot? The problem is that where the blade is drilled is on a very narrow part of the tang and when the razor is opened to 180 degrees there is a lot of pressure put on the scales by the thicker part of the tang moving behind the pivot. The scales had to spread wider by flexing against the pivot pin.
-
01-17-2014, 04:49 PM #9
-
01-25-2014, 12:35 AM #10

It's nice and shiny:
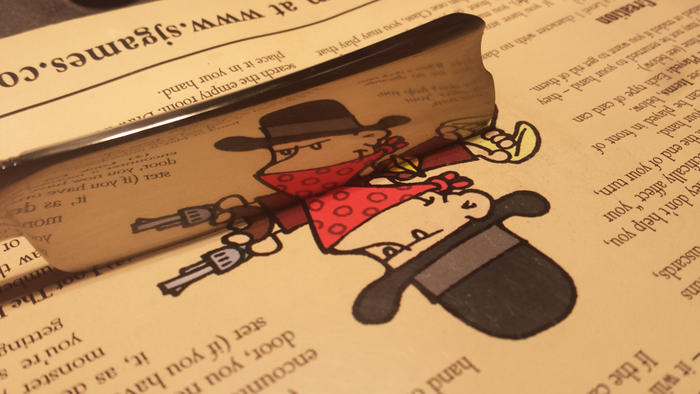
but still has fine scratches:
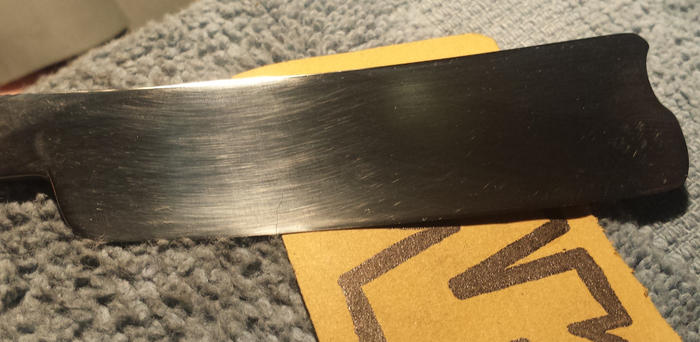
Is there anything I can do by hand to get rid of those fine scratches. I've gone to 2K grit to get this far.
I'm surprised by how uneven the forged surfaces where; one side of the tang was a little convex and the other a little concave at the stamping and concave on both sides in the tail. Not a nice even curve that could be easily sanded but a sort of pan like depression that made sanding very difficult. This made sanding with the paper on a flat surface useless. I've lost definition in the angles but over all I'm fairly happy with it as a first try. Still waiting on some horn scales I ordered.


 11Likes
 LinkBack URL
 About LinkBacks


 Reply With Quote

