
Results 1 to 6 of 6
 2Likes
Thread: Give me back my frosting!!!
 LinkBack URL
 About LinkBacks
-
07-27-2014, 01:52 AM #1Senior Member


- Join Date
- Jun 2014
- Location
- Eads, TN
- Posts
- 1,042
Thanked: 161 Give me back my frosting!!!
I think I screwed up. The A. leon diamond edge came in today and as is my usual habit, I started cleaning it up but I was using new buffer wheels. Well, I buffed it and got it nice and clean but the frost background has disappeared, not all together but enough that now you can barely see the etching. Is there anything I can do to bring it back up? I know this thread is useless without pictures but I am still having troubles on my end getting pictures up on the web.
SRP. Where the Wits aren't always as sharp as the Razors
http://straightrazorplace.com/shaving-straight-razor/111719-i-hate-you-all.html
-
07-27-2014, 02:34 AM #2Senior Member


- Join Date
- Nov 2012
- Location
- Across the street from Mickey Mouse in Calif.
- Posts
- 5,320
Thanked: 1185
re-etch it, is all I can think of. There is nothing good you can do to etch with a Dremmel in my experiences.
Good judgment comes from experience, and experience....well that comes from poor judgment.
-
07-27-2014, 02:36 AM #3Senior Member
- Join Date
- Jun 2014
- Location
- Eads, TN
- Posts
- 1,042
Thanked: 161
That's what I was thinking. I guess I will have to take it to a buddy of mine that is a jeweler to see if he can re etch it. The is a lot of intricate work in this thing.
SRP. Where the Wits aren't always as sharp as the Razors
http://straightrazorplace.com/shaving-straight-razor/111719-i-hate-you-all.html
-
07-27-2014, 07:11 PM #4Senior Member

- Join Date
- Sep 2011
- Location
- stockholm,sweden
- Posts
- 567
Thanked: 100
You could ask mycarver if he can do it for you, he did a great job on a frost etching before.
http://straightrazorpalace.com/custo...rost-line.html
-
07-30-2014, 12:49 PM #5Senior Member
- Join Date
- Apr 2008
- Location
- Essex, UK
- Posts
- 3,816
Thanked: 3164
A simple line, like your link shows, is one thing and quite simple to do. If lettering is involved that is quite another thing, and much higher up the list of hard things to do. Matching up with an existing, lettered etch is even more difficult.
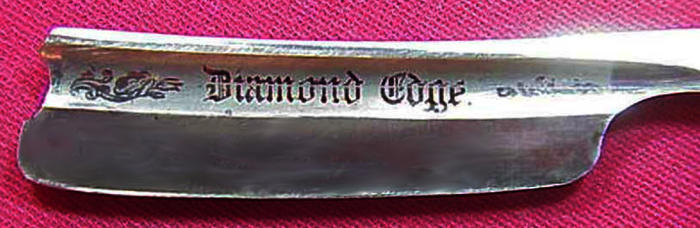
The A. Leon above is even harder - not only does the frosted area have bright letters in it, it is in a bit of a tight curve (NB some of the particularly ill-informed will tell you that the curve was a later re-hollowing job/re-hollowing gone wrong/later addition) - not so - I have plenty of razors by different makers like this - it was a recognised grind at the time)
Simple etching is just that - simple. The steel has to be scrupulously clean. After cleaning, it must not be touched with the fingers - finger or body oil acts like a resist that the etching medium will not penetrate. After the first stage cleaning water will bead off the surface. After the final cleaning a thin film of water is retained all over the surface. If you cannot get to this stage, there is not much point going any further.
The part of the steel that is not to be etched is protected by masking it off with a resist - wax, varnish, finger nail varnish, bitumen, etc. Most razor factories use a bitumen preparation that is black. I use a soft grade of bitumen resist that is a fairly thin liquid and easy to apply.
Then you decide which etchant to use, acids (eg hydrochloric, sulphuric, nitric or a mix), ferric chloride, etc. The metal salt solutions are far safer than the acids. Don't ask how I know! Ferric chloride used to be used for copper, but it will etch steel, especially if 'bumped up' with citric acid.
Or you could just use your resist and electro etching, either with ferric chloride as the solvent or just salt water. This works particularly well, and fast - especially if you have a small aquarium pump circulating the solution. You have to keep on top of this process though (indeed you do with mosst etching solutions) by brushing away bubbles and waste, traditionally with a feather so as not to ruin the resist, which tends to be quite soft..
What makes matching-up so difficult is the quality of the 'bite' - the frosting, if you like. You want something soft and even, not pitted and aggressive, so it would pay to have a scrap razor with the same bright finish as the one you want etched - just to practice on. Otherwise buff the etch right off (much more difficult than it seems) and start again. In which case you want to photograph the lettering in detail before you start work - enough detail and a flat, diffuse light so that the lettering can be converted into printable copy by means of which you can either make a negative or an iron-on resist, the latter of which is only suitable for flat and gently curved surfaces.
The beauty of a home-produced negative is that you can print it very easily on transparent film using a decent printer. You then use a tape resist to leave the area (a slightly larger area) that you want to etch over clear, then spray or coat it with a uv hardening water based resist. This can be done under subdued or photographic dark-room lighting - a yellowish filter over the light is best, or black out a window and leave a small area to tape yellow film over. Use soft-ground resist over the rest of the blade after removing the tape, stick down the edges of the home-mad neg, and expose to UV light - a controlled source like a facial lamp or uv tube is good (not a black-light uv tube they used to use when nightclubs were called discos - wrong wavelength), but in a pinch sunlight can be used - facing away from the sun on a bight but overcast (eg continuous cloud cover) is best. Direct bright sunlight dries everything up and is a bit uncontrollable, a cloud may cover the sun for a while.
In any event, you need to make a few test runs, so a sheet of steel of similar composition to the razor or a few donor razors may be required.
By donor razors I mean ones that have indicated that their blades can be experimented upon in the interests of science once they have shuffled off this mortal coil and gone to join the choir invisible. An ex-blade. One that is deceased and gone to meet its maker.
Everyone knows that.
Regards,
NeilLast edited by Neil Miller; 07-30-2014 at 01:33 PM. Reason: added photo
-
The Following 4 Users Say Thank You to Neil Miller For This Useful Post:
criswilson10 (07-30-2014), Geezer (07-30-2014), guitstik (07-31-2014), Robbied (08-01-2014)
-
07-31-2014, 01:25 AM #6Senior Member
- Join Date
- Jun 2014
- Location
- Eads, TN
- Posts
- 1,042
Thanked: 161
Thanks Neil, as usual, a very in depth instructional on etching or re etching in this case. I have Ferric Chloride and Ascorbic acid that I use for photography and developing so I had that covered, all I need now is my close in eye sight back. I need to find me a good well lit boom magnifier for doing all of the fine detail on the razor and some bitumen both I believe can be found at either a hardware store or a hobby shop. This is going to take some time as I will want to do quite a bit of practicing before the main event.
SRP. Where the Wits aren't always as sharp as the Razors
http://straightrazorplace.com/shaving-straight-razor/111719-i-hate-you-all.html


 Reply With Quote