
Results 11 to 19 of 19
 20Likes
Thread: Satin finish and patina
 LinkBack URL
 About LinkBacks
-
10-19-2014, 07:25 PM #11Shave This


- Join Date
- Jan 2014
- Location
- Pickering, Ontario
- Posts
- 1,036
Thanked: 183
It looks like you have a nice even scratch pattern and you're protecting and preserving the edges and corners well. I think of patina as the very thin coating of light grey oxidation, any black spots are rust pits. The patina would disappear almost instantly with any sandpaper and even with polishing paste without much effort. What to remove is a matter of taste but I think if something is found with a nice patina and little or no pitting, it's a rare thing and should be left as is.
 Than ≠ Then
Shave like a BOSS
-
10-19-2014, 07:27 PM #12Senior Member

- Join Date
- Jun 2014
- Location
- sweden
- Posts
- 194
Thanked: 16
thanks RezDog, you allways explain so good and have so patient, thanks agian Originally Posted by RezDog

 RezDog likes this.
-
10-19-2014, 10:54 PM #13Senior Member

- Join Date
- May 2014
- Location
- Canberra, Australia
- Posts
- 257
Thanked: 43
i would have like to have done that, but none of it would move. there is sill some pitting but not as much. you are right though, sticking it out at one can take just as long as cleaning up the scratches from a lower grit.
-
10-21-2014, 02:39 PM #14Senior Member
- Join Date
- Jul 2014
- Location
- Boise ID
- Posts
- 102
Thanked: 8
Great thread! I recently was looking into how to do all of this and came across a great video about making a satin finish by etching with vinegar, made by Charlie Lewis. I tried it and it seems that you do need to sand first, or what ever method you want to use to get the metal in good condition before hand.
Hopefully this helps,
Sean
-
The Following User Says Thank You to seanreum1 For This Useful Post:
dooey (10-26-2014)
-
10-21-2014, 04:39 PM #15Senior Member


- Join Date
- Apr 2012
- Location
- Diamond Bar, CA
- Posts
- 6,553
Thanked: 3215
Get some Crocus cloth, also sold as Plummers Cloth, a couple buck per sheet at my local Ace Hardware, sold in fine, med and course. It is sold in sheets and rolls for plumbers for polishing copper pipe for soldering. I bought 9x11 sheets because they did not have the rolls in fine grit.
Crocus is cloth backed Ferrous Oxide, fine is about 1K grit and is different from sand paper and emery cloth, it also last a long time. Dont toss it out just because it gets dirty, I use it dry. It also leaves a more uniform satin finish than paper or emery.
To get a good satin, you have to get a nice polish then back the finish down to satin, if you dont it will look unfinished.
After scrubbing with 000 steel wool and WD40, I start sanding at 600 grit, to see what is needed, 600 scratches are easy to polish out but will remove most rust and patina. You can then spot sand with progressively lower grits and work back up.
Beginning at sub 400 makes a lot of work and removes a lot of metal. Sand from edge to spine, over lapping sanding patches, with a curved shaped eraser backer or wine cork, up to 1000. Cut your paper into strips the width of the eraser or cork, with a garage sale paper cutter.
Once you have a nice even finish, leaving pitting if you wish, the grits go fairly quickly. Then sand with fine Crocus cloth, spine to edge. It will leave a very fine satin finish. A paint stir stick cut to about 3-4 inches and the tip sanded to a 45 degree angle makes a nice backer that will give you a lot of control.
-
-
10-26-2014, 12:11 PM #16Senior Member
- Join Date
- May 2014
- Location
- Canberra, Australia
- Posts
- 257
Thanked: 43
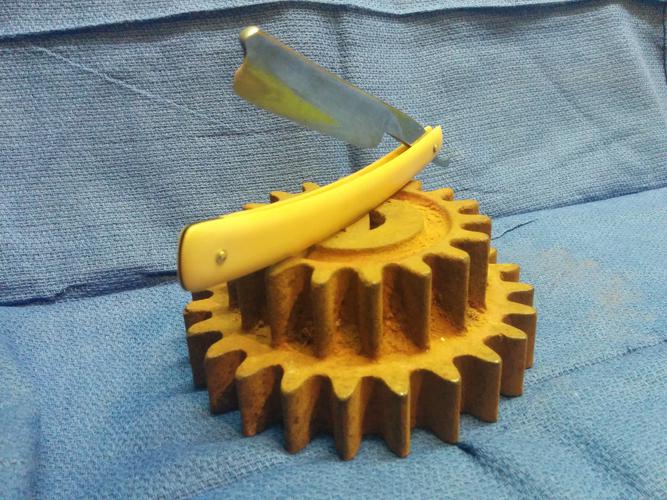
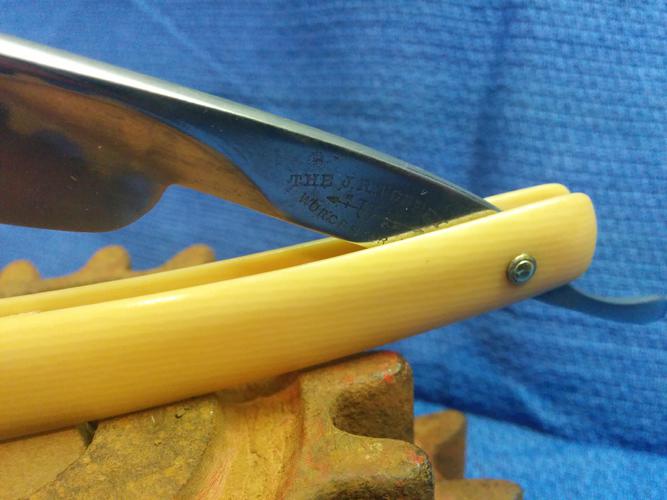
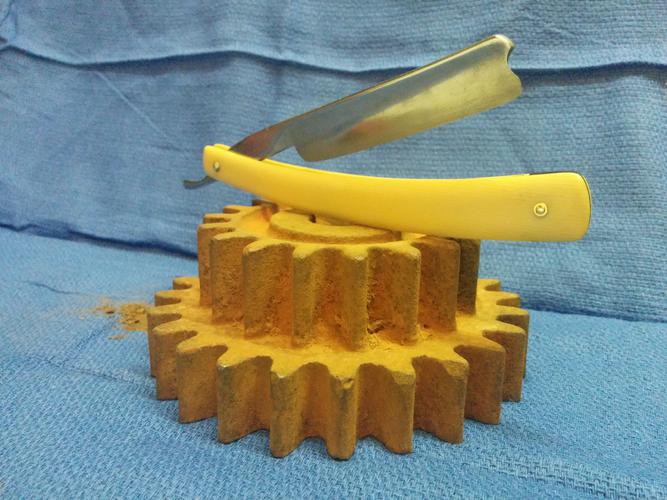
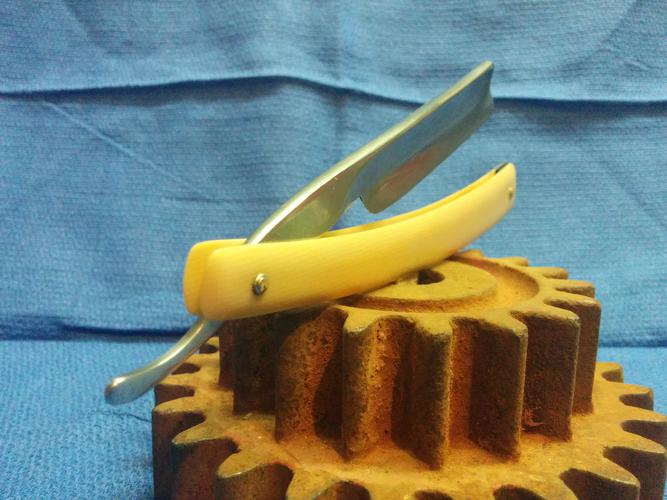
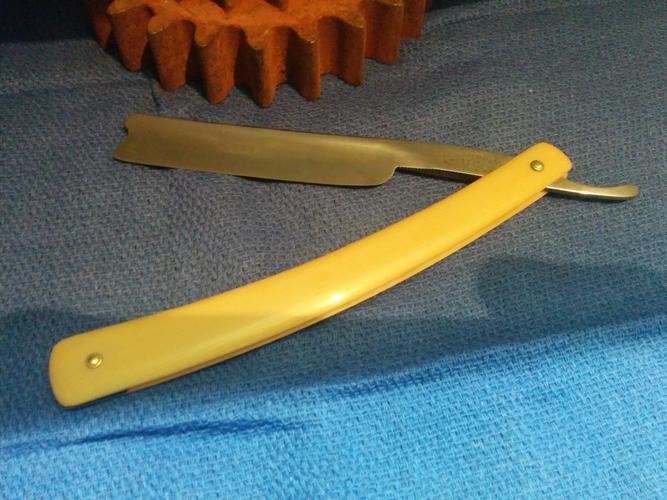
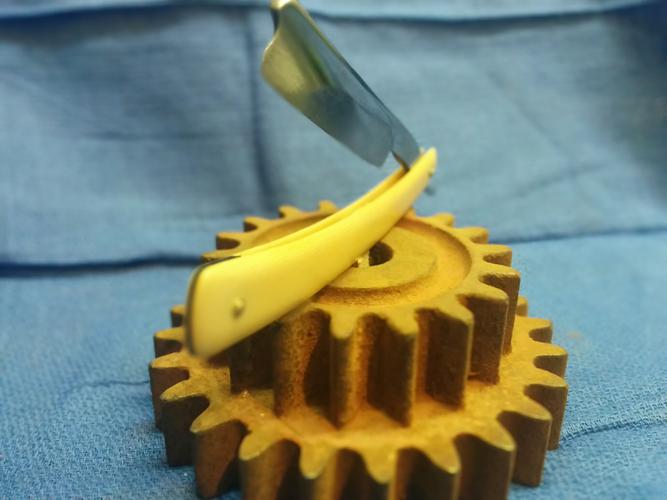
this is what i finished up with.
i used the boiling vinegar idea, seemed to work. just a few things for next time
- keep it in there for longer than on the video, about ten to fifteen minutes
- have some spare i ran out and i couldn't finish i through out what i had because i thought it was done
- protect any etching that you already have, they seem to fade quickly in the vinegar
ill have another go on a different razor and post the results again.
-
10-26-2014, 05:47 PM #17Senior Member

- Join Date
- Feb 2013
- Location
- Haida Gwaii, British Columbia, Canada
- Posts
- 14,444
Thanked: 4828
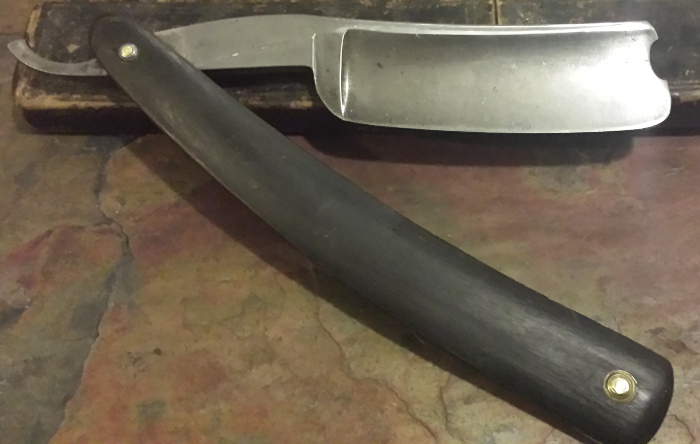
There have been a few threads on creating or forcing patina. Here is one that I did a while ago that was with bluing and bleach.

I have not gotten the scales to look as old as I would like and the blade is a tad dark. At some point I will get back to this project. The blade would never have been able to take a polished finish of any kind so I though it made it the perfect candidate for this.It's not what you know, it's who you take fishing!
-
10-27-2014, 01:25 AM #18Senior Member
- Join Date
- May 2014
- Location
- Canberra, Australia
- Posts
- 257
Thanked: 43
i think that the 5th picture down shows the satin effect that i wanted, i am not the best photographer with my phone.
-
10-27-2014, 02:06 AM #19Senior Member
- Join Date
- Feb 2013
- Location
- Haida Gwaii, British Columbia, Canada
- Posts
- 14,444
Thanked: 4828
If you look at the before and after shots I think you can see that it is clearly going to last much longer and as far as I'm concerned looks great. It is hard to get it just the way we want it in part because as the project progresses we want a little more out of it. You did well. All that's left now is the shave report.
dooey likes this.It's not what you know, it's who you take fishing!


 Reply With Quote