
Results 1 to 10 of 19
 20Likes
Thread: Satin finish and patina
 LinkBack URL
 About LinkBacks
-
10-12-2014, 01:04 PM #1Senior Member


- Join Date
- May 2014
- Location
- Canberra, Australia
- Posts
- 257
Thanked: 43 Satin finish and patina
i have this torrey
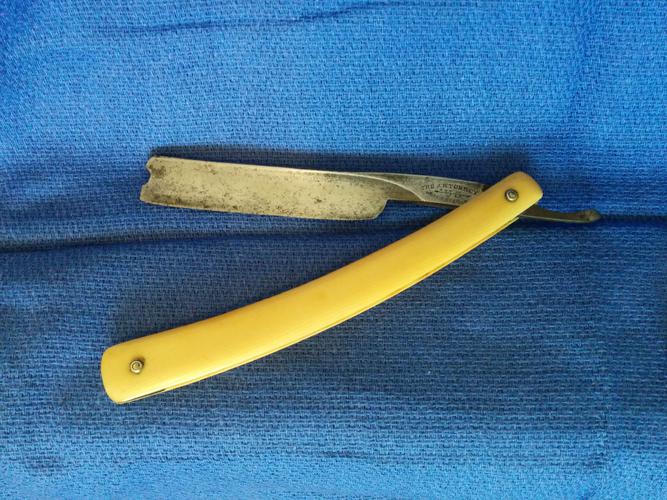
and i want to try to put a satin finish on it but i am struggling to get rid of a lot of the patina to get it to mirror finish.
what will it look like if i dont get it to mirror first and leave some of the patina?
-
10-12-2014, 02:04 PM #2Senior Member


- Join Date
- Feb 2013
- Location
- Haida Gwaii, British Columbia, Canada
- Posts
- 14,443
Thanked: 4828
How have you been trying to clean it up so far? You can try to do a satin over the patina and corrosion and go back to it if you don't like the results. I've never seen one where the owner had described the refinishing in that way.
It's not what you know, it's who you take fishing!
-
10-12-2014, 02:12 PM #3The Shell Whisperer


- Join Date
- May 2008
- Location
- Sin City
- Posts
- 5,597
Thanked: 3384
For starters what tools do you have at hand? Buffer with greaseless and rouges, sandpaper (hand sanding), dremel, belt grinder?
ScottGoodman likes this.
əˌfisyəˈnädō | pərˈfekSH(ə)nəst | eS'prəSSo | düvəl ləvər
-
10-12-2014, 10:08 PM #4Senior Member
- Join Date
- May 2014
- Location
- Canberra, Australia
- Posts
- 257
Thanked: 43
I am hand sanding at the moment.
-
10-12-2014, 10:20 PM #5Senior Member
- Join Date
- Feb 2013
- Location
- Haida Gwaii, British Columbia, Canada
- Posts
- 14,443
Thanked: 4828
hand sanding is good. I do it most of the time as well. I always back my paper with an old wine cork and at the end of 600 start to sand with WD-40 as the wet component. Any light oil will do, it just has to be super light. I usually start high and then drop down grits as the situation demands. I rarely go below 400 because it can be so hard to get the lower grit scratches out. It does take quite a bit of time, and not all the pitting can go, especially on the very thin ground razors. I go up to 2K with sand paper and then do 000 and then 0000 steel wool and then steel wool with mothers polish and then just the polish. If you want to leave the pitting but get the black out steel wool is my weapon of choice. Once you have it clean and polished with the pitting left you can take 1 to 2K sandpaper and in one direction only take the finish to satin using oil and very light strokes. No back and forth and it will look right. It does take a lot of messing around to make it even but it can be done.
Geezer likes this.It's not what you know, it's who you take fishing!
-
10-12-2014, 11:20 PM #6Senior Member
- Join Date
- May 2014
- Location
- Canberra, Australia
- Posts
- 257
Thanked: 43
Haha rezdog you read my mind, that is exactly my plan! I just use blue magic polish :P I guess I was just more curious what the satin would look like if I left some patina, would it be really rubbish?
Would 1k or 2k sandpaper (with oil) be enough to leave a satin finish? So far I've read to use 800.
-
10-13-2014, 12:56 AM #7Senior Member
- Join Date
- Feb 2013
- Location
- Haida Gwaii, British Columbia, Canada
- Posts
- 14,443
Thanked: 4828
I personally have used 1K and 1.5K for satin. I thought the 1K was too hard to get even and went to 1500. If you scrub the black out it should be just fine. There were a couple of models that look like that one. I have one and it is pretty awesome.
It's not what you know, it's who you take fishing!
-
10-13-2014, 01:36 AM #8Senior Member
- Join Date
- May 2014
- Location
- Canberra, Australia
- Posts
- 257
Thanked: 43
That sounds good, thanks for the help rezdog. I just have to put the time into it now, I'll post some pics here when it is done.
RezDog likes this.
-
10-19-2014, 06:03 AM #9Senior Member
- Join Date
- May 2014
- Location
- Canberra, Australia
- Posts
- 257
Thanked: 43
this is where it is at, just after 150 grit sandpaper. i went all the way down to 120 to get into some of the patina, it was deeper than i first thought
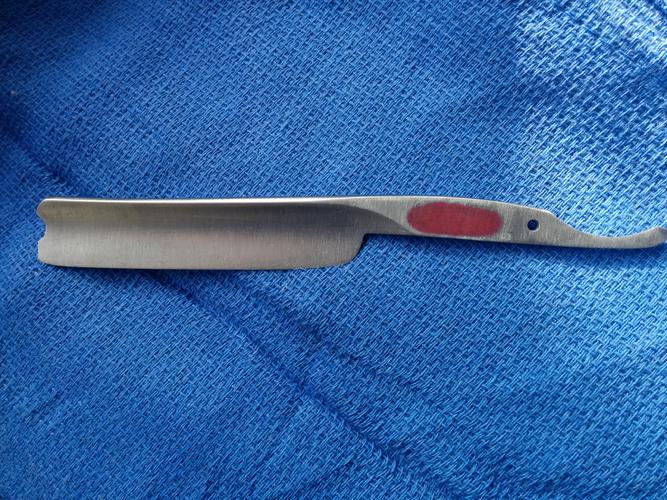
the red is just nail polish to protect the stamp
edit: i didnt just jump all the way down, i did step down all the way through from 400 gritLast edited by dooey; 10-19-2014 at 06:09 AM.
-
10-19-2014, 03:23 PM #10Senior Member
- Join Date
- Feb 2013
- Location
- Haida Gwaii, British Columbia, Canada
- Posts
- 14,443
Thanked: 4828
It takes a long time to get the scratches out from the really low grits. I am usually happier sanding longer at 400 than I am when I drop lower. It is really just two sides of the same coin. When you are taking out pitting really what you are doing is removing the rest of the steel to the depth of the pitting. I.m sure that is you put this much time into it the finish will be great. Keep us posted.
Euclid440 and JoelLewicki like this.It's not what you know, it's who you take fishing!


 Reply With Quote