
Results 1 to 10 of 16
 10Likes
Thread: First razor restore project
 LinkBack URL
 About LinkBacks
-
12-28-2014, 05:47 PM #1Senior Member


- Join Date
- Feb 2014
- Location
- Florida panhandle, near Ft. Walton Bch.
- Posts
- 247
Thanked: 23 First razor restore project
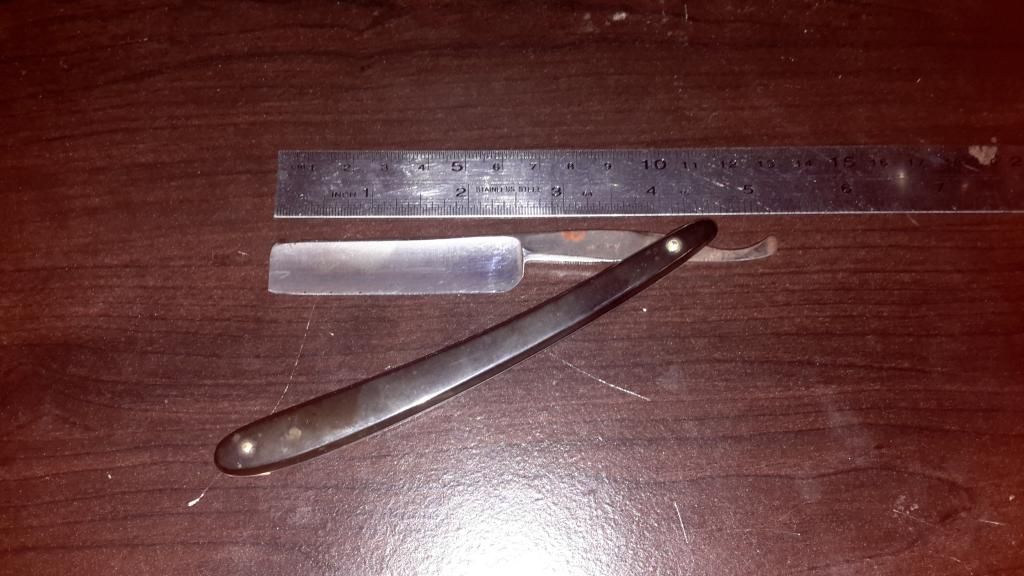
I got a couple of old razors on eBay a couple of months ago with the intentions of restoring them. This one is in the best shape regarding corrosion. I got a pretty good edge on it and had a pretty nice shave this morning with it. The blade is 2.5" instead of the usual 3".
I plan to remove the handle. I can try to drill the pin out and save the handle but if I break it I don't care. I plan to get something else for the handle material. My first thought is kirinite. I've used it for knife handles and love working with it. I've made a couple of handles already and used a screw and pivot pin instead of the usual more permanent pins. This did require I drill the hole in the tang of one blade. I'm thinking this time I'll get some usual pins. Any info on how to do this? I'm sure there is. I'll look but suggestions are appreciated. Not to mention suggestions from personal experience.
Since I'll be polishing the blade I can't use tape to cover the edge. Should I dull it first? If I don't do something I know I'll cut myself.
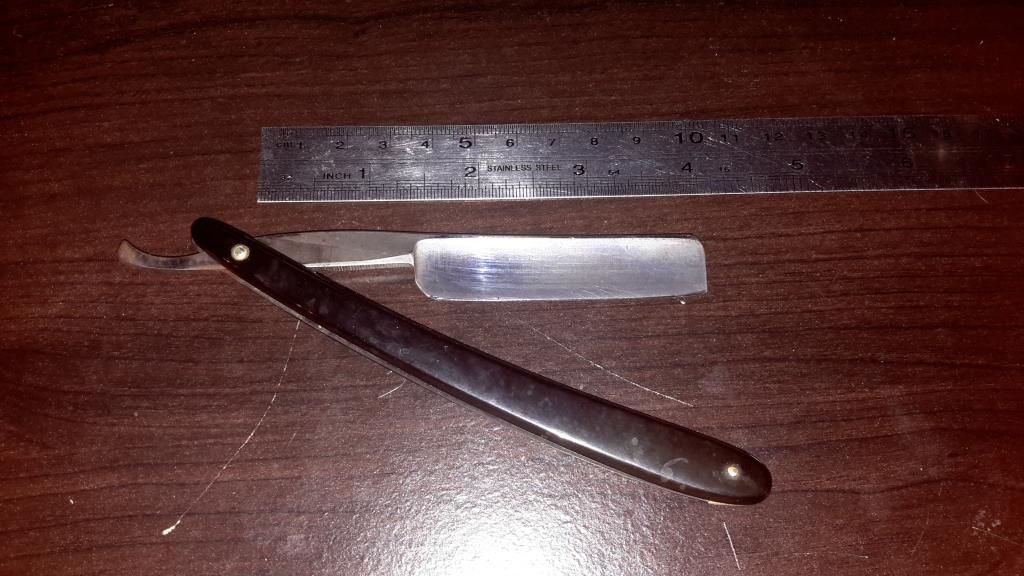
I don't know how long this will take mainly because of how often I sit down to work on it. Here are two pictures of the razor before I do anything. Any help is greatly appreciated.
 jemmo likes this.
-
12-28-2014, 05:50 PM #2Senior Member
- Join Date
- Feb 2014
- Location
- Florida panhandle, near Ft. Walton Bch.
- Posts
- 247
Thanked: 23
I plan to file a flat spot on the pin head then drill the heat out so the pin can be removed. Any other suggestions? I have a drill press so it won't be done with a hand held drill.
Jack
-
12-28-2014, 06:50 PM #3
Go to the Library on here.
Top of page and click tab.
or go here:Straight Razor Place Library - Straight Razor Place Library
There is SO MUCH info
-
12-28-2014, 09:54 PM #4Senior Member
- Join Date
- Feb 2014
- Location
- Florida panhandle, near Ft. Walton Bch.
- Posts
- 247
Thanked: 23
Great post. I read an article on sanding the razor blade and tang. It was very helpful and I'm rarin to go. Originally Posted by Chevhead

 I plan to make the wooden tools Bruno (author) made for himself.
ThanksChevhead likes this.
-
12-28-2014, 09:58 PM #5
Well you know what they say.... Originally Posted by Jack0458

-
12-28-2014, 11:42 PM #6Senior Member


- Join Date
- Jul 2013
- Location
- Kitsap County, WA USA
- Posts
- 1,549
Thanked: 351
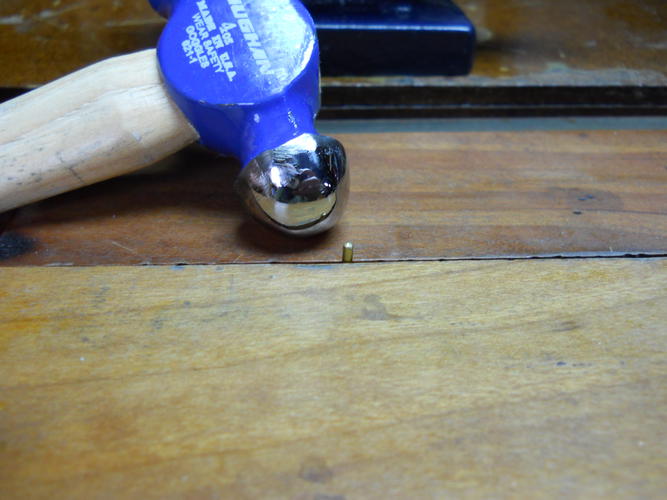
As far as the drill press I use a ball end bit to make a divot. Helps with the drill slidding.
The older I get the more I realize how little I actually know.
-
12-30-2014, 02:45 AM #7Senior Member
- Join Date
- Feb 2014
- Location
- Florida panhandle, near Ft. Walton Bch.
- Posts
- 247
Thanked: 23
Got the handle off with less trouble than I thought. I can reuse the scales if I want to. I ordered a set of scales with pivot pin and washers (inside and out) from Maggard Razors. I don't know the diameter of the pin (brass). The hole in the razor tang is 3/32". Hope I don't need to drill it bigger but I will if I have too. I will have to drill the holes in the scales. It looks like they come assembled at the rear end. As soon as they arrive I can put the razor back together instead of making my own set. I will still be doing that but right now I'm in a hurry. I'm very impatient sometimes. Also, since I got the pin drilled out so easily I don't worry about changing scales after I make a set. Just need extra pin material. Shoot. Should have ordered some when I ordered the scales. In the past I have used a pin and screw. This will be my first time peening a pivot pin. According to the article in the SRD library I will flare one end of the pin so it will hold the outside washer and insert it through the razor. Then there will be another washer on the outside. How much longer than the very outside of the washer should the pin be to create the same look on both sides. Or, do I really need washers on the outside? I have a small steel hammer. Do I need a ball peen hammer? I did read where someone (Bruno I think) polished the face of his hammer to avoid marring the pin. I may need a new one.
Here's a pic of the razor so far. It's not mirror by any means but that's ok. I'd put it together now if I had the scales. I may polish it more while waiting for the scales. There are some pits that I'm not worried about getting out right now. Leaves it with a "old razor" look. I got wet/dry sandpaper up to 2000 grit and I have some "micro mesh" pads that go from 1500 to 12000 grit. They are little squares with abrasive on both sides of a soft pad. It needs more work to look really good.
Blade at the moment. Sorry about the horrible photo. Funny though, it's prettier looking at it with my naked eye (old and half blind) than it is in the picture.
 MattCB likes this.
-
01-03-2015, 08:27 PM #8Senior Member
- Join Date
- Feb 2014
- Location
- Florida panhandle, near Ft. Walton Bch.
- Posts
- 247
Thanked: 23
I got the razor scales today and went to work. I must have hit the pin at an angle or something because it bent inside the razor. It is now together and it's as good as it can get until I get some more pin material. The razor I'm working with has a 2.5" blade so I can remove the pin and do it again when I get more pin material. I may even drill another hole farther from the end because there's lots of extra scale length. Or, I may have an extra pin/screw I can use. Not knowing how to put the pin in right reinforces my desire to use a pin/screw pivot.
Anyone have any tips on how to NOT bend the pin. Actually I bent it before trying to assemble the razor. The directions said to peen one end of the pin first. Trying to do this I bent the pin. I straightened it and bent it again 3 times. Then I cut it to the length needed and finally got one end to spread enough to hold the washer on. Then I put the pin through the scales/razor and started tapping on the other end. The pin bent inside the pivot. Maybe, if I were to have cut the 1" pin shorter first it may not have bent as easily. Also, the previous bending may have weakened it so it bent easier when peening the second end. Any thoughts of what I did wrong? Does peening pins take practice? I didn't foresee this problem at all. I can shave with the razor now but the tension is not consistent as I open the razor. The pivot tension is good when closed. When the razor is straight it is wobbly loose which makes it difficult to strop. When it is open in the shaving position it's snug but not snug enough. So I need to do this razor again. But I'd like to get tips on what anyone thinks I did wrong. Any ideas? Thanks.
Jack
-
01-04-2015, 04:11 PM #9Senior Member

- Join Date
- Feb 2014
- Location
- West Virginia
- Posts
- 605
Thanked: 284
Jack, It has been my experience that it is better to support the pin in a vise leaving about 1/16 exposed when peening the first end and remember...Lots and Lots of little taps.
 Chevhead likes this."It is easier keeping a razor honed than honing a razor."
-
01-04-2015, 04:19 PM #10'with that said'


- Join Date
- Aug 2010
- Location
- Walla Walla in WA State USA
- Posts
- 11,260
Thanked: 4238
I hope this will help. I find Glen's videos very informative. He really is a wonderful teacher.
Here's one that Charlie did, it will show you some close-ups and a couple of tricks that he uses.
Last edited by cudarunner; 01-04-2015 at 04:28 PM.
Willisf likes this.Our house is as Neil left it- an Aladdins cave of 'stuff'.
Kim X


 Reply With Quote


