Mike B52, awesome pic sequence and explanation of the electroplating process. :tu
If they would have had cool stuff like that back in science class in school I probably would have hung around longer than I did!!
Printable View
Mike B52, awesome pic sequence and explanation of the electroplating process. :tu
If they would have had cool stuff like that back in science class in school I probably would have hung around longer than I did!!
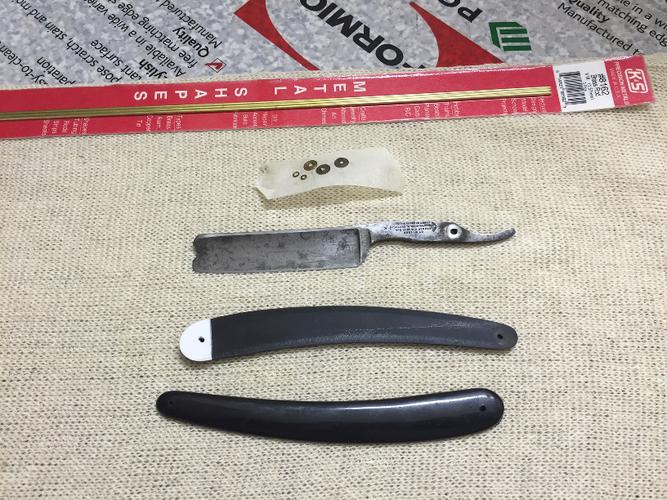
Started on my 1st restoration, a Joseph Rodgers.
Managed to find some brass 1/16" rod at a local hobby shop and also save the washes after unpinning.
The wedge has been glued onto the one scale.
Looks like the toe has been slightly over-honed in the past but the blade should clean up nicely as there is no pitting.
Attachment 222754
Nice goin Tony!
That's a good looking Rodgers. Some hi grit wet sanding, and or polishing. Beauty reborn!
While the members of the BB Cult praise your adventurous foray into plating, I would like to be the first to note that you made up a word dis-encladded! I seriously admire made up words...bravo Mike!Quote:
Originally Posted by MikeB52
Agreed, Bill! 'Dis-encladded' is wordalicious! :DQuote:
Originally Posted by WW243
High kudos from a wordologist such as yourself Bill. heheQuote:
Originally Posted by WW243
Sometimes Webster missed one I think,, :)
And besides, we can butcher the Queen's script as easily as a blade over here..
:chapeau
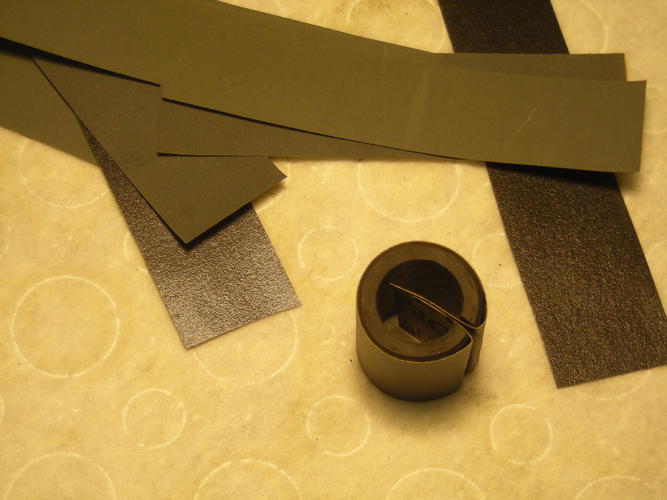
Tony, that will be a great piece once finished. The K&S brass is probably the best to use as a hobbyist. I like it all & the brass tubing fits inside the larger pieces when you have to use some of it.Quote:
Originally Posted by Thug
Right on Bill. A new made up word is always unique in its own way plus the meaning.Quote:
Originally Posted by WW243
Good job B52!Quote:
Originally Posted by MikeB52
I finally got my cocobolo pieces flat on the inner side. Now to start on my design & cut it out & this time to carefully take a little bit off at a time when putting my contour in them. I will also mark where they are joined together.
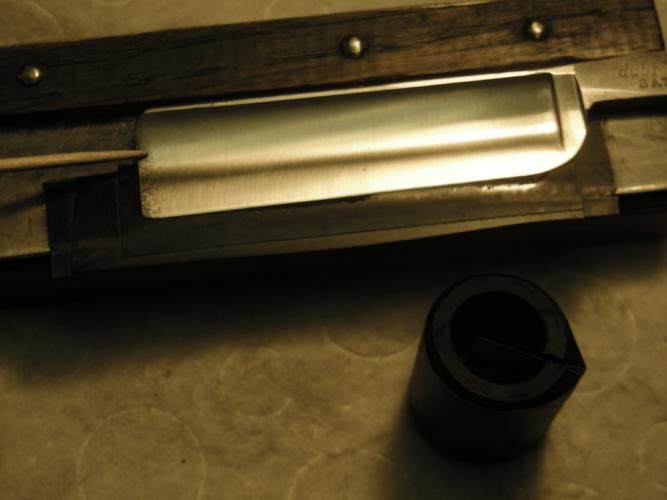
Sanding on the Quackers a bit with wet/dry and WD. I use a piece of automotive heater hose, split. Cut some strips of 600, 1000, 1500, and crocus to fit it. Cannot bring myself to begin rougher than 600 as the scratches never seem to come out otherwise.
Some rough pitting at the end and some spider veins to attempt sanding out.
I can already see loading up the crocus with CroOx and attempting a more satin finish in the end.
It IS a Satinedge! :)
Attachment 222764Attachment 222765
I can go 15-20 mins at a time and have to quit for a while. Going to take a long time.
On razors double-ground like this one, I do the top grind a while and then across the bottom one.
I like to attempt to preserve the top of the bottom grind as much as possible by trying not to sand over it as much. Attachment 222766Attachment 222767
That's a clever made sanding block Tom. :tu
I use some rubber shapes purchased from Lee Valley, in different profiles, but that hose idea is simple and captures the paper in the split.
Idea borrowed, and patented,, hehe
Also, there are unlimited diameters of hose, fuel hose, vacuum hose diameters to use for different things.Quote:
Originally Posted by MikeB52
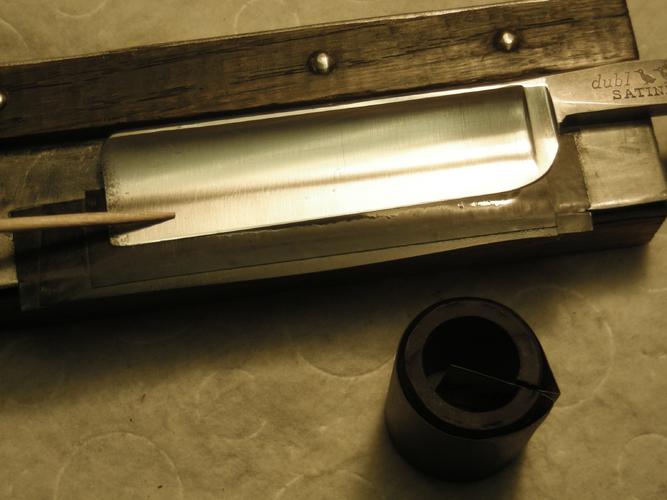
As I get weary of sanding, I go out to the bench with the razor/magnetic jig and use a tad of Dremel using 600 greaseless and some worn scotchbrite buffs, bring it back in for the next sanding session. I cheat as much as I can! ;)
Attachment 222772Attachment 222773
I hate sanding on blades more than I do honing.
With that being said, if it does not look good with 600, it ain't gonna fly. Just like moving past the 1k stone!