Results 1 to 10 of 4688
Thread: The Butchered Blade
-
08-07-2015, 03:02 AM #1Str8Faced Gent.


- Join Date
- Aug 2013
- Location
- Orangeville, Ontario
- Posts
- 8,467
- Blog Entries
- 1
Thanked: 4207 The Butchered Blade
Evening gents.
Won this 7/8th and knew I was getting a chewed up blade from the pics.
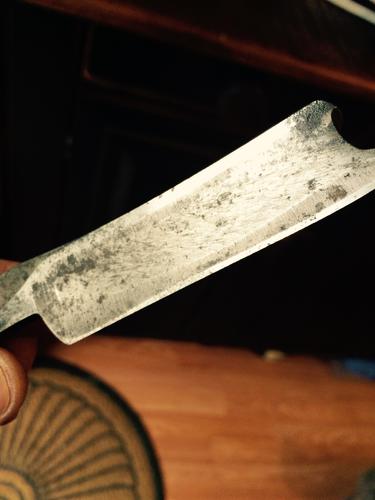
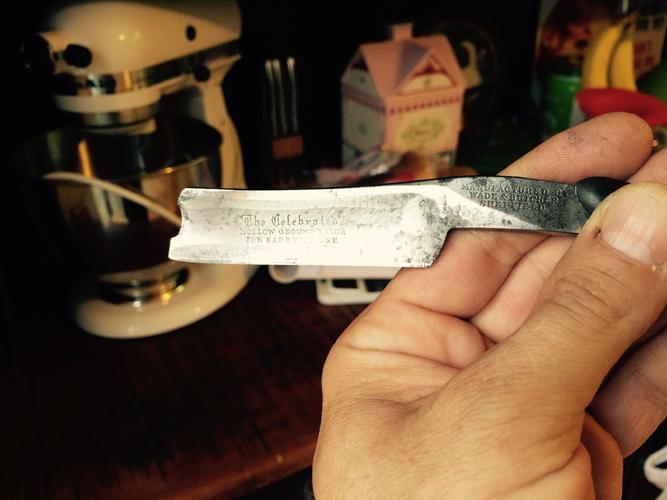
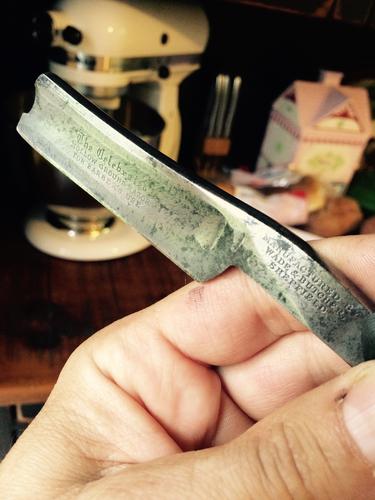
The scales are chunked up some, but I'm going to try and save them as well using some epoxy and shaved up bakelite (tip from Tom) or maybe shaved up old horn from another scale. What kind of epoxy to use, clear I presume and fully hardening. No flex?
Anyway, I notice that the arrow is ground completely away on this blade, under the wording, as is all the definition at the rear stabilizer, both sides. A drag that someone mistreated this bad boy so much but time to try and make lemonade.
So I started and finished with hand sanding, but did end up going to my wheel and compounds to finally get this blade back into some semblance of razor shaped again.
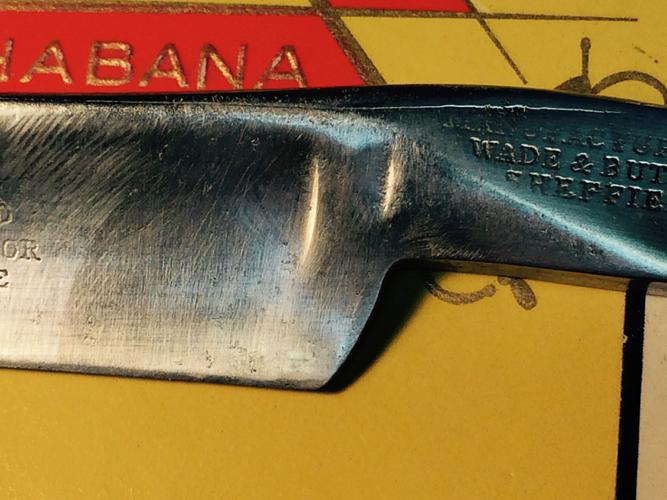
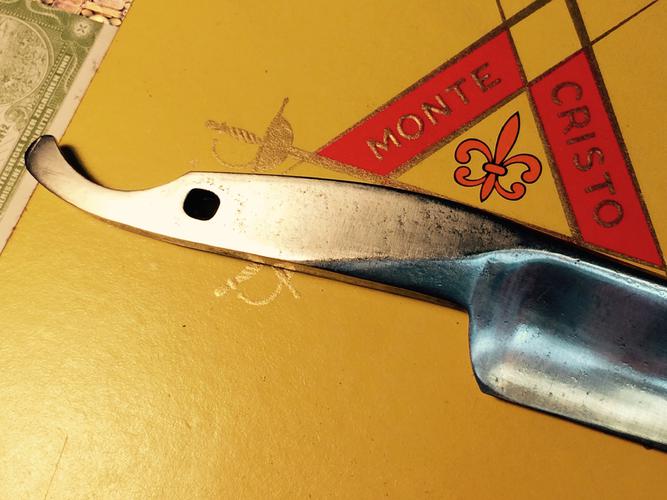
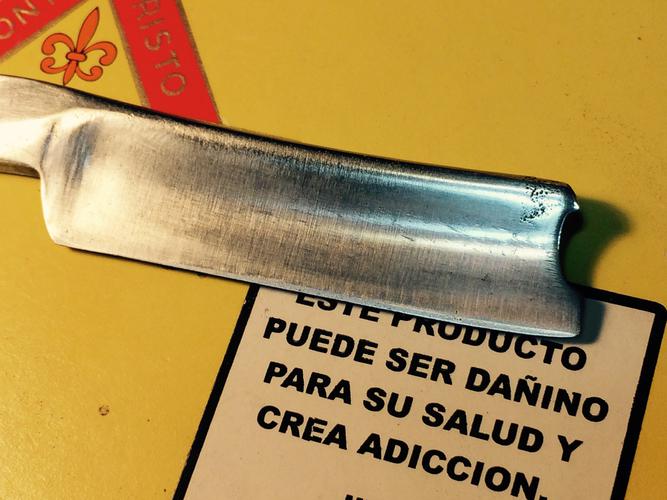
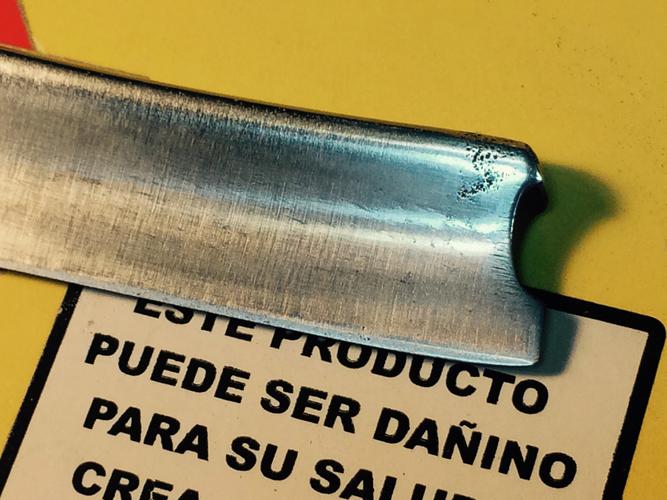
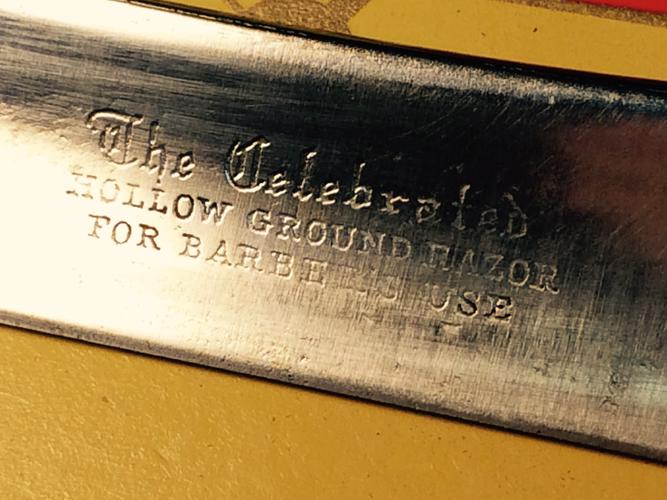
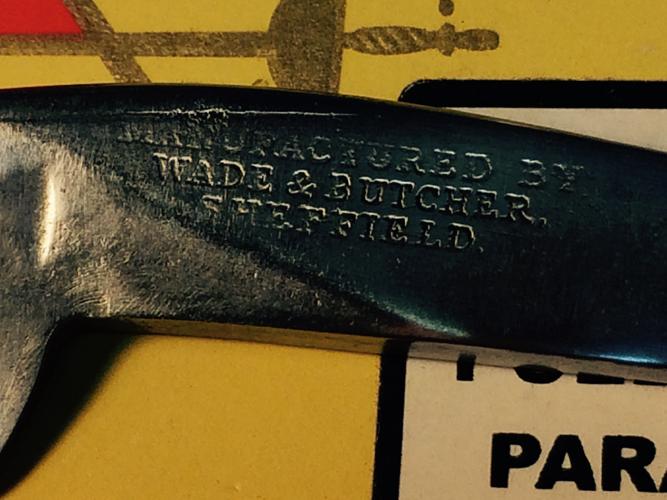
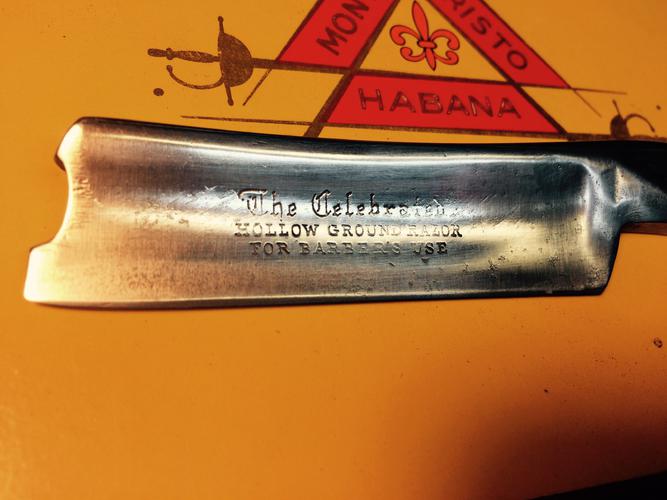
I'm now to this point and think a heel reshaping is in order? Try to get the heel curved back to what's left of the original rear stab line? Don't know if it's a good idea to try and get the smile back and just thought I'd post these up and get some ideas from seasoned restorers. How much farther to go etc.
Happy I was able to keep so much of the stamps intact thus far.
Thanks for any feedback or suggestions.

Last edited by gssixgun; 11-12-2015 at 05:43 AM. Reason: Title Change by request of OP
"Depression is just anger,, without the enthusiasm."
Steven Wright
https://mobro.co/michaelbolton65?mc=5
-
-
08-07-2015, 03:39 AM #2

Looks like its in good hands. I dont know about the heel, maybe a little but not too much..?
I was also thinking about the same question today concerning filling worm holes with two part 5 min epoxy mixed with ground horn... Does it shrink? Will it flex? I read that 50/50 mix is good. Ended up just letting the holes stay no structural problem and most holes on the inside.
Looks great so far, alot of people might have opted to work on a different blade... so good on you! “You must unlearn what you have learned.”
– Yoda
-
08-07-2015, 03:51 AM #3

Get with it, Mike! I figure some thick steel there.
"Don't be stubborn. You are missing out."
I rest my case.
-
The Following User Says Thank You to sharptonn For This Useful Post:
outback (08-07-2015)
-
08-07-2015, 04:07 AM #4

Im with tom.
Plenty of steel.
Put that smile back in her.
And watch out for yours, think it will be from ear to ear.
[emoji6]Mike
-
08-07-2015, 04:10 AM #5

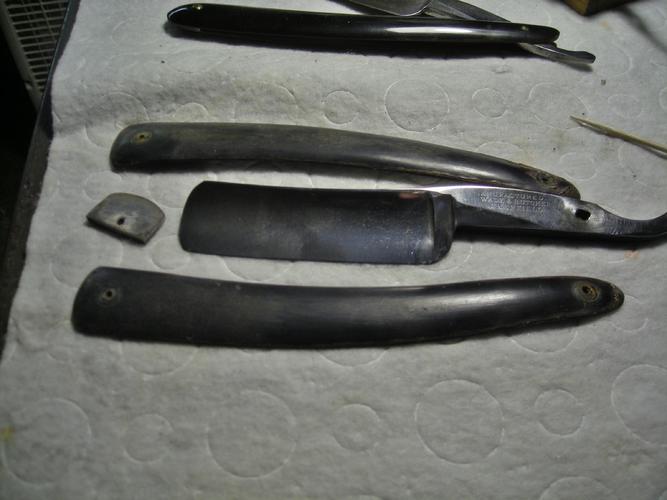
Mike gave me blessings to join in. Here's my pile!
 "Don't be stubborn. You are missing out."
I rest my case.
-
08-07-2015, 04:22 AM #6Str8Faced Gent.


- Join Date
- Aug 2013
- Location
- Orangeville, Ontario
- Posts
- 8,467
- Blog Entries
- 1
Thanked: 4207
You dug it out, X allent....
Seems to have the same squared pivot hole now as well. Were they ever round I wonder. I always presumed so. Plan on filling mine and redrilling for 1/16th again.
And if I were planning on soaking the scales in neatsfoot, is that pre or post repair on the chunks?"Depression is just anger,, without the enthusiasm."
Steven Wright
https://mobro.co/michaelbolton65?mc=5
-
08-07-2015, 05:42 AM #7
-
-
08-07-2015, 02:36 PM #8

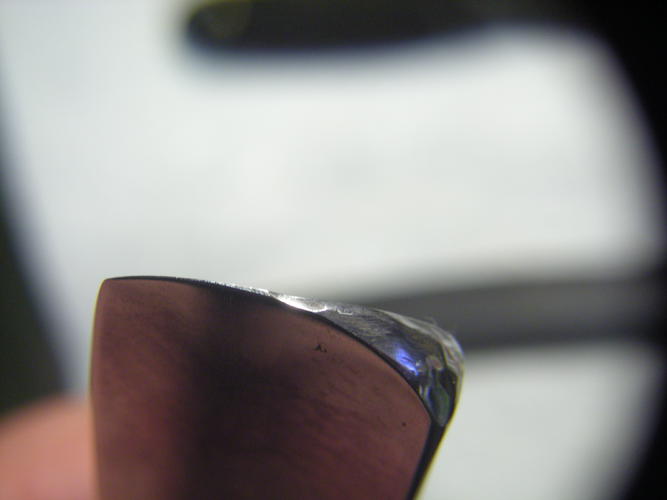
This thing has been reground. Just a faint hint of the barber's notch on the rounded point. Surely it was huge as the spine is almost 5/16 wide. Right between 7/8 and 15/16 now, my plan is to begin by squaring off the tip and taking a bit off the toe and heel to have the smile emulate the spine. The stabilizer will have to be relieved. I may wind up taking more off the end, depends on what it looks like as I proceed. Going to have to keep all the width in the belly. It looks pretty goofy now, IMO.
I always go with an aluminum pop-rivet bushing in the hole if I don't want it to walk forward.
The holes were never round. Smacked in with a hammer and punch as red-hot.
I always recommend epoxy before any oil is applied. Oily surfaces and adhesives don't do well together.
I may use this set of old FBU scales. The tips are pretty badly delaminated and rotten, so a good candidate to chop off at the pivot and reshape. Will need to use hot water/steam to get one of them flat again.
Should be big fun. I will get on it in earnest next week. Don't get too far ahead of me, Mike!
Last edited by sharptonn; 08-07-2015 at 02:39 PM.
"Don't be stubborn. You are missing out."
I rest my case.
-
08-07-2015, 02:51 PM #9

Hey Mikey
I'm with outback I think on this one
If it were mine, I'd grind that toe back just a bit, round the heel very slightly as its already been relieved a bit and hone a smile into her
JMHO of course
It'll make a great shaver either way
-
The Following User Says Thank You to Mcbladescar For This Useful Post:
kruppstahl (02-03-2016)
-
08-07-2015, 02:59 PM #10Str8Faced Gent.


- Join Date
- Aug 2013
- Location
- Orangeville, Ontario
- Posts
- 8,467
- Blog Entries
- 1
Thanked: 4207
Thanks for the prods gents.
I will be cleaning up the heel and toe to have the smile match the spine once more. Or as close to it as I can.
The pop rivet bushing idea's a good one. Will experiment with some of my knick knacks.
Juggling a few projects tight now, so this one will proceed slowly.
Bought some latigo leather for my next couple of weekend kits, and am restoring a Boker King Cutter for one of my 20 yr olds bud's. Was his grampa's blade and he is interested in the craft. Horrible slant to the edge currently as all the honing was at the toe but I can bring it true again for him and get it shaving again.
Kid needs a shave badly, but so does mine.. They seem afraid to shave like it will never grow back....

Cheers and have a great Friday men."Depression is just anger,, without the enthusiasm."
Steven Wright
https://mobro.co/michaelbolton65?mc=5


 13682Likes
 LinkBack URL
 About LinkBacks


 Reply With Quote

