
Results 11 to 20 of 4688
 13682Likes
Thread: The Butchered Blade
 LinkBack URL
 About LinkBacks
-
08-07-2015, 03:01 PM #11Razor Vulture


- Join Date
- Oct 2010
- Location
- Lone Star State
- Posts
- 26,195
Thanked: 8624
Take pics along the way, Mike!
"Don't be stubborn. You are missing out."
I rest my case.
-
08-07-2015, 03:14 PM #12Str8Faced Gent.


- Join Date
- Aug 2013
- Location
- Orangeville, Ontario
- Posts
- 8,466
- Blog Entries
- 1
Thanked: 4207
Ditto Tom..

Seems I take pics of everything these days. Way better than my rusty memory..
Cannot believe someone ground off the notch on yours?? That's just wack.
So regarding the epoxy for scales, do you use black, or clear or? In my experience the slower the cure time, the stronger the finished set, so just curious what brands people use.
May hit Lee valley on my way home, even though that's usually an expensive visit when I do.sharptonn and HARRYWALLY like this."Depression is just anger,, without the enthusiasm."
Steven Wright
https://mobro.co/michaelbolton65?mc=5
-
08-07-2015, 03:45 PM #13Razor Vulture
- Join Date
- Oct 2010
- Location
- Lone Star State
- Posts
- 26,195
Thanked: 8624
Yeah, as they ground them thin, the notch was usually eliminated, it seems. I suppose they were 'modernizing' the razor, but also as thinned, the support was gone for the blade under the notch, I think.
For dark horn, I use clear or the amber stuff . Use a dremel drum sander and go at an old bakelite scale over a piece of paper to make some bakelite dust. Plop the epoxy in the middle and mix it all up. I usually grab the Loctite stuff with the double syringe."Don't be stubborn. You are missing out."
I rest my case.
-
-
08-07-2015, 10:30 PM #14Senior Member


- Join Date
- Mar 2015
- Location
- Akron, Ohio
- Posts
- 12,118
Thanked: 4316
Yeah, what is it with these kids now a days. Not enough hair to call it a beard. Looks like a dirty neck from a distance.
My nephew wants to straight shave, but only the base of his neck.
Wants to keep his scruff.Mike
-
08-09-2015, 08:50 PM #15Junior Tinkerer

- Join Date
- Apr 2014
- Location
- Canberra
- Posts
- 799
Thanked: 242
I was waiting for this. Well done so far, I would also try and give it back the smile. A bit worrying though, looks like you can easily get too close to the shoulder and the notch while grinding away. I'm with the mentioned approach to hone the smile back in, gradually. I'd probably protect the spine with a few layers of tape and use a coarse stone.
For filling the holes and voids I normally use Bison 5-minute epoxy (the red one) and if I need a bit more time, I use a little less hardener. It's flexible, kinda stiff rubbery even when used in 50-50 mix, which I like for the scales. I didn't notice that it shrinks at all. I don't usually use bakelite (which works just fine), but some scrap ebony I have laying around. I make a bit of dust with say, 600 grit paper and I found you don't need much at all to turn the epoxy pitch black.As the time passes, so we learn.
-
-
08-09-2015, 09:56 PM #16Senior Member

- Join Date
- Jun 2015
- Location
- South Carolina
- Posts
- 1,838
Thanked: 516
I bought some two part gorilla. Gonna test that out. I figure use the same material ground up.. but perhaps to achieve the desired consistency, color, or ?... other materials might serve better than the original especially if you don't have that material to grind down.
I'm curious as to which is the best epoxy for what job. You are right though, play with the catalyst/hardener to achieve different consistency.
I'm thinking about making brass/epoxy scales. How much brass will it take to make it shine and look fairly solid? Hmmmm maybe some testing is in order...
"to the laboratory!!!"You must unlearn what you have learned.
Yoda
-
08-10-2015, 12:21 AM #17Str8Faced Gent.
- Join Date
- Aug 2013
- Location
- Orangeville, Ontario
- Posts
- 8,466
- Blog Entries
- 1
Thanked: 4207
Not familiar with Bison adhesive, but I do like the consideration of flexibility in the finished product.
I picked up some 'plastic epoxy' as well as the traditional 2 part epoxy mixes and am going to try some different mix ratio's on different worm bitten horn scales before I commit to the ones that came with this blade. Spent some time with a coarse stone last night cleaning up the heel some. Will try to rebuild the smile during the honing. That will be post scale rebuild so is a few days away still.
Got distracted in the driveway today chasing down a nuisance oil leak on my old Corrado. Been there since engine swap, just a few drops, but always a few drops and I just couldn't take it any more. Turns out, I think, that the T tape I used when I installed the oil pressure sender didn't hold up. I used basic white, but have since switched to petroleum rated. Almost impossible to see, or get to when the engine's in the car. Ran it for 30 minutes, no drips..
Anyway, happy Sunday gents!HARRYWALLY likes this."Depression is just anger,, without the enthusiasm."
Steven Wright
https://mobro.co/michaelbolton65?mc=5
-
08-10-2015, 12:44 AM #18Senior Member
- Join Date
- Apr 2012
- Location
- Diamond Bar, CA
- Posts
- 6,553
Thanked: 3215
The photos are somewhat deceiving, on some the toe looks larger and some the heel. In the second photo they look even-ish. If so, I would make it smile removing the same amount (not much) from the toe and the heel.
Trace the blade on a piece of cardboard and play with the design until you get one you like, then cut it out and trace it on to the blade, with black marker. If you still like it, then start grinding.
Use a dime or washer to get a heel shape you like. Should be a fun project.
-
The Following User Says Thank You to Euclid440 For This Useful Post:
MikeB52 (08-10-2015)
-
08-10-2015, 10:19 PM #19Razor Vulture
- Join Date
- Oct 2010
- Location
- Lone Star State
- Posts
- 26,195
Thanked: 8624
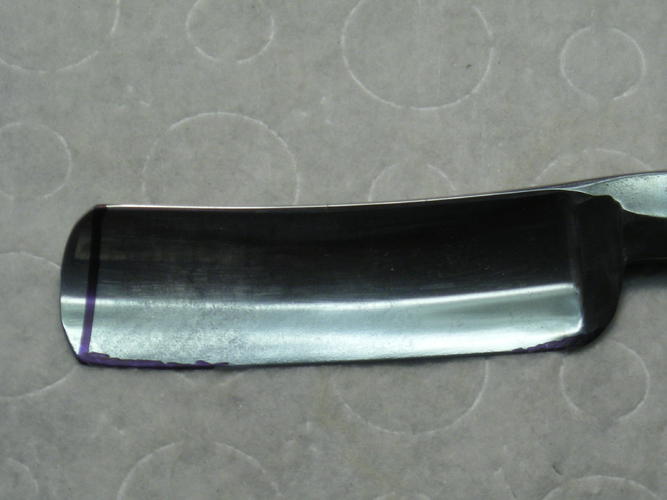
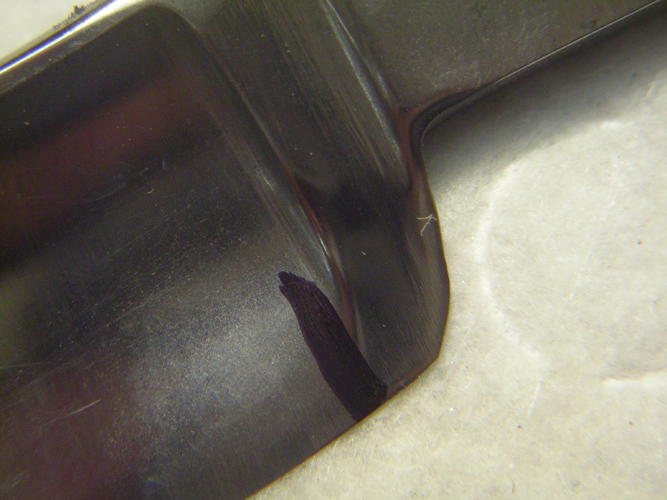
I have gotten some done with my Butchered Wade. Sharpied out what I wanted to begin with;
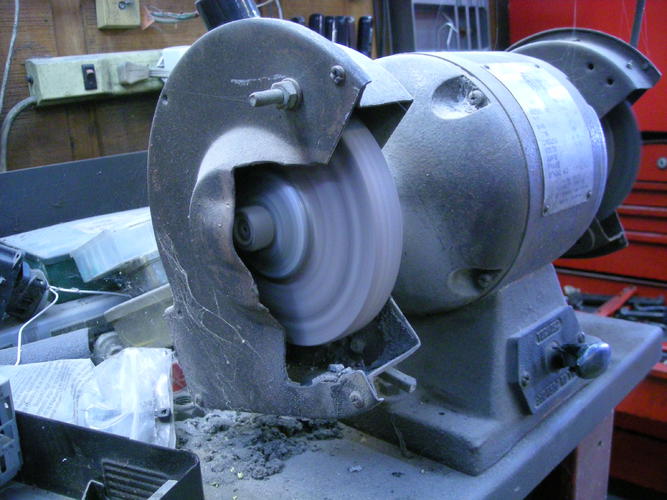
Went out to the precision grinding apparatus with a fine stone.
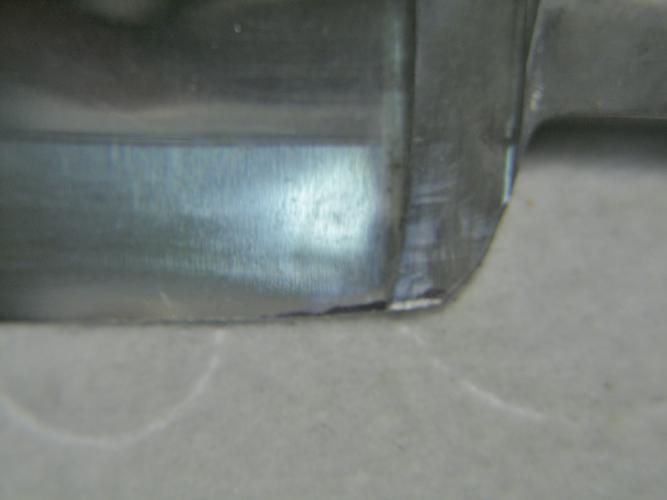
Got the rough shape done. Time to deal with the stabilizers. Hate that part!

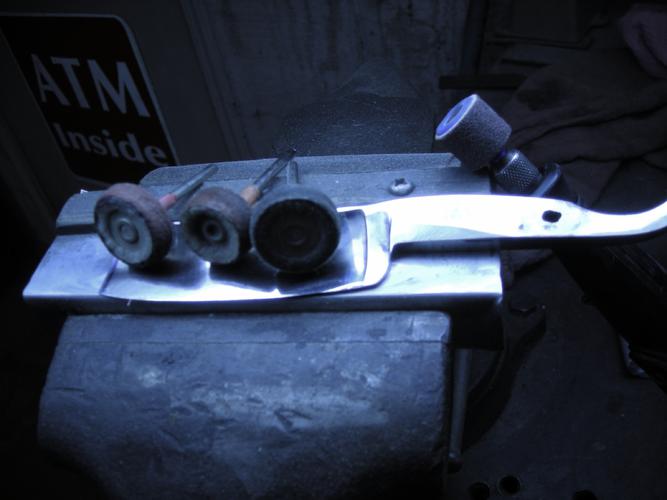
A magnetic jig, Dremel, sanding drum and some worn compound buffs. Lots of light, delicate work.
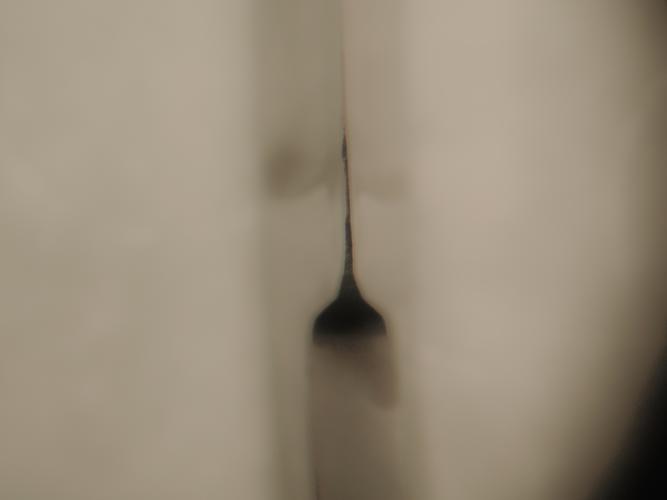
I got things fairly close. Still not down to blade level, quit for a while. Marked the blade next to the remnants of the stabilizer so I can (hopefully) get the lower stabilizer gone without hitting the blade next round. If I hit the black, I can see it immediately. Also, since the heel is now 'breadboarded', marking underneath gives me a good visual as to how far away I am, side-to-side and total. Trick to this is to attempt emulating the grind evenly and not going too far.
Is nice to get an even bevel around the heel. Sometimes I can.
Last edited by sharptonn; 08-10-2015 at 10:29 PM.
"Don't be stubborn. You are missing out."
I rest my case.
-
-
08-11-2015, 12:57 AM #20Str8Faced Gent.
- Join Date
- Aug 2013
- Location
- Orangeville, Ontario
- Posts
- 8,466
- Blog Entries
- 1
Thanked: 4207
Great ideas and pics Tom.
So glad I got busy on other projects before your and Euclid's replies.
The idea of the cardboard mock up, and the pics of your reshaping are going to help immensely.
Cheers and keep at it...
 "Depression is just anger,, without the enthusiasm."
Steven Wright
https://mobro.co/michaelbolton65?mc=5
-
The Following User Says Thank You to MikeB52 For This Useful Post:
sharptonn (08-11-2015)


 Reply With Quote