
Results 1 to 10 of 36
 114Likes
Thread: Crawler & His ERN.
 LinkBack URL
 About LinkBacks
-
01-23-2016, 10:53 AM #1Senior Member


- Join Date
- Jan 2015
- Location
- N.E. Indiana
- Posts
- 970
Thanked: 134 Crawler & His ERN.
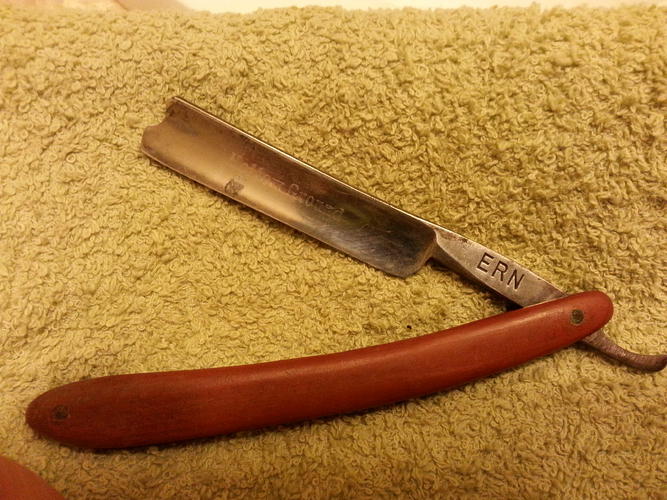
This thread is to chronicle the journey I have embarked upon to restore an ERN, the very first vintage razor I picked up. Trying to resist my usually long winded posts (forum published micro-novel?
 ), I will try to break it up over the course of several posts, hopefully improving the organization a bit as well.
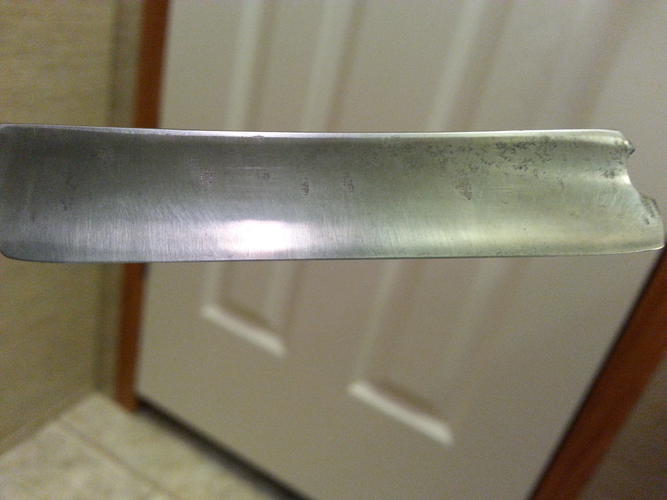
I believe I have already done an "unboxing" thread on it, so I'll get straight to pics pertaining to condition. The scales were a bizarre material, somewhere between plastic, wood, and cardboard.
Found condition:
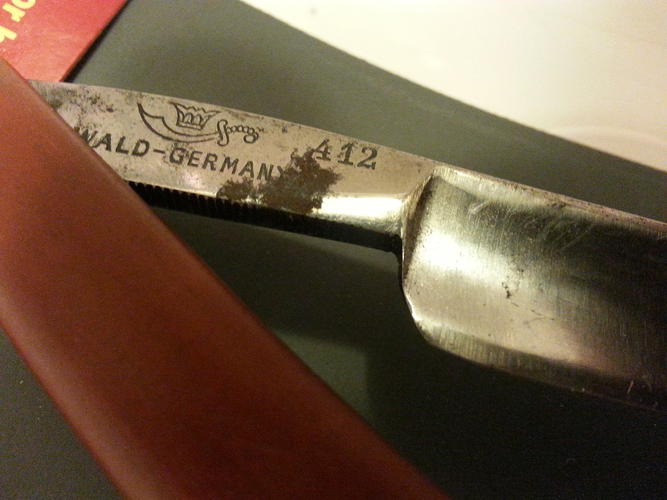
Back of blade:

The full writeup on my progress to this point may be over the course of several days, as my spare time allows. Another major advance in this restore will happen Sunday. I consider it a turning point, so I'm reservedly stoked .
Decades away from full-beard growing abilities.
.
Decades away from full-beard growing abilities.
-
01-23-2016, 11:39 AM #2Senior Member
- Join Date
- Jan 2015
- Location
- N.E. Indiana
- Posts
- 970
Thanked: 134 Dealing With Rust.
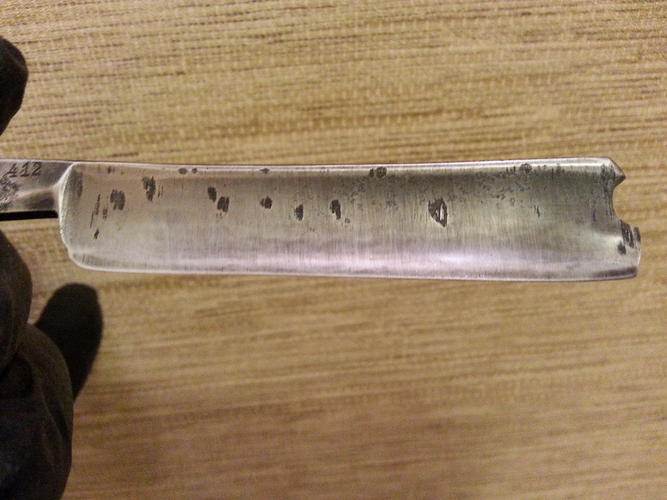
Light cleaning, and high grit sanding off some rust didn't produce much progress. I also wanted to at least attempt to neutralize the rust/corrosion of pitting. So next, I played with Evaporust quite a bit.
More on my use of Evaporust Here.
An abbreviated set of pics in this regard:
Before Evaporust.
After some time in the dip...
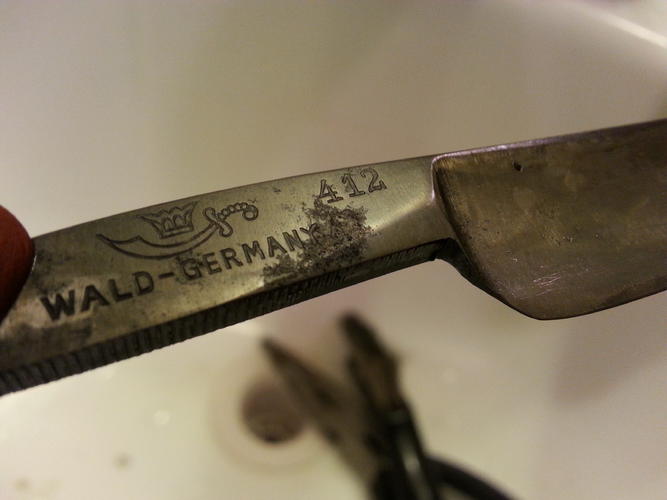
Getting better:

Too much of the dip??
 Decades away from full-beard growing abilities.
-
01-23-2016, 11:52 AM #3Senior Member
- Join Date
- Jan 2015
- Location
- N.E. Indiana
- Posts
- 970
Thanked: 134 Sanding!
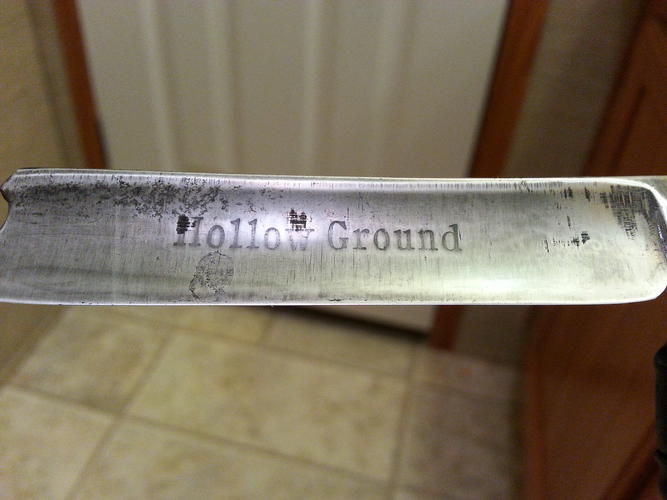
After many, many, MANY hours of hand sanding, mostly during idle time at work. I kept stepping down in grit until it seemed like there was even somewhat noticeable progress.
220 cheapo w&d from harbor freight, then all 3M from 320 to 400 & higherç
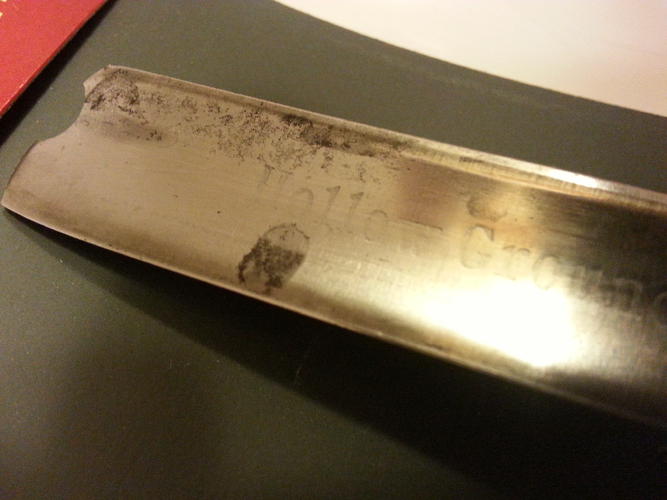
The etch is shallow, so I didn't do much to the "face" side, even avoiding the etch when sanding:
 Decades away from full-beard growing abilities.
-
01-24-2016, 04:19 AM #4Senior Member
- Join Date
- Jan 2015
- Location
- N.E. Indiana
- Posts
- 970
Thanked: 134 Dance Break!
As I type this, I am in the middle of a 12hr shift at work in the bakery. I get easy stuff on Saturdays
! Since I have some spare time, but not the ability to work on my ERN at its current stage while at work, I will explain & break down my process recently, and what's to come.
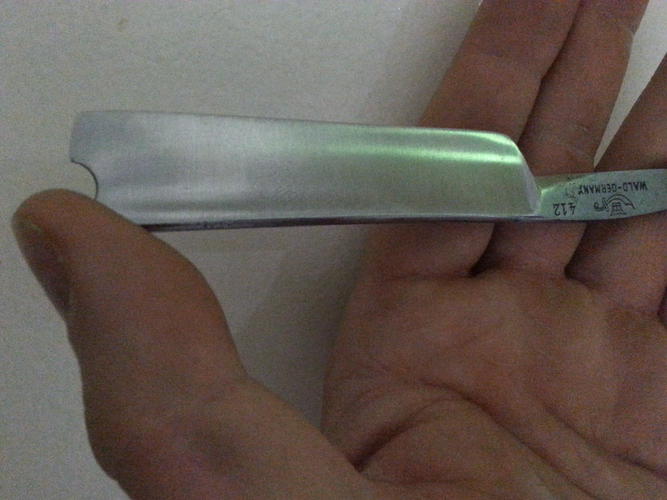
Not shown since the last pic: I hand sanded most of the razor to a satisfactory, but not overdone level... except the face. I barely touched that further with sandpaper.
I decided that I was not going to lose the etch! But I am also going to get rid of the corrosion!! More self education was had. It started here, of course, then spiraled outward, down a web-fu "rabbit hole" named Google.
First, I researched methods of etching. Two basic methods are prevalent: acid etching, and electrochemical. The saying goes "There is more than one way to skin a cat...". What I learned is that electrochemical etching has greatly reduced risks to person and property, compared to acid etching. BUT, the etch produced is very shallow. It still uses acid, but in weak (household vinegar, etc) concentrations, using electricity haphazardly drawn from a battery (usually) as a catalyst for the metal and mild acid to react with one another.
My Father: If it's worth doing once, it's worth doing right the first time.
With that phrase ringing in my head more loudly with every year that passes, I quickly chose an acid etch method. Which required more self education, because pre-made etching solutions are not available locally. It is also cheaper (per ounce) to simply make your own from two chemicals available retail just about anywhere in the world.
Less than $10 later, including sales tax, I have the two chemicals needed, with enough to make a gallon of solution. Another $10~ish for a fish tank air pump & about 12' of pvc air line. Another $5 for an HDPE (a type of plastic) bucket & lid from a big box hardware store to safely store the acid outside, where any errant fumes won't be able to harm my household OR metal objects in the vicinity!
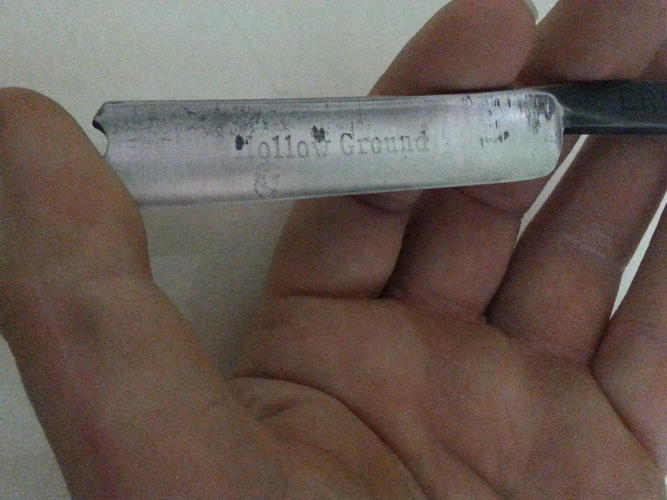
In preparation for this endeavor, I lightly washed the blade with the green side of a scotchbrite sponge & dish soap. I then asked the wife for a few bottles of her nail polish that she doesn't use/like/ has gone bad. I used two colors of polish to completely cover the razor. I then spent somewhere between 8 and 20 hours carefully picking out the "Hollow Ground" etch in the polish (after giving it more than a day to dry) with improvised tools and a 5x jeweller's loupe. That week, I had a trainee that mostly knows the job.
Side effects of this include, but are not limited to, a neck ache, blury vision and or vision induced headache, and temporarily "cracking up" from painstakingly scratching away microscopic pieces of resist media (nail polish).Decades away from full-beard growing abilities.
-
01-24-2016, 04:41 AM #5Senior Member


- Join Date
- Dec 2010
- Location
- South Florida
- Posts
- 13,530
Thanked: 3530
Hang in there Crawler,,, lets see that ERN when its done.
Don't breathe those chemicals & don't get it on the bread dough either.
-
01-24-2016, 05:07 AM #6Str8Faced Gent.


- Join Date
- Aug 2013
- Location
- Orangeville, Ontario
- Posts
- 8,456
- Blog Entries
- 1
Thanked: 4207
Great attention to detail will pay off in the end man. Looking forward to the etch details..
 Crawler likes this."Depression is just anger,, without the enthusiasm."
Steven Wright
https://mobro.co/michaelbolton65?mc=5
-
01-24-2016, 05:37 AM #7Senior Member
- Join Date
- Jan 2015
- Location
- N.E. Indiana
- Posts
- 970
Thanked: 134 Prepping to Etch.
Up till this point, most of everything that I've done to the razor is fairly common here at SRP. Even the Evaporust has some first hand users here. The next stage of this restore, AFAIK, is virtually never seen here... with only one or two examples of similar projects that I know of.
DISCLAIMER!!!
This is dangerous! Acid is not a toy!!! I am not a chemist, nore do I claim to know what I'm doing! If someone reads this thread, makes an attempt, and winds up causing harm or damage, they have ONLY themselves to blame! You must educate yourself. You must take the necessary precautions. And you must hold yourself accountable!
Certain chemicals are violent & extremely deadly when mixed! Always know the expected outcome when mixing anything! ...Kinda like urinating in a toilet bowl that someone didn't tell you was currently being cleaned by letting bleach sit in it for a while. The result: ammonia + bleach (chlorine family of chems) = a gas that could potentially harm your airways if you don't leave the room IMMEDIATELY.
To quote the signature lines of two senior members:
"An investment in knowledge always pays the best interest."
"Common sense ain't so common anymore..."
Supplies:
Resist media: nail polish.
Etching solution: Muriatic acid (~30% hydrochloric acid), consumer grade hydrogen peroxide (3% by volume).
Something to perform the etching process in: the muriatic acid came in a bottle made from HDPE (recycle symbol #2), so I will use a container made from the same material. Your average milk jug is made of this, but I've set aside several things to choose from when I get to this point.
A lid, if not already supplied, to contain the fumes during etching: I will use Press 'n Seal, depending on which container I use. Plastic films have less resistance to acids/allow more vapor to escape, so it should NEVER be used for such things in any kind of long term way.
Something to store the etchant in once the project is done: for me, a milk jug or soda bottle with lots of tape around the tightly closed lid to slow any fume leakage down.
A bucket w/lid to store the muriatic acid & etchant outside, away from any metal. Clearly marked as poisonous and/or acid!
Protective items & planning: well ventilated/outside area, safety goggles, disposable gloves, a plastic drop cloth of some sort in case of spills/splashing, baking soda to neutralize the acid, only plastic utensils for handling anything/stirring.
Steady hands & LOTS of patience.
Hands-free magnification of at least 5x.
Something with a tip smaller than the thinnest part of the design to be etched: I used small seeing needles & similar things.
Optional:
Something to agitate the solution, helping to ensure even removal of material: fish tank air pump and lines.
The ability to find enjoyment in challenging the MaCGyver part of one's brain... just for fun!
An improvised rig to both contain fumes, and also carry them outdoors if inclement weather requires this be done inside (in a VERY well ventilated room!)
Extra ways to seal up containers: tapes, glues, plastic bags tied around containers, or a use of all of the above.
I think that's most of what should belong in this post. Stay tuned! Next post might not happen until tomorrow.Decades away from full-beard growing abilities.
-
01-24-2016, 06:19 AM #8Senior Member

- Join Date
- Feb 2013
- Location
- Haida Gwaii, British Columbia, Canada
- Posts
- 14,450
Thanked: 4829
Ok. You have caught my attention now.
Crawler likes this.It's not what you know, it's who you take fishing!
-
01-24-2016, 06:38 AM #9Senior Member

- Join Date
- Nov 2012
- Location
- Across the street from Mickey Mouse in Calif.
- Posts
- 5,320
Thanked: 1185
Did I hear a boom and then the sound of several fire trucks ? :<0)
Good judgment comes from experience, and experience....well that comes from poor judgment.
-
01-24-2016, 07:00 AM #10Senior Member

- Join Date
- Sep 2014
- Location
- Yorkton, Saskatchewan, Canada
- Posts
- 1,171
Thanked: 230
I'm curious to see how this comes out.......
 Crawler likes this.Is it over there or over yonder?


 Reply With Quote