
Results 1 to 5 of 5
 2Likes
 LinkBack URL
 About LinkBacks
-
05-19-2016, 10:57 PM #1Junior Member

- Join Date
- Apr 2016
- Location
- South Carolina
- Posts
- 16
Thanked: 1 1st Try at Restore - 6/8 S. Littman Spanish Point
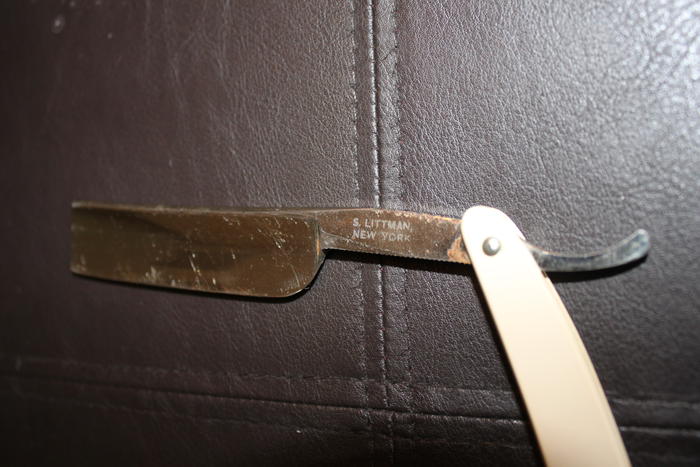
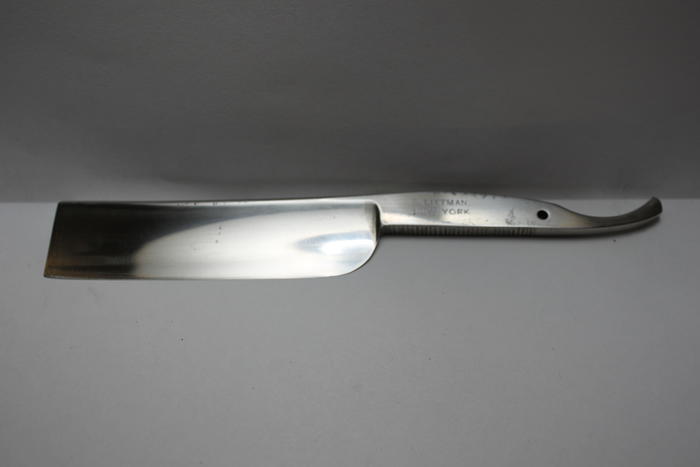
Hello everyone,I'll start by saying that i have truly gone "all in" with the straight razor art. In that vein, I recently picked up a 6/8-inch S. Littman Spanish Point for one Andrew Jackson. I purchased it because it didn't look too bad in the sellers photos, the edge looked nick free, and figured I could try my hand at restoration. In all the restoration photos below, I have hand sanded the blade after unpinning the scales.
This is my first restoration attempt and here are some photos of the razor as I received it from the seller:
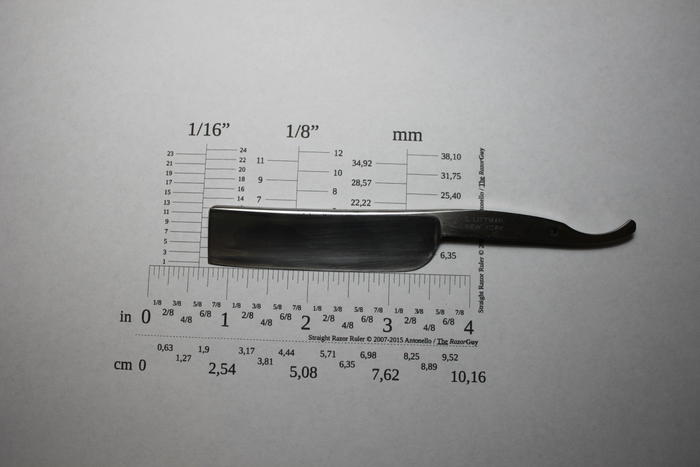
Here is a photo of the blade profile and a photo on the Straight Razor Ruler:
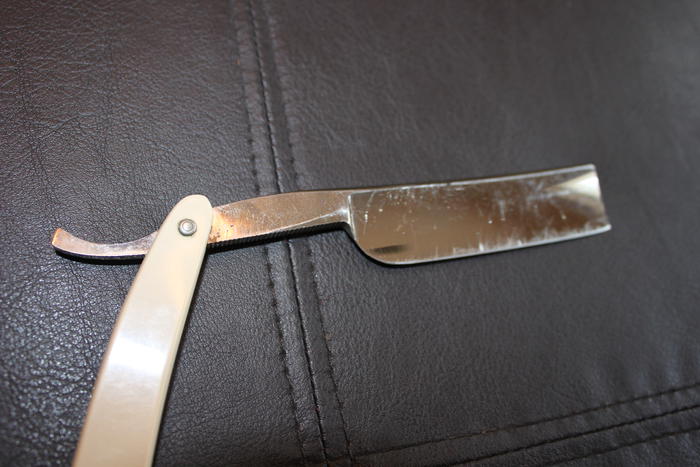
Here are some photos after the following sanding progression (400/600/800/1K/1.2K/1.5K/2K Grit Silicon Carbide paper):
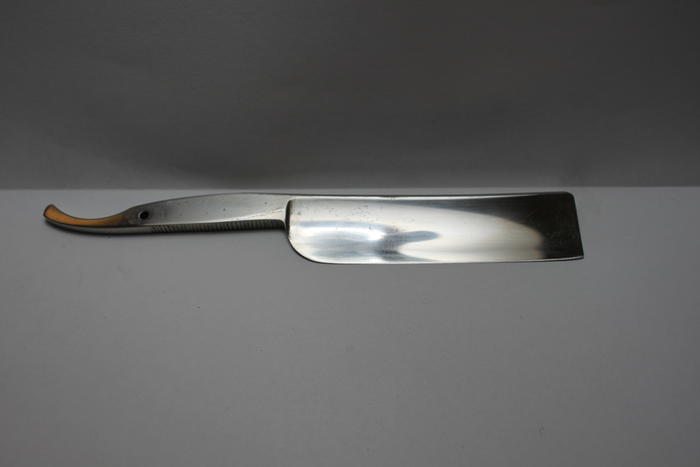
The photos are not the best, but it's starting to look much better than when i received it.
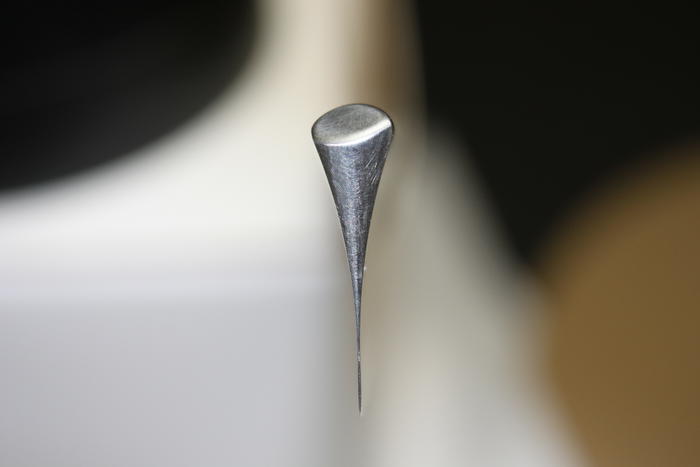
After all this work, I noticed that the blade has a two-tone variation along its face (as illustrated in the photo below):
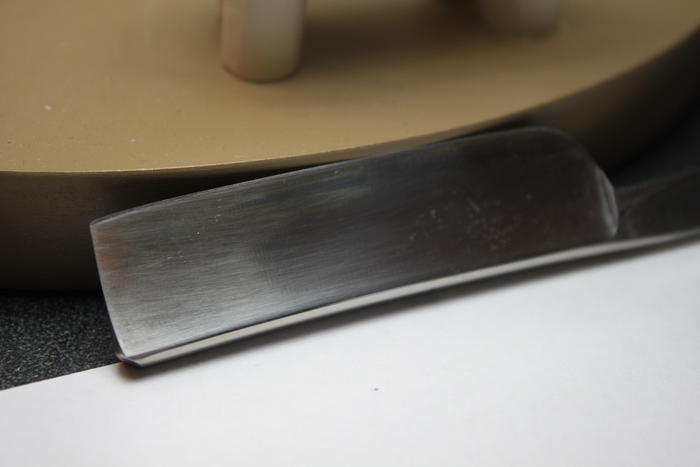
You can see a duller color on the face of the blade near the toe and a shinier color as you move further back. My guess is that my sanding work is not up to par, but wanted to get some confirmation from the folks who really know how to restore and have probably seen this before.
Any and all help is greatly appreciated.Last edited by eroman99; 05-19-2016 at 10:59 PM. Reason: Incorrect Razor Brand in Title
BobH likes this.
-
05-19-2016, 11:14 PM #2Razor Vulture


- Join Date
- Oct 2010
- Location
- Lone Star State
- Posts
- 26,182
Thanked: 8620
Looking good.
 You should start sanding up and down to get those length-ways scratches out!
So I believe that is a square-point?Hacker7 likes this."Don't be stubborn. You are missing out."
I rest my case.
-
The Following User Says Thank You to sharptonn For This Useful Post:
eroman99 (05-19-2016)
-
05-19-2016, 11:22 PM #3Senior Member

- Join Date
- Jan 2014
- Location
- Islip N.Y.
- Posts
- 788
Thanked: 167
Looking good. Keep sanding and alternate the pattern. Go heel to toe with 1 grit then spine to edge with the next grit until the scratch pattern from the previous grit is gone. Its a lot of work. If you really like doing this a buffer will make your life a lot easier. I don't recommend using a dremel, to many mishaps. The workshop section has a lot of hand sanding information. Keep plugging away, doing fine.
-
The Following User Says Thank You to Hacker7 For This Useful Post:
eroman99 (05-19-2016)
-
05-19-2016, 11:42 PM #4Junior Member
- Join Date
- Apr 2016
- Location
- South Carolina
- Posts
- 16
Thanked: 1
Thanks for morale booster! I thought Spanish Point and Square Points were interchangeable terms......perhaps I have picked up some misinformation in all the reading I have been doing lately!! Originally Posted by sharptonn

-
05-19-2016, 11:47 PM #5Junior Member
- Join Date
- Apr 2016
- Location
- South Carolina
- Posts
- 16
Thanked: 1
Thanks for the kind words and advice. I am doing everything by hand since we are in a rental home right now and my tools are in storage until my our new home is finished (not that I have a buffer). Plus, it gives me some solo time to work on something I enjoy and it gives me an appreciation for manual work just like it was done in the days when straight razors were the only thing you could shave with....... Originally Posted by Hacker7


 Reply With Quote