
Results 1 to 10 of 13
 16Likes
Thread: Chip Repair
 LinkBack URL
 About LinkBacks
-
10-16-2016, 07:55 PM #1Senior Member


- Join Date
- Sep 2015
- Location
- I'm thinking...
- Posts
- 447
Thanked: 79 Chip Repair
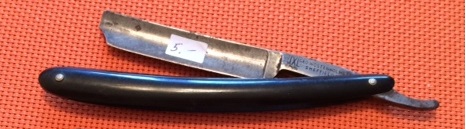
I purchased this razor at an antique store some time ago. It is a IXL Geo. Wostenholm & Son. I bought it because I wanted to try to repair a chip on the toe of the blade...and because it was only $5. Here is the before pic:
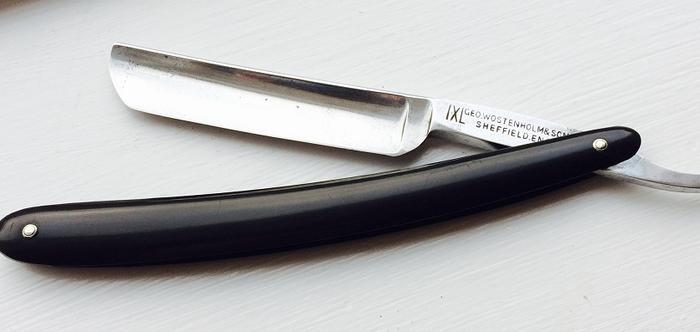
I used 400 grit wet/dry sandpaper to smooth out the curve. Then I went through my usual process -- steel wool, 800, 1000, 2000 grit wet/dry and then Mother Mag and Aluminium Polish. I don't use power tools (too noisy). There is no substitute for elbow grease. For a $5 find I think it turned out okay. Here is the after pic:
I will get this on the stones in the next few days and take it out for a spin...
-
The Following 2 Users Say Thank You to Whizbang For This Useful Post:
Lemy (11-08-2016), ScoutHikerDad (10-16-2016)
-
10-16-2016, 08:23 PM #2Senior Member


- Join Date
- May 2010
- Location
- Upstate South Carolina
- Posts
- 3,308
Thanked: 987
Very nice save-I bet that will make a great shaver!
Whizbang likes this.
-
10-16-2016, 08:26 PM #3Senior Member
- Join Date
- Jun 2013
- Location
- Pompano Beach, FL
- Posts
- 4,017
Thanked: 631
How much lenth did you loose? I would have wrapped the blade with wet paper towel and used a Dremel with sanding wheel. A little at a time and given it a round point.
-
10-16-2016, 09:40 PM #4Senior Member
- Join Date
- Sep 2015
- Location
- I'm thinking...
- Posts
- 447
Thanked: 79
I didn't lose any length, I simply rounded the toe. I used 400 grit wet/dry sandpaper. I wrapped it around a paint mixing stick and slowly rounded the toe. I don't own a Dremel. I don't mind doing these things by hand. Originally Posted by bouschie
 AcesandEights likes this.
-
10-17-2016, 01:50 PM #5Glock27
- Join Date
- May 2016
- Location
- Michigan
- Posts
- 316
Thanked: 18
That is marvelous, outstanding, wonderful. Now I have an idea of how to go about a gash repair of such a nature. It looks so natural to me. Question if I may. You said this was accomplished by hand. I assume the 400 grit was used to reshape the tip, toe!?
Whizbang likes this.
-
10-17-2016, 01:51 PM #6Glock27
- Join Date
- May 2016
- Location
- Michigan
- Posts
- 316
Thanked: 18
I applaud this idea. Great thought
Whizbang likes this.
-
10-17-2016, 05:32 PM #7Senior Member
- Join Date
- Sep 2015
- Location
- I'm thinking...
- Posts
- 447
Thanked: 79
Yes, I only used the 400 grit to reshape the toe. I used 800, 1000, 2000 on the blade. The 400 grit removes metal fairly quickly so you have to keep checking on your progress. Originally Posted by Glock27
Johntoad57 likes this.
-
10-31-2016, 04:50 AM #8Member

- Join Date
- Jun 2011
- Posts
- 61
Thanked: 7
Very nice repair. ( from experience: be careful with a Dremel. It's to easy to turn a razor into a missile.)
Sent from my iPhone using TapatalkWhizbang likes this.
-
10-31-2016, 06:41 AM #9Glock27
- Join Date
- May 2016
- Location
- Michigan
- Posts
- 316
Thanked: 18
Mr. Whizbang, or others. With this experience under your belt what grit level would you contemplate after bread knifing SR. I just did one and have been grinding away (3 layers of electric tape). Started with 400 grit to arrive as some level of an edge. Having dispensed with innumerable strokes on a 400 grit. While not arriving at much of an edge, I have noticed, under a 60x loupe numerous pits showing up, indicating that maybe I should just throw the thing away. With nothing more than this what say you?
Pre Thanks.
-
10-31-2016, 11:47 AM #10Senior Member
- Join Date
- Sep 2015
- Location
- I'm thinking...
- Posts
- 447
Thanked: 79
It is difficult to say without seeing some visuals...can you post a pic? There have been other threads that address "bread knifing" an edge. My only advice would be that less is more...and go slow...and use the least amount of grit and sanding to achieve the desired outcome. There are others here that are more knowledgeable than me on this subject. Originally Posted by Glock27


 Reply With Quote