
Results 1 to 5 of 5
 9Likes
 LinkBack URL
 About LinkBacks
Hybrid View
-
12-09-2017, 09:50 PM #1Senior Member


- Join Date
- Sep 2015
- Location
- I'm thinking...
- Posts
- 447
Thanked: 79 The Scorcher #141 Strop Restoration Project
Not sure if this is the place to post.
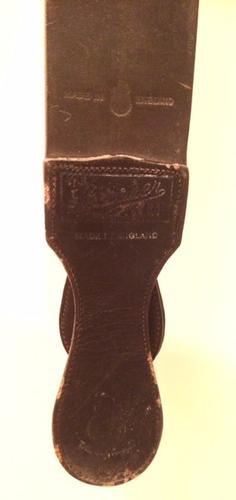
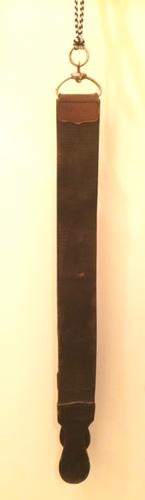
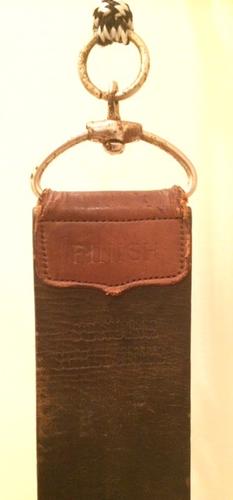
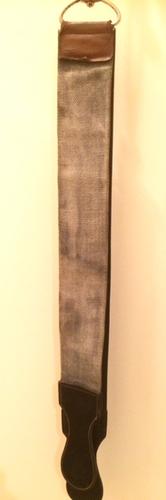
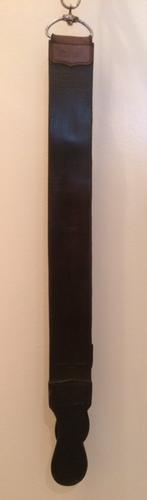
I picked up this vintage -- The Scorcher Strop #141, Genuine Shell Horse, Made in England -- in an antique store some time ago. I decided this would make a good restoration project. My first strop restoration project. I will post before pics in this posting and then open it up for some advice (I do have a few questions). Then I will post after pics....well...after.
I have watched a few restoration videos on Youtube and read other forum postings and the Wiki on strop restoration and I am a bit torn in terms of which order I should follow. Should I wash with saddle soap, then oil with Neatsfoot oil, then sand out any imperfections? The razor Emporium video suggested that I should sand it lightly first to remove any blemishes, then wash with saddle soap and then oil and buff, etc. The general condition of the strop is good. There are some slight blemishes along the lower edge and I am concerned they may catch on a blade edge, and there is one slight nick in the center of the strop. The canvas strop is just dirty. Needs a good wash.
I would appreciate any and all advice!
-
12-10-2017, 03:18 AM #2Senior Member
- Join Date
- Sep 2015
- Location
- I'm thinking...
- Posts
- 447
Thanked: 79
Update: This evening I decided to proceed with cleaning the strop with saddle soap on the leather part and a mild detergent on the linen side. Judging by the colour of the rinse water it was quite dirty (some of it may have been original leather dye). I hung it on a coat hanger to let it air dry. When it was dry I sanded some of the rougher spots with sandpaper until the leather was smooth and even. I put a few drops of Neatsfoot oil on my hand and rubbed it in. I will let it settle overnight and post pictures in the morning. When I purchased the strop the leather was stiff and dry and now the leather is feeling more supple and smooth.
-
12-11-2017, 05:43 PM #3Senior Member
- Join Date
- Sep 2015
- Location
- I'm thinking...
- Posts
- 447
Thanked: 79
Update # 2: I wasn't pleased with the first conditioning of the leather...the leather just wasn't smooth enough for my liking. So I started again with sanding...starting with 400 grit, then 800 and then 1000. I sanded with dry wet-dry sandpaper in the hopes there would be no grains of grit left in the leather. Then I conditioned the leather with a leather conditioner. This left a much smoother surface. I decided to further condition the strop by hand rubbing twice a day every day for about a week with just a couple of drops of Neatsfoot oil on my hand as lubricant. I will do this until it is smooth and supple enough for my liking. So far it is looking much better and it feels more like a strop.
This is my first strop restoration project. Just a couple of observations: first, old strops are made of much thicker leather than some of the newer strops and with age they get very hard and stiff and it takes a lot of work to return the supple feel of a new leather strop. Second observation: don't be in a rush. It takes time to clean, smooth, and condition a strop to get it just right. The webbing was also very hard to clean. Since I was unable to remove it from the strop to wash it separately I had to carefully wash it with a mild detergent and a tooth brush and it is at least a uniform grey and not blotchy as in the original picture. Sorry my pics are not better, but as you can see the leather is much more uniform in colour and looks more like a strop should look. I didn't get a picture of the webbing.
 dinnermint likes this.
-
12-12-2017, 11:50 AM #4Senior Member


- Join Date
- Mar 2015
- Location
- Akron, Ohio
- Posts
- 12,118
Thanked: 4316
Try a moistened rag (water) and neatsfoot oil. The water helps draw the oil into the leather.
Mink oil works as well.!
Yes, a slow process. But it also took a long time to dry out.
Nice looking work, so far.
I also like to rub the strop with a smooth sided glass mug, to smooth the surface of the strop.Mike
-
12-12-2017, 01:30 PM #5Senior Member
- Join Date
- Sep 2015
- Location
- I'm thinking...
- Posts
- 447
Thanked: 79
Good advice. Yes, I will do what you suggest. Originally Posted by outback


 Reply With Quote