
Results 1 to 10 of 11
 32Likes
Thread: Moose and Bone brush and scales
 LinkBack URL
 About LinkBacks
-
03-29-2020, 06:52 PM #1Bondservant of Jesus


- Join Date
- Apr 2011
- Location
- Milan, Michigan
- Posts
- 766
Thanked: 116 Moose and Bone brush and scales
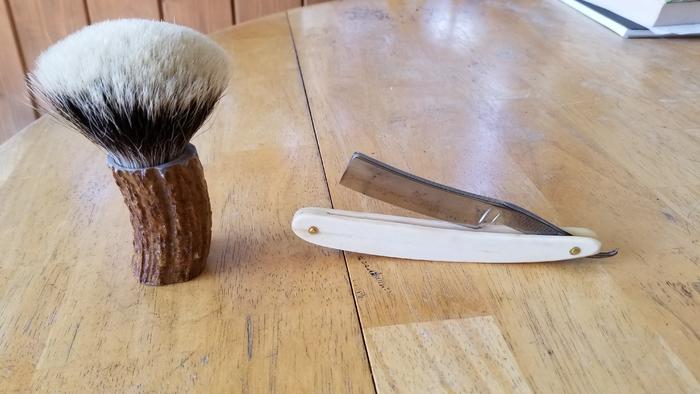
Well after appropriating a couple of an Uncles bench-top tools, I was able to complete a couple of projects I had on the back burner. Now that I do not have to pick up the kids because school is cancelled and all extra-curricular activities are cancelled, I have had some time to make a second magnetic brush. Recently, I had a razor pop a plastic scale so it got some new bone scales. Here is the completed project:
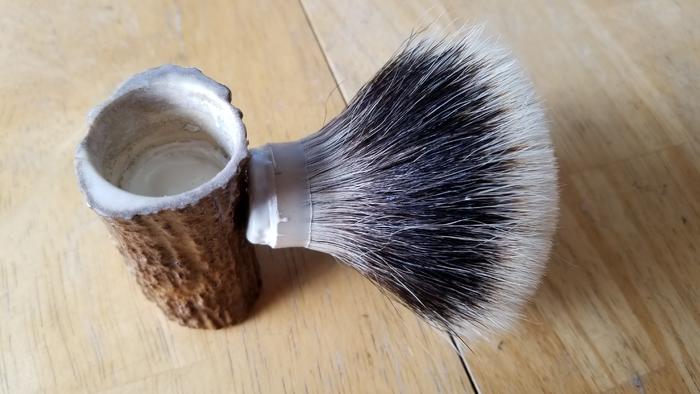
And a picture of the bottom of the brush:
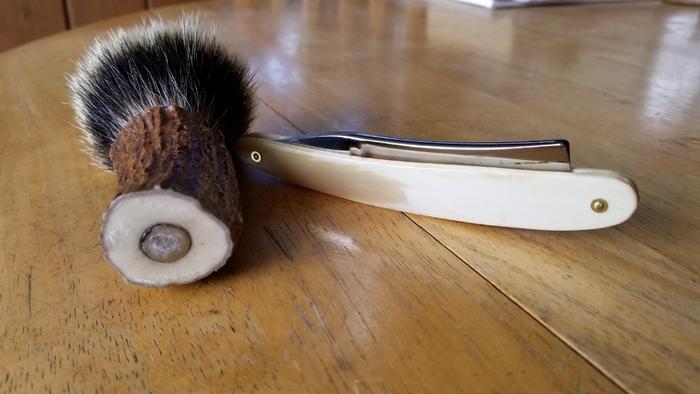
My work at doing a brush has been to easily replace a knot. To do this I have been gluing a powerful magnet into the handle and to the bottom of the knot. I used two-part marine epoxy to adhere the magnet to the knot; and in this brush I had to epoxy the bottom as the handle was too short or the magnet was too long. You can see in the above photo where I drilled the bottom of the brush to place the handle magnet. This also allows me to easily hang it from any metal object to dry. Even in an earthquake that handle is staying put.
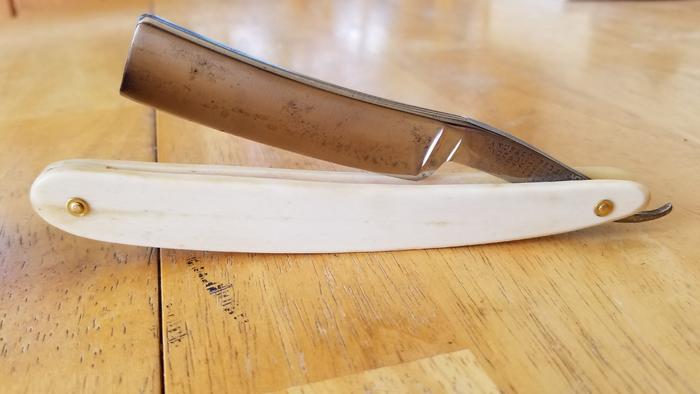
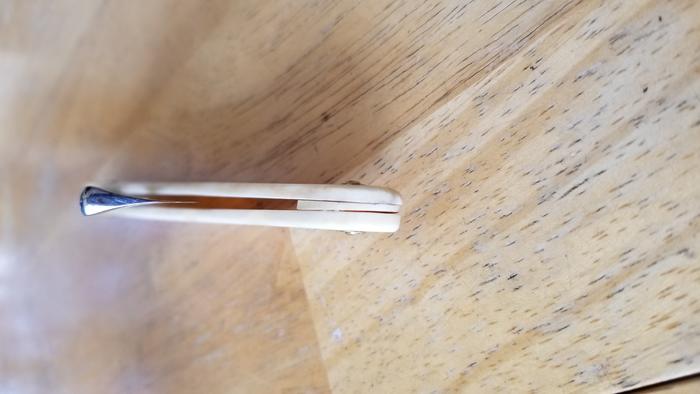
Now for the scales. My Wade and Butcher cracked the scale a couple of weeks ago. I had previously bought a pair of bone blanks from Maggards that I put to use. I traced the original scale and use my new (to me) band saw and sander to get it to shape.
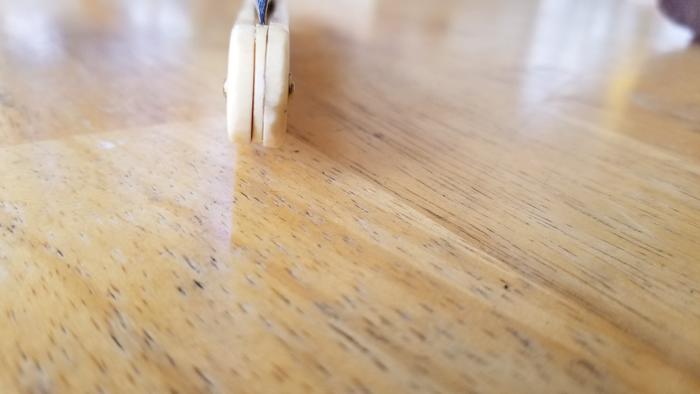
and the backside:

The scales are a little too thick at the tang. It is not easy to hold onto the razor as the tang does not stick out enough. I might take it back to the sander for a thin down. I stained the bone with coffee and sanded with wet-dry sandpaper 400, 800, and steel wool.
The wedge was the original plastic wedge, this is why it does not fit perfectly...
Thanks to all the help from the forum and a special shout out to Doughboy68 as he sent me some microfasteners which helped me to mock up and finish the razor.
-
03-29-2020, 07:36 PM #2Senior Member

- Join Date
- Jun 2013
- Location
- Pompano Beach, FL
- Posts
- 4,049
Thanked: 636
You can fill in the voice at wedge with hone dust from sanding and superglue or baking soda and superglue.
Insert the dust or soda in good and add superglue then sand.
-
03-29-2020, 08:31 PM #3Senior Member

- Join Date
- Jun 2013
- Location
- archbold ohio
- Posts
- 2,379
Thanked: 546
Looks good Darren! A bandsaw is a must have tool in my opinion. You'll wonder how you ever did without it. I like the idea of the replaceable knot.
PaulFLUS likes this.
-
03-29-2020, 09:17 PM #4Bondservant of Jesus
- Join Date
- Apr 2011
- Location
- Milan, Michigan
- Posts
- 766
Thanked: 116
I might do that eventually. That would really make it permanent. If I take the scales down more, and then really like it I might consider the superglue route. Right now I can live with the gaps. My eyes are not nearly as good as the camera eye.. Originally Posted by bouschie


-
03-29-2020, 09:23 PM #5Bondservant of Jesus
- Join Date
- Apr 2011
- Location
- Milan, Michigan
- Posts
- 766
Thanked: 116
I have already done one knot and it was a 28 or 30 mm and is really large. I tried a mixed 50/50 badger/boar and did not like it. With the Super High Density knot it really works well. On this one I used a 26 mm knot and prefer that size better, but I would have liked to get the knot further down the handle to give it a little more backbone. My original thinking on the replaceable knot was to be able to switch knots easily based on my preference or rotation. But I really haven't used a rotation before - just used a brush till it died and bought a new one. With the SHD knots I am not sure I will do anything but replace the knots with the same SHD size since I like them so much. Originally Posted by tintin
It is also easy for me to size them as I am a short drive from Maggard's and can match the hole size in the moose antler to the knots in the store!
I also have another project coming up... Building a custom door for my basement. I will be using the bandsaw as well as other borrowed tools from my brother-in-law and my father...ScoutHikerDad and tintin like this.
-
03-29-2020, 09:53 PM #6Senior Member


- Join Date
- Oct 2011
- Location
- Standish, Maine
- Posts
- 816
Thanked: 954
Bone scales should be thin. I make mine about .085. If they are thick they will not flex and will be heavy and will balance poorly. Take them apart and properly fit the wedge. No sanding dust and glue. Do it right. There are a few tutorials on how to make/fit a wedge. Take your time. You can do it.
-
03-29-2020, 10:04 PM #7Bondservant of Jesus
- Join Date
- Apr 2011
- Location
- Milan, Michigan
- Posts
- 766
Thanked: 116
They do balance poorly...
-
03-29-2020, 11:42 PM #8Skeptical Member


- Join Date
- Nov 2016
- Location
- Colorado Springs
- Posts
- 10,559
Thanked: 2197
I second what Karl.said. 0.075 to 0.085 for me. Bone needs to be thin to flex properly. You did a good job. But when your rsady take it apart and give it another go. Good luck!
It's just Sharpening, right?
Jerry...
-
03-30-2020, 01:26 AM #9Senior Member
- Join Date
- Mar 2015
- Location
- Indiana, Portland
- Posts
- 321
Thanked: 70
I especially like the brush. You had good ideas on that and carried them out n icely.
jfk742 likes this.
-
04-03-2020, 01:07 AM #10Bondservant of Jesus
- Join Date
- Apr 2011
- Location
- Milan, Michigan
- Posts
- 766
Thanked: 116
Alright folks,
I thinned the scales up and contoured the area by the tang. They are balanced now! The flex also keeps the razor tight throughout the range. I did not have a caliper so I did some math and used a ruler to get them between 2mm and 3mm thick.
Thanks for all the feedback


 Reply With Quote