
Results 31 to 40 of 42
 138Likes
Thread: Scales Experiment.
 LinkBack URL
 About LinkBacks
-
07-25-2020, 04:55 AM #31Senior Member

- Join Date
- Jun 2014
- Location
- Eastern Washington State USA
- Posts
- 406
Thanked: 59
First the failures.
- Embedding cloth into the plastic was a complete failure. You would probably have to melt it to the point of liquid to get it into the fibers.
- Trying to heat weld a wedge was a failure. The scales are too thin. By the time they get hot enough to stick together, they are hot enough to squish out of shape.
The successes:
- Using a heat gun, I was able to get them soft and bend them into a crescent shape. They hardened back up and held their curve. This gives them the "spring" that I was looking for.
- Shortening the overall length helped stiffen them up as well. I'll try making a stubby razor for them.
In the end, I pinned the scales together without a wedge and the new curve of the scales seems to be functioning without the wedge. The description of it feeling "soapy" is accurate when it is polished. I took mine back to 400 grit in order to help minimize the odd texture. I didn't have any issues sanding them, but I'm using a belt grinder (designed for knifemaking), so that may have made a difference.
-
07-29-2020, 03:03 AM #32Senior Member
- Join Date
- Jun 2014
- Location
- Eastern Washington State USA
- Posts
- 406
Thanked: 59
Well they are still too soft in such a thin piece for scales. After installing a stubby blade, they simply were not stiff enough to ensure that the blade would always close centered in the scales. At least half the time, the blade would close on one of the scales unless I made a conscious effort to avoid that. I think that the key to using these as scales would be to find an adhesive that you could use to bond them to something else, something that would be stiffer and keep them in alignment.
That being said, I think this would work as a brush handle material. I may try that in the not too distant future. I can think of a few ways to embed some boring wood or even metal into a block of this stuff. The internal wood or metal would provide a surface that epoxy would adhere to for the knot and an end cap.32t likes this.
-
08-09-2020, 09:34 AM #33Member
- Join Date
- May 2010
- Location
- New York
- Posts
- 94
Thanked: 9
Neat idea!
What about a mechanical bond to the aluminum liners, rather than trying to glue?
I'm thinking a series of holes drilled through, with tapered countersink "flares" going out the back, and press the hot plastic with the preheated liners in the vice?
Having never used the stuff, I'm not sure if it's strong enough to hold shape without shearing off inside the tapered holes, but might be worth a shot?
I've been meaning to try out some recycling projects with this myself. Have seen some really cool soft mallets made this way
-
08-21-2020, 08:15 PM #34Senior Member

- Join Date
- Dec 2011
- Location
- Omaha, Ne
- Posts
- 482
Thanked: 263
Still working out the process.
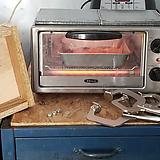
I picked up (2), 7 inch square, 1/2 inch thick, steel plates from eBay. Made a box from scrap particle board to fit them.
The plates were placed on top of the oven to warm up while the polypropylene was melting.
When all was ready, I dropped a plate into the box and placed a nut in each corner for thickness control. Scraped out the plastic onto that and the other plate was placed on top and clamped. It took a long time to cool down but popped out with no sticking issues.
I was pleased with the results. It had a relatively uniform thickness and and acceptably smooth surface. It did eat the nuts but I'll be able to retrieve those. If I have time this weekend I'll work up a set of scales out of this blank.
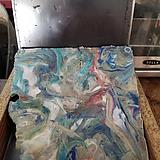
I have some Teflon cloth coming and will likely get a 6 ton shop press with in a week or 2. I believe the polypropylene (5) will work better than the HDPE (2), it certainly scrapes and sands better.
More to come.
-
08-26-2020, 11:14 PM #35Senior Member
- Join Date
- Dec 2011
- Location
- Omaha, Ne
- Posts
- 482
Thanked: 263
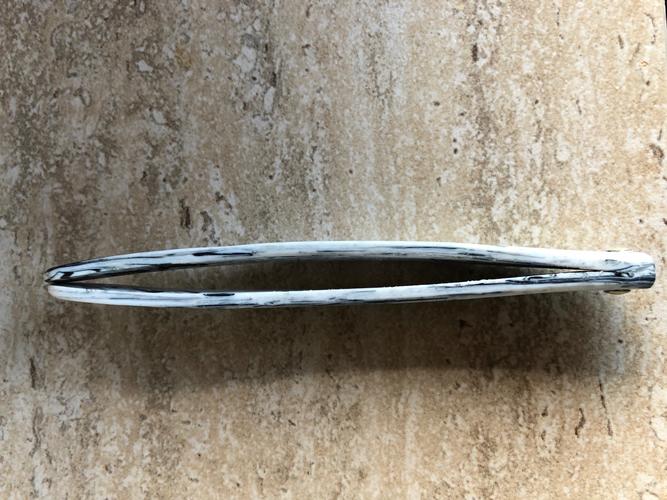
I'm happy with this set of scales.
They sanded much better than the HDPE. It still has a slightly soapy feel so 800 grit was where I stopped. A light buffing with a cotton Dremel wheel at low speed gave it a bit of shine.
Counting down to acquiring the shop press and some pattern experimenting.
-
08-27-2020, 12:22 AM #36Senior Member


- Join Date
- Feb 2016
- Location
- San Antonio, TX
- Posts
- 1,862
Thanked: 435
Those are Funky! I like them! Back in the 60's we would have called them "Mod" Well Done!
Semper Fi !
John
-
The Following User Says Thank You to Johntoad57 For This Useful Post:
joamo (08-27-2020)
-
09-09-2020, 12:23 AM #37Senior Member
- Join Date
- Dec 2011
- Location
- Omaha, Ne
- Posts
- 482
Thanked: 263
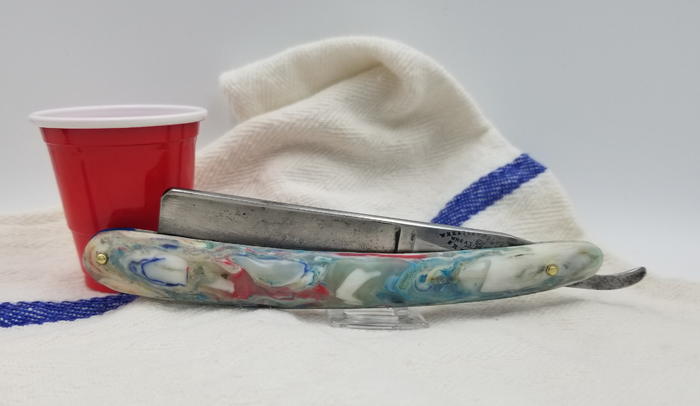
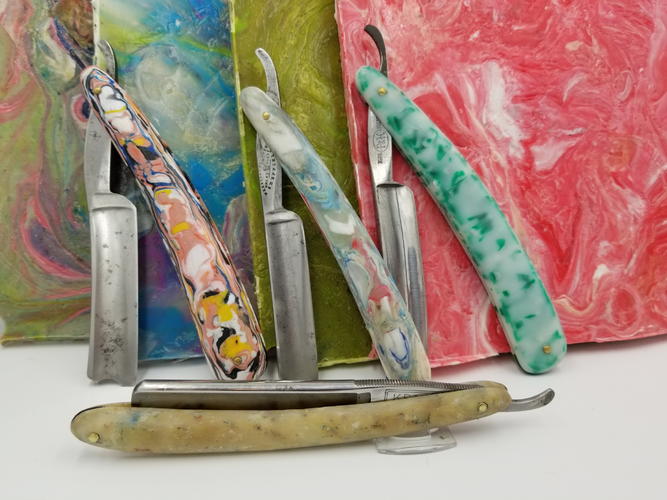
The newest set of PP scales is in the foreground. Standing razors have been previously posted. L-R HDPE, PP, HDPE.
The 7 x 7 inch plates are all polypropylene,(5) I should have enough material to last awhile.
I'll post pics of the razors as I finish them.
-
The Following 2 Users Say Thank You to joamo For This Useful Post:
cudarunner (09-09-2020), DVW (09-09-2020)
-
09-09-2020, 12:32 AM #38'with that said'


- Join Date
- Aug 2010
- Location
- Walla Walla in WA State USA
- Posts
- 11,260
Thanked: 4238
Thanks for the update. This has indeed been interesting.
 Our house is as Neil left it- an Aladdins cave of 'stuff'.
Kim X
-
The Following User Says Thank You to cudarunner For This Useful Post:
joamo (09-09-2020)
-
09-09-2020, 12:43 AM #39Senior Member
- Join Date
- Jul 2012
- Location
- Mooresville NC
- Posts
- 747
Thanked: 133
this is a pretty awesome thread. Fantastic work
-
The Following User Says Thank You to Christian1 For This Useful Post:
joamo (09-09-2020)
-
09-09-2020, 03:02 AM #40Senior Member

- Join Date
- Sep 2016
- Location
- Silicon Valley
- Posts
- 465
Thanked: 113
Wow! That came out cool! I dig the green/white swirl and the red/white swirl looks dope!
-
The Following User Says Thank You to Toroblanco For This Useful Post:
joamo (09-09-2020)


 Reply With Quote