Results 1 to 10 of 13
Thread: Making new pressed horn scales.
Threaded View
-
08-04-2021, 06:56 PM #1
 Making new pressed horn scales.
This is going to be a multi-part post because it represents about 8 months of work on my part. I'm going to start by describing what actually worked, then in additional parts I'll talk about what didn't and why I think it didn't.
Background:
A friend asked me if I could somehow make new scales for his 1830's Greaves Patent Protector razor, for which he had only a blade. I had already been thinking about using my resin 3d printer to make scale molds, so I said yes unaware that I was about to set sail on a cursed Greek epic.
Process:
I already had 'high temperature resin', that is, it's measured heat deflection is about 320 Fahrenheit or 160 C. Specifically, Siraya Tech Sculpt.
I designed a 2 part press mold of a simple coin design, printed it on my Elegoo Saturn printer, clamped a small piece of old razor scales into it, and plopped the whole thing including a c-clamp holding it together into the toaster oven at 300 F for 30 minutes. Figuring it would smell better, I'd greased the mold with coconut oil.
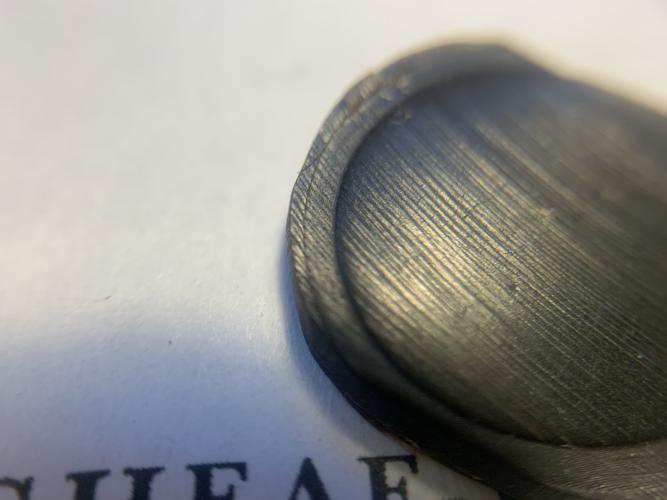
The coin shape I cut didn't fit well into the mold and I didn't get particularly clear impression, but it was good enough that I decided to go full steam ahead.
I got out Lummus' old article with the only extant picture of the 'modern' version of the Patent Protector and created digital versions of the front and back scales for the razor. Lummus didn't have closeups and the reproduction wasn't good, but he did at least say what the text was on both sides. I used other Greaves razors in my collection from the same time period to refine the details, spent a few days tracking typography (which is its own entire topic: I settled on Baskerville as the closest to the typeface Greaves used, but it's not an exact match, nor can I find one).
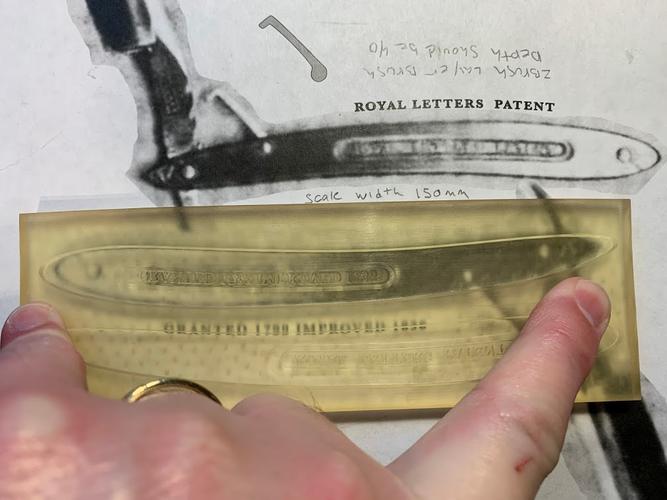
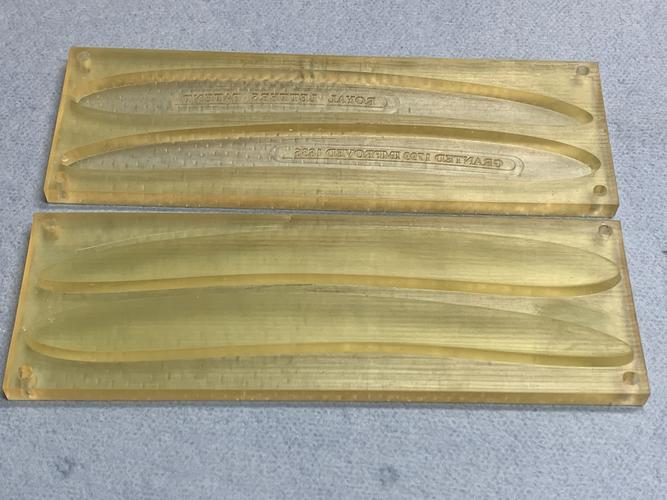
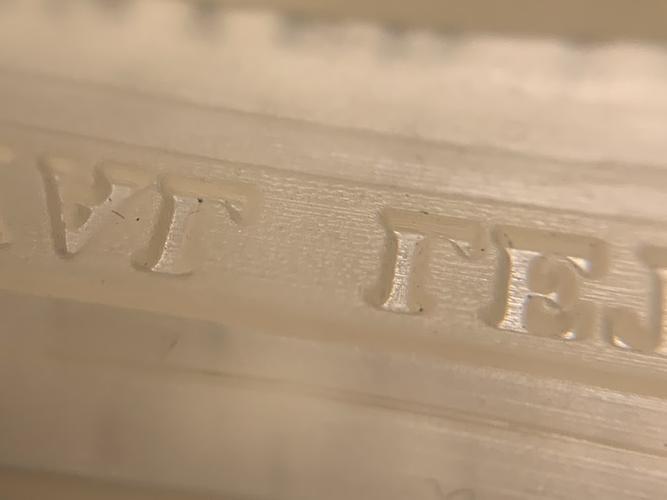
(My resin printer has quite good resolution)
With molds printed, I then spent 6 months profoundly failing to get anything to work, sometimes failing to do anything but ruin horn blanks.
FINALLY I stumbled on a process that worked.
The first step was thinning down the horn blank to about the final thickness of razor scales. The thicker the piece of horn, the less effective the technique.
Step 2 is soaking that horn in heated ammonia for 3 weeks.
Yeah. Just that.
When the ammonia was cold, it didn't work.
Getting to this point I'd bought a cheap vacuum pot, so I used that (which was really just a stainless steel kitchen stock pot with a fancy lid*). To heat it I used an under-tank heater for a reptile enclosure since they provide moderate heat at a reasonable power cost (about 60 watts draw, much better than my other option which was a 1200 watt space heater, which I'd learned from previous excursions is... not cheap to run for weeks at a time).
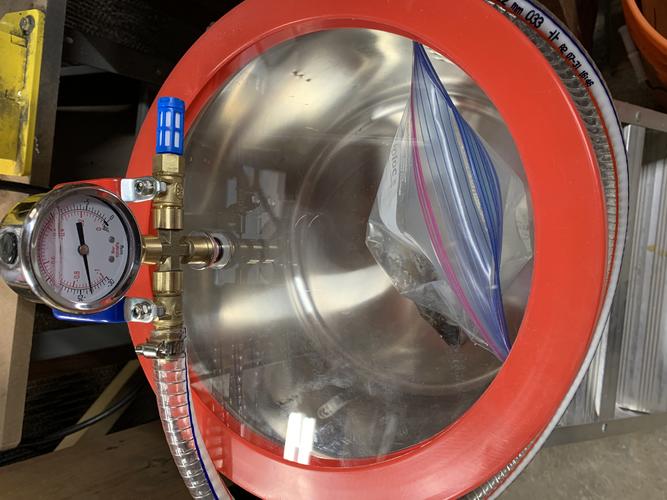
At 2 weeks, the horn was almost ready, but not quite. Longer than 3 weeks might possibly have been better, but I was running out of patience. At any rate, 3 weeks in and I could cut the horn blank with normal paper scissors. To get a cutting guide, I put the entire slab of horn into my mold, clamped it with c-clamps and cooked it at 280F for 15 minutes. That let me cut pretty precisely sized scale pieces.
With the mold greased with coconut oil, I then cooked those scale pieces at 280F for an hour. It gave me quite good impressions, but I knew from previous experiments that the horn would take more time to re-harden after the ammonia bath, so I left the scales in the mold with the c-clamps for another month after which they were ready to fit up... With the caveat that by this point I'd gone through all my black horn blanks and had only translucent ones, and the process of chemically softening the horn added to chemically dyeing it black was not as successful as I wanted.
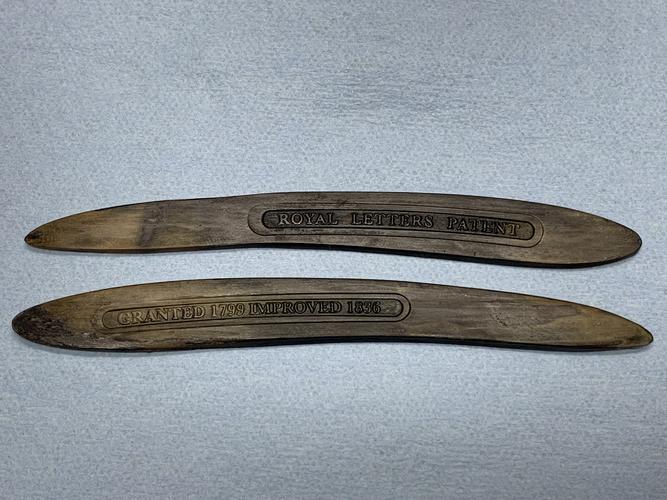
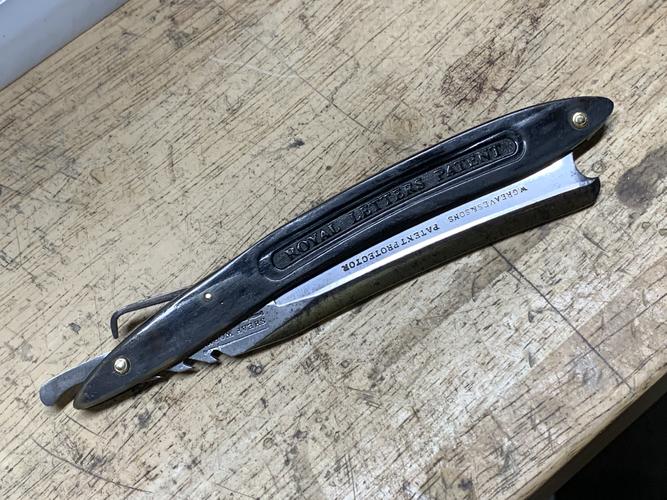
Further details:
Making the small metal latch arm was pretty straight forward metalworking, though I had to make a second one when the first turned out to be missing a vital feature hidden inside the scales in Lummus' picture. Fortunately, petercp4e shared pictures of his older model that clarified the latch.
The molds I used, as printed, were not structurally sound enough for what I was doing. To get them to work, I modified the press I'd made to flatten old scales and gave the negative mold steel reinforcement so it didn't have room to deform under load and temperature.
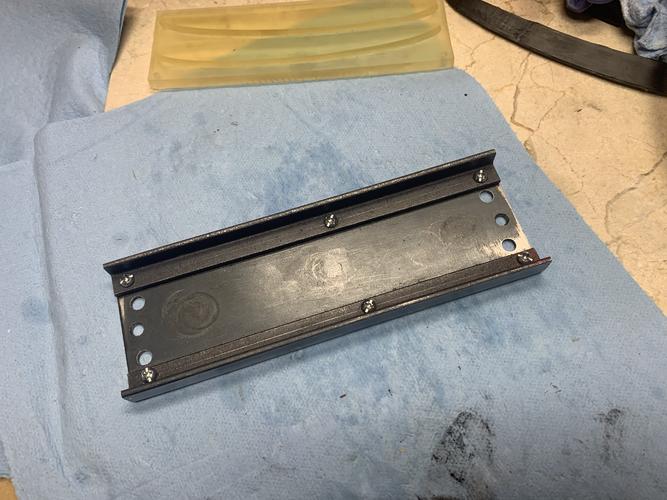
In designing the molds I went through several iterations, including one which was a 1 part mold that relied on the steel back plate to push the horn in, but what ultimately worked was a 2 part mold designed to be self-registering. It's also worth noting that if you do this yourself, you need to design the scales with a draft angle so they can be removed from the mold. Unlike most every other part of the process, I didn't need to learn that by doing it wrong since there are good resources out there on mold design.
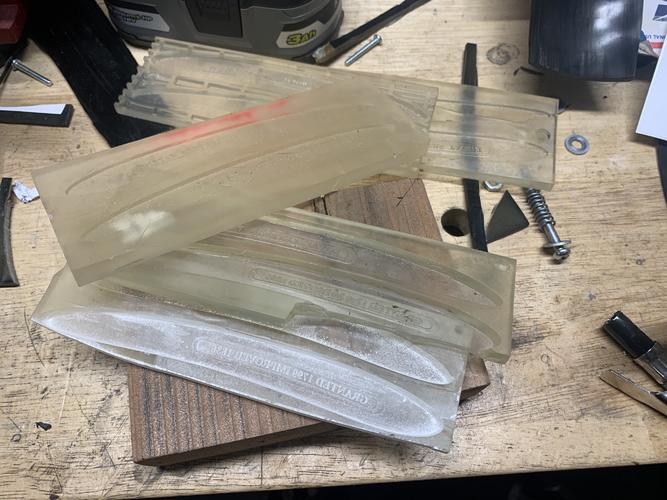
Next up: a catalog of failures
*The lid of the vacuum pot is a 1/2 thick piece of polycarbonate with a silicone gasket around the edge and some brass hardware with a vacuum gauge mounted in it. That's all fine for the vast majority of applications, but using heated ammonia in it threw me a curveball. Since the lid rested above the heated ammonia, it invariably condensed on the underside, so the brass nut and pipe going through the polycarbonate were effectively also soaking in ammonia. That leached copper salts out of the metal and dripped them back into the rest of the ammonia, creating a really slow dye. So the translucent horn I put in there came out black after 3 weeks. Which would have been great, except I needed to sand and trim it slightly to assemble the razor, leaving weird clear spots. Dying it a second time using normal hair dye stripped off the entire layer of dyed horn and left a rough, patchy surface with considerably less detail from the mold. I was able to fix that by just clamping it all tight and cooking it a couple of times, but it did not make me happy.-Zak Jarvis. Writer. Artist. Bon vivant.
-
The Following 4 Users Say Thank You to Voidmonster For This Useful Post:
JBHoren (08-04-2021), jfk742 (08-04-2021), markbignosekelly (08-04-2021), petercp4e (08-04-2021)


 38Likes
 LinkBack URL
 About LinkBacks


 Reply With Quote