
Results 11 to 20 of 25
 29Likes
 LinkBack URL
 About LinkBacks
-
12-18-2022, 04:19 PM #11Senior Member


- Join Date
- Dec 2018
- Location
- Gainesville, FL
- Posts
- 6,625
Thanked: 670
Not intended to be hurtful but I also have to say you should curb your expectations for that one. Without some serious repairs that one is not going to shave or even hone up. Mike pretty well covered it. The upside is that you don't have much in it. Also there are so many razors out there to work on that you can pick up for cheap that are much easier candidates. AND, since you are not strapped for shavers you can try out repair techniques and learn what works and what doesn't. Worst case, you screw it up then you add it to the wind chime pile. I think most guys here who do restoration have one of those.
It happens. I had a beautiful Böker with sculpted scales in the original box that need a minor chip removed near the heel. Using a Dremel to correct it I lost my grip and snapped the entire heel off. Straight to the wind chime pile with it.
When you're new to it it's hard to recognize what's in good shape and what's not. Plus, at least for myself, I would get really excited about a new one. I still do. It's called RAD: Razor Acquisition Disorder. But, you're young and have a lot of resources to work on them with so you'll find others that you can have plenty of success with...and we'll help you along the way.Iron by iron is sharpened, And a man sharpens the face of his friend. PR 27:17
-
12-18-2022, 07:49 PM #12Senior Member


- Join Date
- Mar 2015
- Location
- Akron, Ohio
- Posts
- 12,107
Thanked: 4313
The parts/junk box.
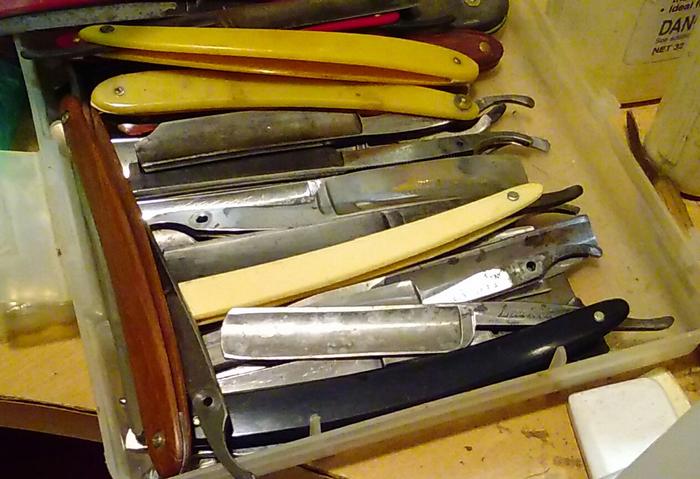
Yeah, there's probably a few that could be saved, but for what, when a look thru a few antique shops can turn up some real gems for $20 or less. Quite often, they need no more than pulled apart, cleaned, and a good rub with a good metal polish. 3M marine metal restorer/polish is the best, so far.
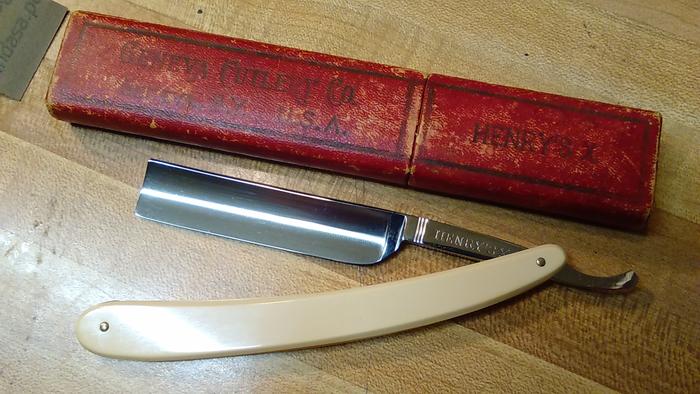
For example, picked this one up for $15. He said it was bought as a anniversary gift, from his wife. She had passed, he'd never used it.
Or the day I basically robbed the guy of a pile of oldie's, for 150.00 Quite a few that would fetch way more than what I paid for the lot of um, as is.
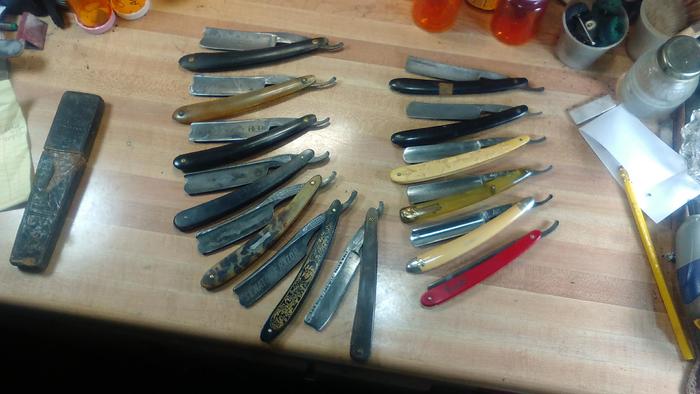
Even more, once restored.

I've spent my time playing with junk, seeing if I could make it live again. Its a good learning experience, that should be done to learn what not to do. For that day you find that special, holy grail type razor you've always wanted. By then you should know what can be done, and how to.Mike
-
12-19-2022, 03:17 AM #13Senior Member

- Join Date
- Dec 2020
- Posts
- 176
Thanked: 1
 Originally Posted by outback
 Originally Posted by PaulFLUS
Originally Posted by Gasman
Originally Posted by outback
Originally Posted by PaulFLUS
Originally Posted by Gasman
Originally Posted by outback
To be clear about context here, the reason I have this junk razor is because my dad has a bad habit of going to bad antique shops, and buying crap razors. Unfortunately when I convinced him to buy a much more expensive brand-new Dovo razor instead, this actually reinforced his initial habit because the Dovo came so badly warped from the factory that it was actually dramatically worse than most of the garbage antique shop razors.
The only reasons I want to attempt some restorations on it are:
1. To learn more about razors, e.g. what each part of the razor is, how they're shaped, why they're shaped that way, how to sharpen them correctly, how to grind them, etc.
2. To learn without putting any more useful razor at risk, as all of my attempts to hone my own more decent razors have failed so far and I don't want to be removing tons of good metal only to keep failing over and over again.
I have no attachment to this razor one way or the other, even from a buyer's remorse standpoint, as I didn't even buy it.
That out of the way, I don't actually understand what is so critically flawed about this razor. I understand the heel looks awkward and janked up in shape, but besides looking uncomfortable to shave with I don't see exactly how that causes any problems with the sharpening / honing process. I was making sure to pay close attention to the blade as I was attempting to hone it, it was definitely sitting nice and flat on the stone throughout the entire process, so I don't see how the stabilizer being slightly too thick is a critical problem or even a problem at all honestly.
Is the geometry of this razor so wrong as to make my practice honing it pointless? Does that explain why I haven't been able to get it in remotely hair-cutting shape? If so, why?
-
12-19-2022, 11:14 AM #14Skeptical Member


- Join Date
- Nov 2016
- Location
- Colorado Springs
- Posts
- 10,548
Thanked: 2194
If I were going to try to fix this...
First I wod use a diamond plate and reshape the edge to match the shape on the spine of the razor. That is how it was in the beginning. At that point the edge would be smiling and not frowning. Then grind the heal back so it wouldn't be in the way when honing. Then try to do a bevel set.
If you want to do this go for it. You can't hurt it any more than it is. Put the razor on a piece of paper, trace the spine of the razor. Move the razor so that the edge is on that line on the paper, then mark the edge so you can see how much you need to grind away from the edge to get the same shape.
Ok. It doesn't have a frown, but it's far from the shape it should be.
That is step one in my book. Then go after the heal.Last edited by Gasman; 12-19-2022 at 11:53 AM.
It's just Sharpening, right?
Jerry...
-
12-19-2022, 12:21 PM #15Senior Member
- Join Date
- Mar 2015
- Location
- Akron, Ohio
- Posts
- 12,107
Thanked: 4313
Yes....that's why it won't hone. The leading edge of the razor has been honed away to the point that the stabilizers are now hitting the stone. That's bad.! It will keep the cutting edge off the hones until the stabilizer clears the edge of the hone. The stabilizers should "NEVER" touch the hone.
I too bought a new Dovo, best quality 6/8.
It wouldn't hone up on the last 1/3 of the blade, closest to the heal. Looking it over closely, I noticed one side of the stabilizers was never ground. I thinned/ground it out with the dremmel, and sanded it smooth again. Hones up just fine, now.
I'm not trying to deter you away from working on it. I agree its just a learning tool, I did the same thing when I started restoring these things, and got the same flak.
Your doing what you should, to learn, I'm with ya. Keep buying the junk stuff for now, you'll see were only trying to get you over the hump of trash that your crawling over, later down the road.
As you see, my avatar is young Frankenstein
I bring um back to life, after death, sometimes.... from salvaged pieces.
Were just trying to help make things easier for you, cause we've already been there, done that. Just trying to remove the bend from the learning curve. Nobody's giving u the run around, just plain, in your face, truth.
Once swallowed, it makes it a lot less difficult down the road. Just saying.
We want you to succeed, just pointing out the obvious. Carry on, brother.! Git-R-Done
-
12-19-2022, 01:44 PM #16Senior Member
- Join Date
- Dec 2018
- Location
- Gainesville, FL
- Posts
- 6,625
Thanked: 670
What they said. Plus, speaking for myself, I just don't want to see you get discouraged with one.that might be beyond what you already know how to correct. That's all. But, I took on projects that were beyond my skill set early on and I further ruined some blades that were already junk and it didn't stop me. People told me the same things and I didn't know why at the time.
If you want to work on it then do it. You can't hurt it really.
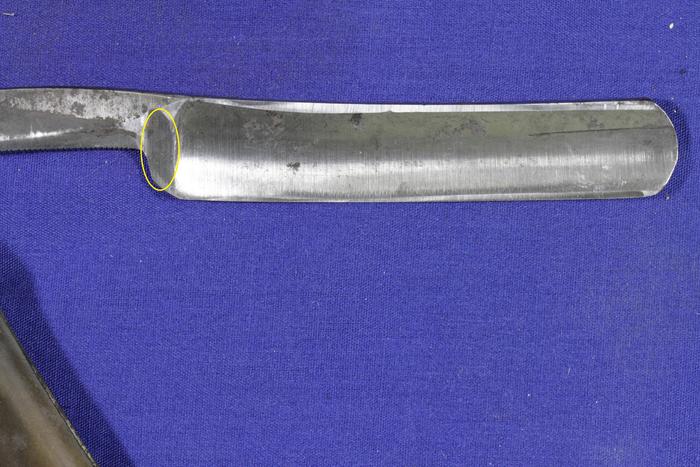
This is what Jerry is talking about:
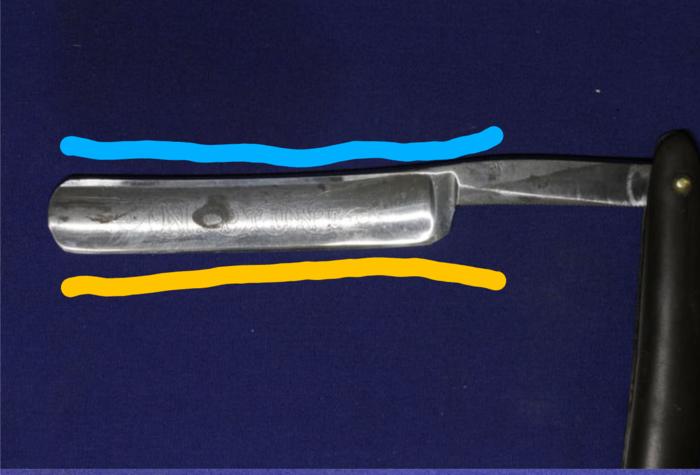
Obviously the lines are not clean but they follow the curves he's referring to. You see how the shape of the blue line doesn't match the shape of the yellow line? The edge needs to be corrected and actually I disagree with him a little. In this pic it does look like that blade has a slight frown.
Now look at where the red lines are pointing.
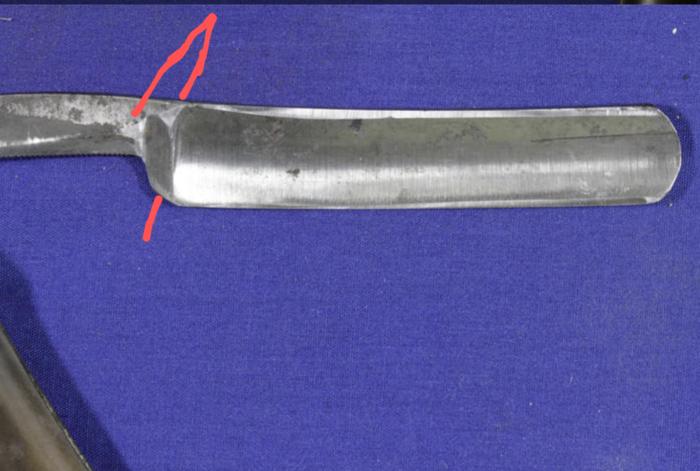
This is what Mike is talking about. The stabilizer is hitting the stone in these places. It should never do that. It may have always had problems with the geometry.but it also has been honed to death. It can be corrected but you are going to have to regrind those curves and that plane that the farthest left line points to.
Also look at how the bevel width changes toward the toe. As you draw the razor along the stone the spine near the toe can spend more time on the stone than near the heal. That causes it to thin and throw your bevel angle off. You will need.to check the thickness of the spine and maybe correct it to get the right bevel angle: 17°-20° but preferably somewhere near the middle of that range but hopefully evenly along the length.
There are some good posts that show how to determine bevel angle.
Those are a.few things you will definitely need to fix and there may be more. You'll have to see how it plays out. Funny: a razor seems so simple but there is really quite a bit to their geometry and getting them to work correctly.Last edited by PaulFLUS; 12-19-2022 at 01:53 PM.
Iron by iron is sharpened, And a man sharpens the face of his friend. PR 27:17
-
12-19-2022, 02:07 PM #17Senior Member
- Join Date
- Dec 2018
- Location
- Gainesville, FL
- Posts
- 6,625
Thanked: 670
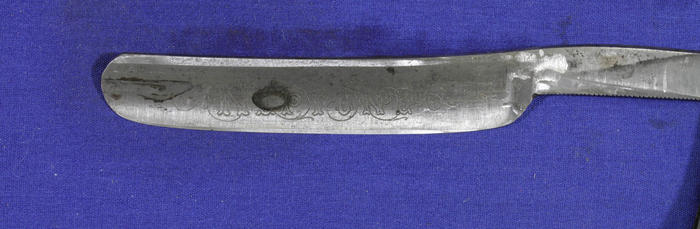
Also, you're starting to get a heal hook.
That heal might be the first thing you want to correct.
Again, the line is not clean, neat or pleasing to the eye but it needs to be worked back out of the way. Take a coin and lay it over the heal and then mark the blade with a sharpie. This will give you something to follow. Play around with the line until it looks right then sand that away on a belt sander or even a diamond plate. Just make sure to go lengthwise not across or you'll snap that heal off and then it is definitely headed to the junk drawer.Iron by iron is sharpened, And a man sharpens the face of his friend. PR 27:17
-
12-19-2022, 04:04 PM #18Senior Member
- Join Date
- Dec 2020
- Posts
- 176
Thanked: 1
Originally Posted by outback
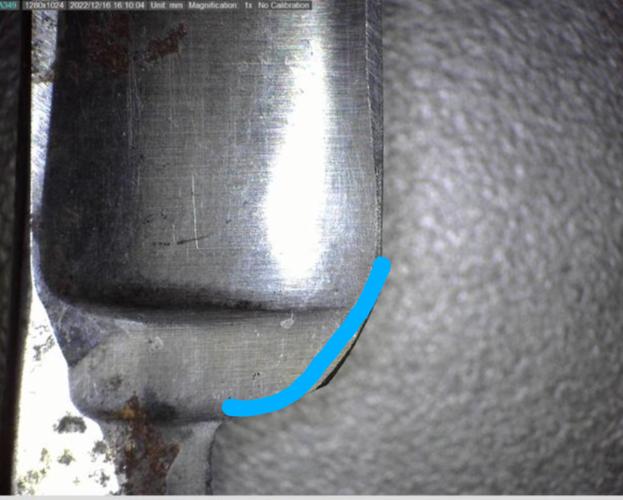
Oh okay, thanks for the pictures that makes more sense now. When he said the stabilizer was hitting the stone I thought he was referring to this part: Originally Posted by PaulFLUS
This would explain my confusion at how this would be causing any issues. I did notice the huge un-evenness of the bevel across the length of the razor but had no particular idea of why that might be happening.
I'll go take a shot at grinding this right now, see if I can get some results. I brought a few other razors to work that are in much better shape to practice on, photos coming later.outback likes this.
-
12-19-2022, 09:36 PM #19Senior Member
- Join Date
- Dec 2020
- Posts
- 176
Thanked: 1
I attempted some modifications. The first thing I tried to do was adjust the blade so that it was roughly smiling the same way as the spine. I did actually get pretty close although I definitely went too far on the toe. I did this mostly on a belt sander. I used a dremel and a coin to try to get the heel to look like a more normal shape, which seemed semi-successful. I tried to grind down the areas where the stabilizer was too thick, I had no idea what I was doing there and mostly just gouged the metal there. It does sit flatter on the hone now which is nice. After all that I spent a good 10 minutes with lots of pressure trying to coax an edge out of it on the 1k stone, seems like that was a failure as well, Near the toe and heel it was far too thick to sharpen that way, the middle of the blade did look almost as thin as my better razors, but nonetheless it still did not cut any hair on my arm after that.
Here is what it looks like:
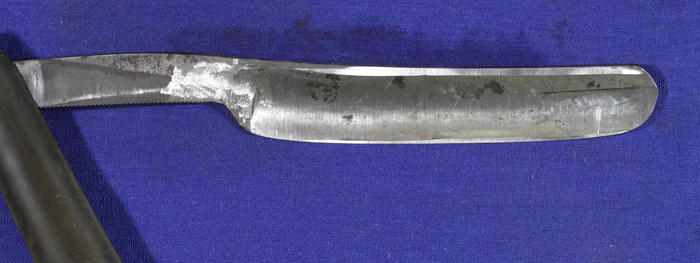
I suspect that once you get a razor down to 1/2" wide like this, even without the list of other considerations, getting a nice edge on it is much more difficult. I don't know.
Despite the fact that I was essentially just torturing this razor for fun, if there's any useful observations that could be made here so I don't repeat these mistakes in a real scenario, please point them out.outback likes this.
-
12-19-2022, 11:42 PM #20The Great & Powerful Oz


- Join Date
- May 2008
- Location
- Bodalla, NSW
- Posts
- 15,636
Thanked: 3751
I think you could have left the toe alone & there was no need to grind away on the tang & stabiiiser as that part of the razor shouldn't touch the stones anyway. Possibly you could have just curved in a bit deeper bringing the heel further forward. Originally Posted by rickytimothy
You may have been able to correct that slight frown in the honing process. Don't think a belt sander was necessary.
Just accept that you won't get an edge all the way to the heel with something so worn..
If you start your sharpening at about 45º & gradually lower it you'll save some spine metal.outback likes this.The white gleam of swords, not the black ink of books, clears doubts and uncertainties and bleak outlooks.


 Reply With Quote