
Results 1 to 10 of 25
 29Likes
 LinkBack URL
 About LinkBacks
-
12-17-2022, 04:33 PM #1Senior Member


- Join Date
- Dec 2020
- Posts
- 181
Thanked: 1 Restoring a Cheap Antique Shop Razor
Hi,
I have this "Neptune" razor my father bought for cheap at an antique shop. It is in pretty bad shape, I posted about it ages ago before I got sidetracked, I remember people pointing out that the heel needs to be corrected, the bevel is very blatantly uneven, and the thing does not cut at all.
I now have access to a full Metallurgy workshop, which means I have a 1K waterstone, 4k/8k waterstone, microscopes, polishing wheels up to 1 micron, grinders, basically anything I could possibly need to do this, the only thing I don't have is the knowledge of how exactly I should go about it.
I did do a zoom session with gssixgun 2 years ago, but my attempts at sharpening this myself so far have failed so I don't think I absorbed enough skill from that to figure this out completely on my own.
Any advice on where to start with this razor?


 RezDog likes this.
-
12-17-2022, 06:03 PM #2Senior Member


- Join Date
- Mar 2015
- Location
- Akron, Ohio
- Posts
- 12,118
Thanked: 4316
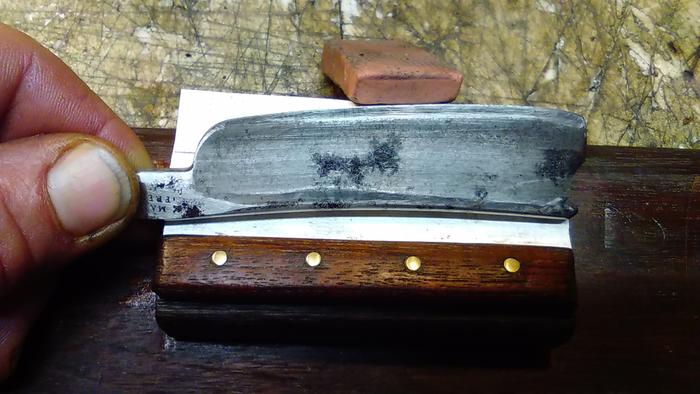
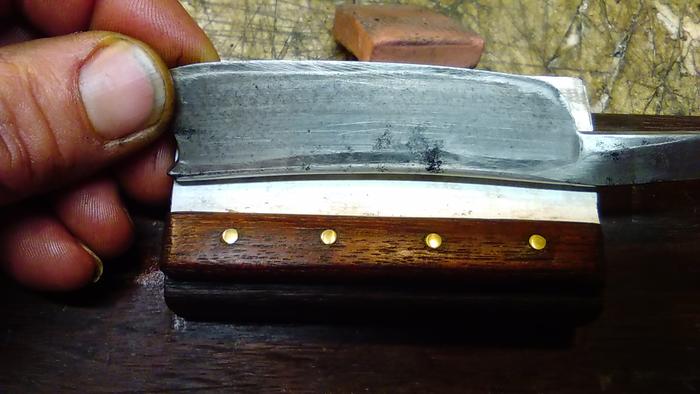
Need better pics of both sides of the blade, in whole. Pics of parts of the razor does me no good.
Need to see the condition and hone wear that the blade is in.
-
12-17-2022, 07:01 PM #3Senior Member
- Join Date
- Dec 2020
- Posts
- 181
Thanked: 1
How close do you want them? I can go take some macros right now, just need to know what I'm taking. By default I would just be laying the razor flat and taking a close up photo of the whole blade, with no particular emphasis on the bevel. I could also shine light on the bevel or tilt the razor if necessary. Originally Posted by outback

-
12-17-2022, 07:30 PM #4Senior Member
- Join Date
- Mar 2015
- Location
- Akron, Ohio
- Posts
- 12,118
Thanked: 4316
Like these.
-
12-17-2022, 09:15 PM #5Senior Member
- Join Date
- Dec 2020
- Posts
- 181
Thanked: 1
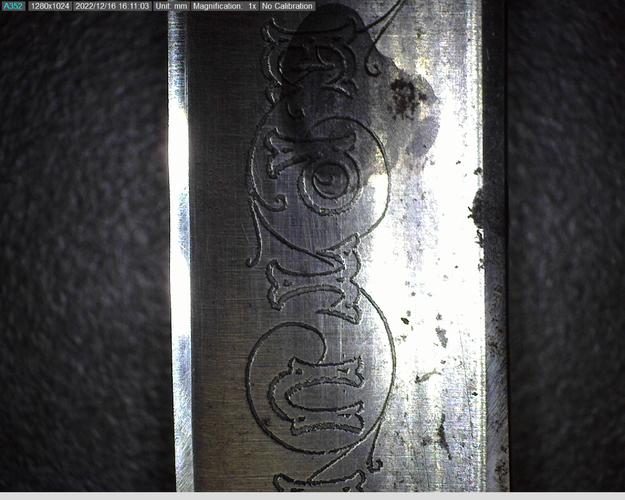
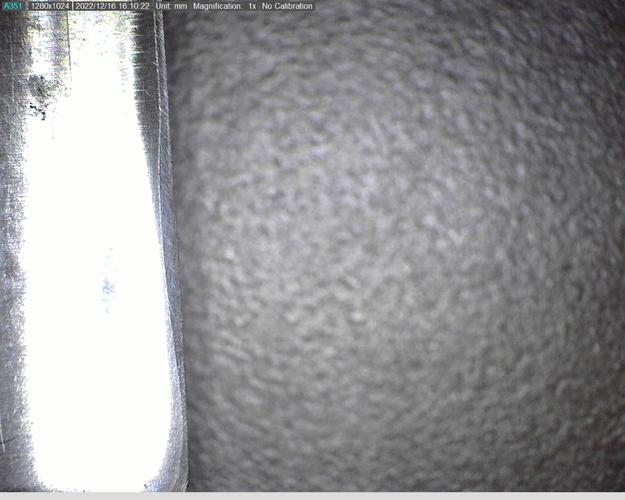
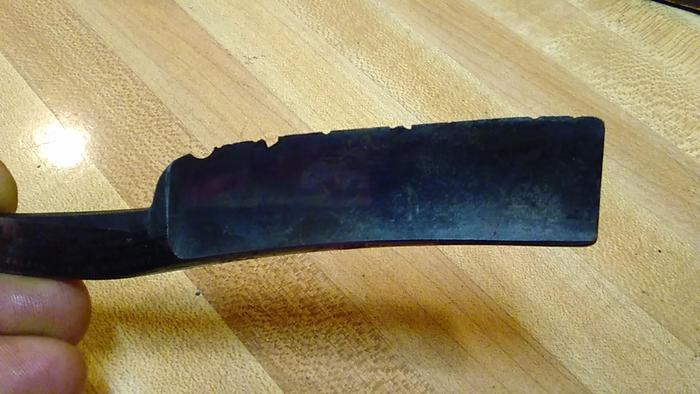
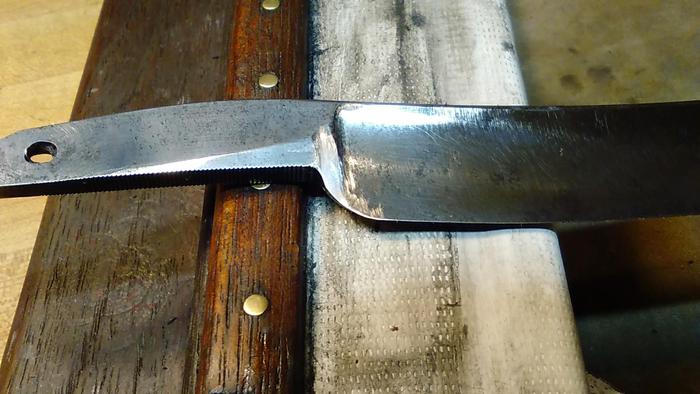
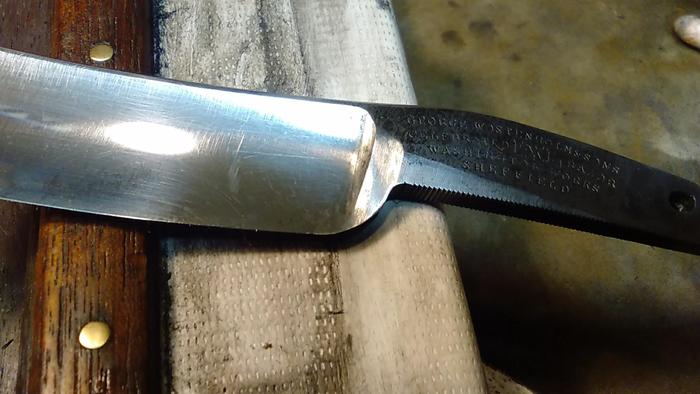
Here you go:
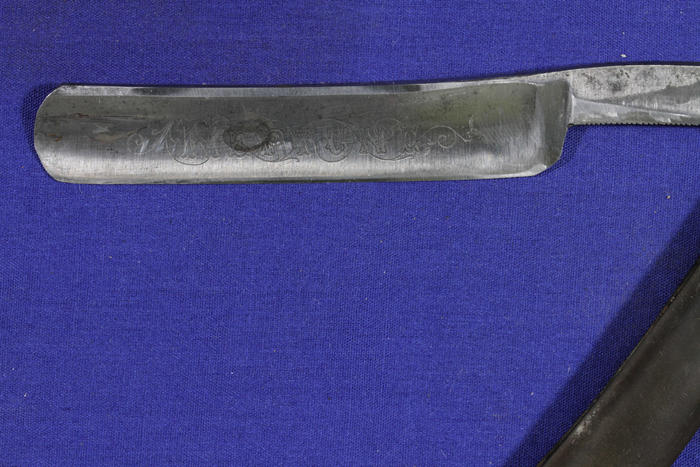
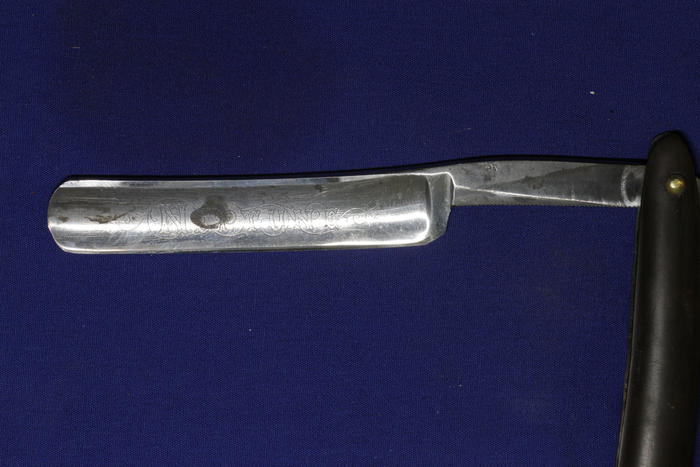
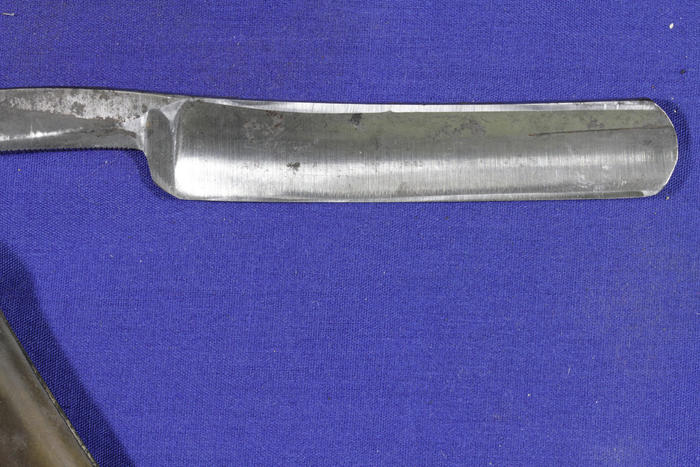 RezDog likes this.
-
12-17-2022, 11:19 PM #6Senior Member
- Join Date
- Mar 2015
- Location
- Akron, Ohio
- Posts
- 12,118
Thanked: 4316
1. Its been honed to death.
A major heel correction is in need. Hone wear is hitting the whole width of stabilizer.
To be blunt, and honest....not worth the effort, or time, to make usable.
Toss it, there's so many more better blades out there. Especially to try and learn to hone something like this, let alone, restore.
But if you want to try, you can. Your going to have to relieve the stabilizers, so the edge clears the hone's, then thin them back down, as originally.
Here's an example of what I mean.
Their the same, ones been reground, with heal and stabilizers thinned. Other is still in original condition. Its one that I never would have touched, in my restoration beginning's, till I'd gained some more skills.
I do believe there's info in the library on this subject, too. But you need that clearance, so it'll hone properly. Period..!!
Other than that, the hone wear looks fairly even.
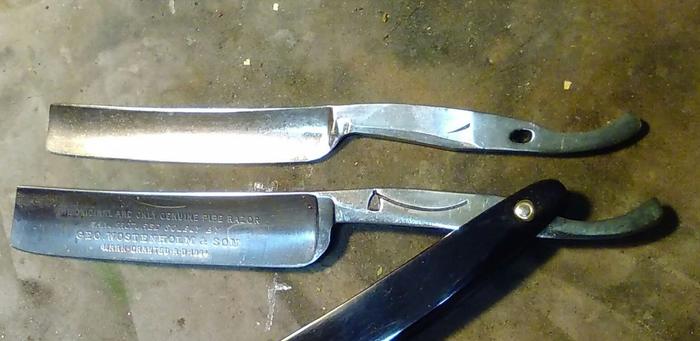
Another in progress of thinning. After chip removal.
How it should look once done. Notice how the edge is now in front, and below the stabilizers
Last edited by outback; 12-17-2022 at 11:30 PM.
Mike
-
12-17-2022, 11:45 PM #7The Great & Powerful Oz


- Join Date
- May 2008
- Location
- Bodalla, NSW
- Posts
- 15,638
Thanked: 3751
As Mike says it's pretty much past its use by date but you could practice on it.
If you do use a grinder to remove the stabiliser take care to not apply it to the wheel width ways you can tear chunks off the blade that way.
A slow speed belt or wet grinder would be best.
After you've done that the razor could have a new geometry depending on how much the stabiliser interfered but you'd learn a lot about restoring an edge & if it's even possible..outback likes this.The white gleam of swords, not the black ink of books, clears doubts and uncertainties and bleak outlooks.
-
12-18-2022, 01:55 AM #8Senior Member
- Join Date
- Feb 2018
- Location
- Manotick, Ontario, Canada
- Posts
- 2,819
Thanked: 563
I don’t have access to a grinder and using one to reshape the stabilizer kind of scares me. I have been able to do that manually with a coarse diamond hone. I felt it was less dangerous for me and gave me greater control over the final results.
onimaru55 likes this.David
Shared sorrow is lessened, shared joy is increased
― Spider Robinson, Callahan's Crosstime Saloon
-
12-18-2022, 01:58 AM #9Senior Member
- Join Date
- Mar 2015
- Location
- Akron, Ohio
- Posts
- 12,118
Thanked: 4316
I use a pencil grinder in my dremmel. Very low speed and lite touch. Not for the beginner, IMHO. But that razor is a perfect candidate for a learning tool. Look at the geometry of good razors, use your marble to come up with ideas and outcome of doing things, beforehand. Like carpentry..measure twice, cut once. Cause ya cant put it back on once ya cut it off.
Dig in, keep us up on your progress. We can give pointers along the way.
But check the library on restorations n such. Get an idea of what's involved, first.
Again...measure twice, cut once. Plan your work, work your plan. Slow wins the race...unless your me.

Last edited by outback; 12-18-2022 at 04:07 PM.
Mike
-
12-18-2022, 12:03 PM #10Skeptical Member


- Join Date
- Nov 2016
- Location
- Colorado Springs
- Posts
- 10,559
Thanked: 2197
I'm with Mike. Wrap it in many layers of duct tape and trash it. It's beyond worth the effort. 35 to 45 bucks on ebay will get you something worth working on. Sorry to be blunt.
It's just Sharpening, right?
Jerry...


 Reply With Quote