
Results 11 to 20 of 39
 100Likes
 LinkBack URL
 About LinkBacks
-
01-12-2023, 01:03 AM #11Hones & Honing


- Join Date
- May 2005
- Location
- Saint Paul, Minnesota, United States
- Posts
- 8,023
- Blog Entries
- 1
Thanked: 2209
.
.
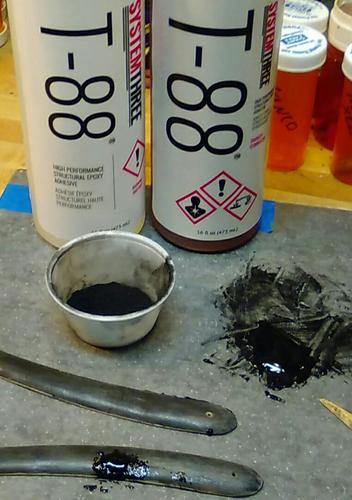
Carbon black can be found at Art Supply houses as a pigment and graphite is purchased in a little tube which is to be used as a lock lubricant.Randolph Tuttle, a SRP Mentor for residents of Minnesota & western Wisconsin
-
01-12-2023, 03:04 AM #12Senior Member


- Join Date
- Mar 2015
- Location
- Akron, Ohio
- Posts
- 12,107
Thanked: 4313
Being able to grind the charcoal into a fine powder does pack into smaller areas of bug bites, typical along the edges of the scales, and leaves a smooth, solid finish. Originally Posted by RezDog

Were as the bog oak is quite lumpy, and has a more porous texture.
Last edited by outback; 01-12-2023 at 04:51 AM.
Mike
-
-
01-12-2023, 10:50 PM #13Senior Member


- Join Date
- Dec 2018
- Location
- Gainesville, FL
- Posts
- 6,625
Thanked: 670
I also use charcoal powder plus some dark brown sawdust to give that slight hint of brown to the epoxy. Some horn more than others is lighter in color and the jet black shows in a patch.
https://sharprazorpalace.com/worksho...ml#post1939944Iron by iron is sharpened, And a man sharpens the face of his friend. PR 27:17
-
The Following User Says Thank You to PaulFLUS For This Useful Post:
DZEC (01-16-2023)
-
01-12-2023, 11:10 PM #14Senior Member
- Join Date
- Dec 2018
- Location
- Gainesville, FL
- Posts
- 6,625
Thanked: 670
Unless you live in Arizona or similar arid climates use WD-40 instead. Locks don't really need much lubrication and work fine dry as long as they are free from corrosion. WD-40 is one of the best anticorrosive agents you can get and it is not oily. Oil is your other enemy with locks because the springs inside are so small(the wire is about the diameter of a beard hair) that the viscosity of the oil renders them inoperable causing the tumblers to stick. Originally Posted by randydance062449

On the left is a typical auto lock cylinder spring and on the right is a typical residential/commercial lock cylinder sprng.
In climates where there is any appreciable amount of humidity graphite will turn to gum inside the lock and if there is any oily residue it will turn into sticky gum actually making it work worse than it would clean and dry. In addition to that, more than a puff of graphite can be compressed by the insertion of the key and turned into a rock. I have pulled key shaped rocks out of locks where.the owner figured that if a little is good a lot must be great.
The one downside to using WD-40 is that it dissipates quicker than oil. Although this is actually a good thing it necessitates more frequent use. As a rule of thumb once per quarter/season is best.
I'm done...
Carry on...Iron by iron is sharpened, And a man sharpens the face of his friend. PR 27:17
-
The Following 3 Users Say Thank You to PaulFLUS For This Useful Post:
DZEC (01-13-2023), randydance062449 (01-16-2023), tintin (01-13-2023)
-
01-16-2023, 12:18 AM #15Senior Member
- Join Date
- Feb 2018
- Location
- Manotick, Ontario, Canada
- Posts
- 2,807
Thanked: 559
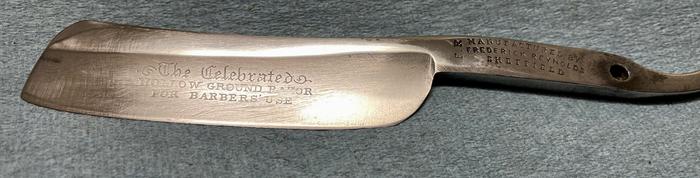
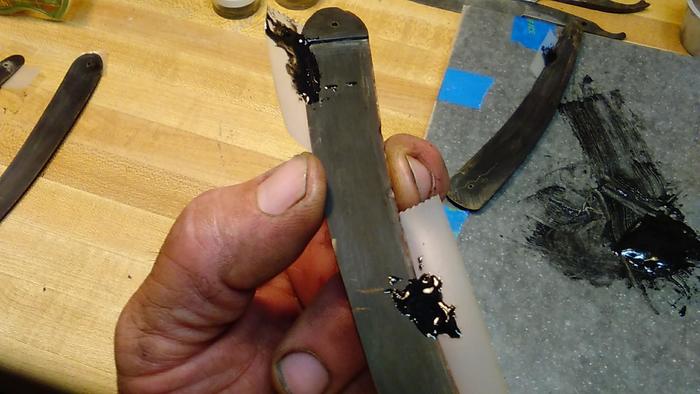
Well I got to where my tools are and managed to separate the scales from the blade. You’ll see in the next post that was not entirely successful.
I used the 3M Marine and some 1200 wet/dry to remove most of the black stuff. The blade seems to be in excellent shape with the exception of some microchips that I’ll have to hone out later.
 randydance062449 and outback like this.David
Shared sorrow is lessened, shared joy is increased
― Spider Robinson, Callahan's Crosstime Saloon
-
01-16-2023, 12:24 AM #16Senior Member
- Join Date
- Feb 2018
- Location
- Manotick, Ontario, Canada
- Posts
- 2,807
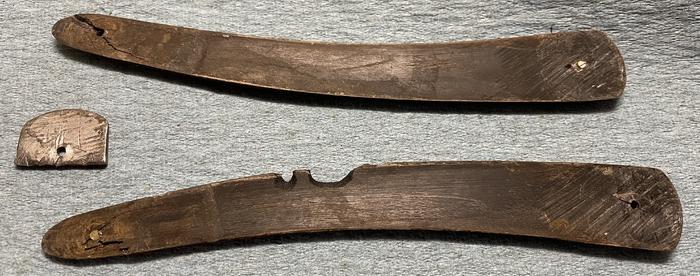
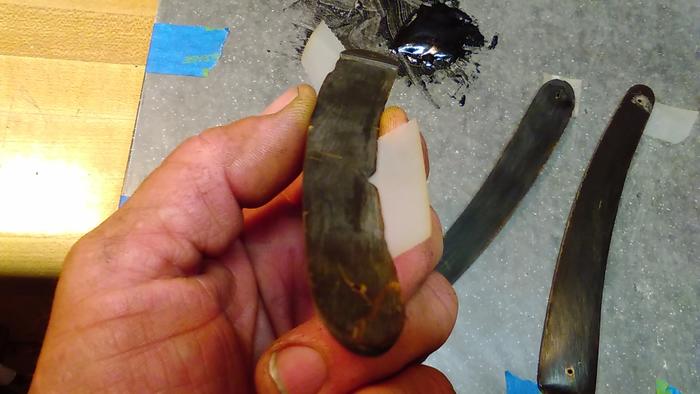
Thanked: 559 Not so much luck with the scales
When I tried to remove the scales, the pins were really stuck in the holes. I guess the horn had shrunk over the years. So I decided to cut them off with my side cutters.
When I tried to separate the scales, I used a flat blade screwdriver to act as a wedge and tried to ease the scales apart. That didnt work and I wound up cracking one scale and leaving bits of the pin in each. I can drill that out later.
I am really intimidated by these old horn scales and would appreciate some advice about what to do next.
 outback likes this.David
Shared sorrow is lessened, shared joy is increased
― Spider Robinson, Callahan's Crosstime Saloon
-
01-16-2023, 03:00 AM #17Senior Member
- Join Date
- Mar 2015
- Location
- Akron, Ohio
- Posts
- 12,107
Thanked: 4313
Short, quick story...
1st, CA and clamp the crack.
Sand scales with 220 sandpaper, removing the old, dried horn from the scales.
Make epoxy repairs, sand repairs to match the contours of the scales. Then smooth with 400, 600, 0000steel wool.
Wipe with denatured alcohol, then you can dye if desired, then soak in neats foot oil.Mike
-
The Following 2 Users Say Thank You to outback For This Useful Post:
DZEC (01-16-2023), randydance062449 (01-16-2023)
-
01-16-2023, 02:26 PM #18Senior Member
- Join Date
- Mar 2015
- Location
- Akron, Ohio
- Posts
- 12,107
Thanked: 4313
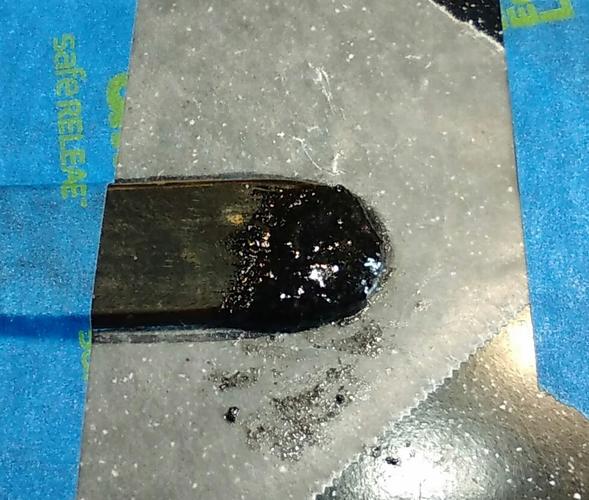
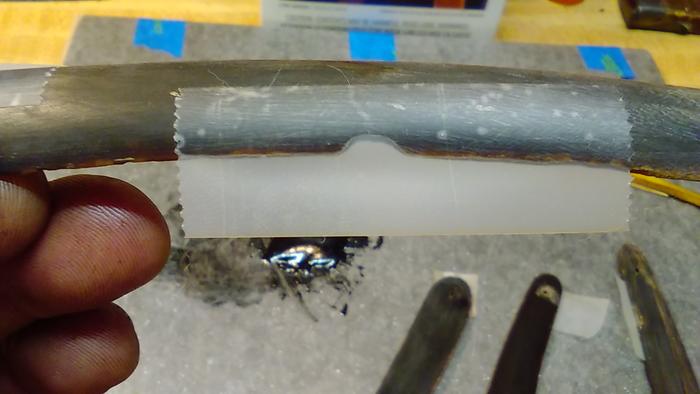
Tape the outside of the scales with scotch tape, over the repair areas. Fill with epoxy from the inside side of the scales. The tape acts as a molding to create the shape of the existing scale.
-
The Following 2 Users Say Thank You to outback For This Useful Post:
DZEC (01-16-2023), randydance062449 (01-16-2023)
-
01-16-2023, 03:34 PM #19Senior Member
- Join Date
- Mar 2015
- Location
- Akron, Ohio
- Posts
- 12,107
Thanked: 4313
Looks good. Though I'd have to remove the hone wear. Probably not in your skill set wheel, yet. Originally Posted by DZEC
Can always come back to it once your comfortable with the work needed to accomplish it.DZEC likes this.Mike
-
01-16-2023, 10:34 PM #20Senior Member
- Join Date
- Feb 2018
- Location
- Manotick, Ontario, Canada
- Posts
- 2,807
Thanked: 559
Would removing the hone wear cause me to lose the etch? Originally Posted by outback
outback likes this.David
Shared sorrow is lessened, shared joy is increased
― Spider Robinson, Callahan's Crosstime Saloon


 Reply With Quote