
Results 19,421 to 19,430 of 20573
 91473Likes
Thread: What are you working on?
 LinkBack URL
 About LinkBacks
-
06-11-2021, 04:49 PM #19421Senior Member


- Join Date
- Feb 2018
- Location
- Manotick, Ontario, Canada
- Posts
- 2,801
Thanked: 557 I’d pay to see a video of you carving scales like that Rez.
 Originally Posted by RezDog
 David
David
Shared sorrow is lessened, shared joy is increased
― Spider Robinson, Callahan's Crosstime Saloon
-
The Following User Says Thank You to DZEC For This Useful Post:
RezDog (06-11-2021)
-
06-11-2021, 05:23 PM #19422Senior Member

- Join Date
- Jan 2015
- Location
- Pinole, ca
- Posts
- 1,526
Thanked: 339
Looking good Shaun!
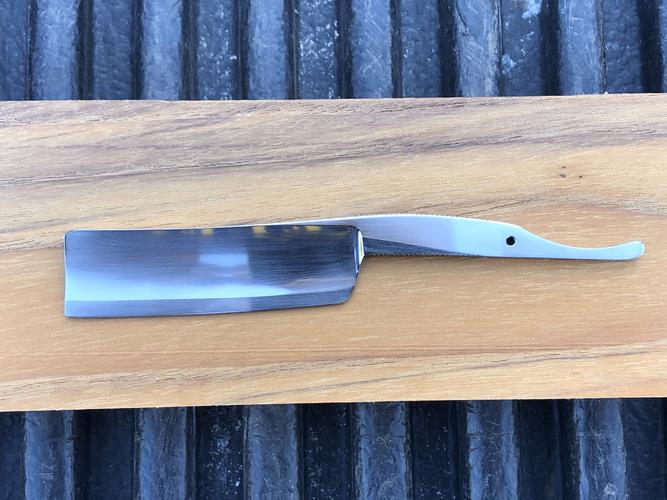
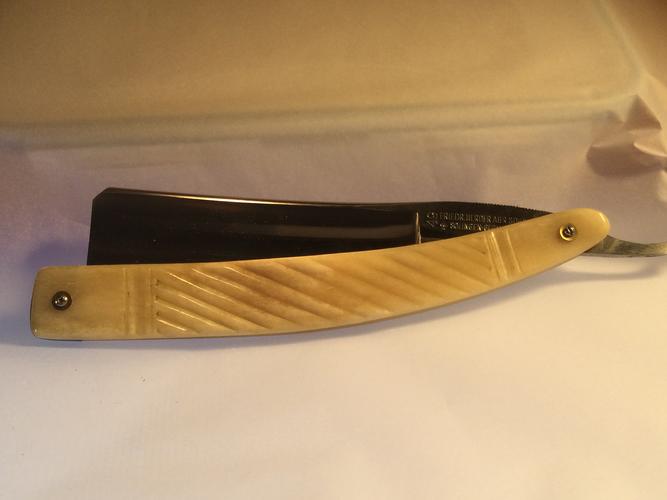
Did some hand sanding and fixed the lines as best I possibly could with what patience I have. The finish is way better but not sure Im happy with sanding lines, they could be straighter. The finish looks much better in hand, the lighting in the photo highlights all the problems. I have designed some scales for it, similar profile as a set of MK ivory scales.
Shaun, any pointers for shaping bone?

-
06-11-2021, 05:46 PM #19423Senior Member


- Join Date
- Feb 2013
- Location
- Haida Gwaii, British Columbia, Canada
- Posts
- 14,448
Thanked: 4829
That razor is looking pretty nice.
I have a systematic approach on all my scale making. If I don’t think I am going to make another set the same, I prep my two pieces by sanding them to 320. It makes for less overall sanding. I use double sided tape to hold my two pieces together. I do my layout then drill my pivot and wedge holes. Doing them first allows me the opportunity to move my layout if I mess up on hole location. I then cut to around 1/16” to my lines. I put them in the soft jaws in my swivel vice and use a heavy file to cut to my lines and then remove the lines with a finer file. I put two tiny finish nails into a small wood block to hold them through the pin holes, then the block in my swivel vice. It helps if your block is thick enough to sit above the vice jaws a bit. Then I use the coarse file to start my round over and maybe crown the scales. I find it easier for me to do the ends first then move to the sides. Unless I am going to carve them or do scrimshaw I usually crown them. A quick shading with a pencil can help you to see that you are coming up on the center line for the peak of the crown. Once I am close to rough shape with the coarse file I switch to a finer file and then a very fine file, back to 320 sand paper, then 400, 600 and 1000. I have a bench buffer and Fabulustre compound. Fabulustre get finer as you buff with it so I load, do 1/2 the scale, load and repeat. Once the coarse buffing is done I stop loading and just keep buffing until I get the finish I want. The 320 is pretty close to the finish of my fine file so it all goes pretty quick. Before I had Fabulustre I would sand to 2000 if I wanted a pretty glossy finish. If you are looking for something more semi gloss you can finish with 0000 steel wool and light mineral oil. I often prefer the mottled look of the unbleached bone. Bleached bone I find very chippy and I never work with it. If I want the bleached look, I soak the bone in hydrogen peroxide and then mineral oil. You can reduce some of the mottled look by soaking in mineral oil. A good dense bone done in peroxide then mineral oil looks pretty close to ivory. I have also found that the bleached bone does not pin collarless very well and tends to split. I have had some decent success pinning the raw bone without collars.It's not what you know, it's who you take fishing!
-
-
06-11-2021, 06:47 PM #19424Senior Member


- Join Date
- Feb 2016
- Location
- San Antonio, TX
- Posts
- 1,839
Thanked: 428
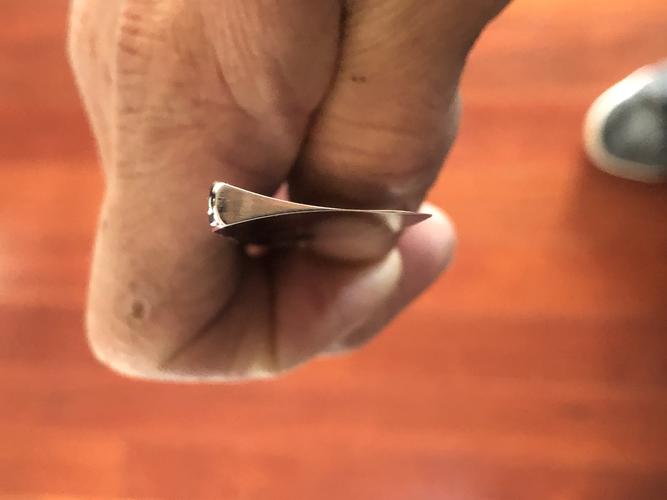
Is this an example of a bellied hollow ground? Originally Posted by jfk742
Semper Fi !
John
-
06-11-2021, 11:45 PM #19425Senior Member
- Join Date
- Feb 2018
- Location
- Manotick, Ontario, Canada
- Posts
- 2,801
Thanked: 557
You put one heck of a lot of information into this post. The way you describe your process, it doesn’t seem so intimidating. Lots to think about and try out. Originally Posted by RezDog
David
Shared sorrow is lessened, shared joy is increased
― Spider Robinson, Callahan's Crosstime Saloon
-
06-11-2021, 11:54 PM #19426'with that said'

- Join Date
- Aug 2010
- Location
- Walla Walla in WA State USA
- Posts
- 11,247
Thanked: 4237
I believe it is. But I've been mistaken before. Originally Posted by Johntoad57
Our house is as Neil left it- an Aladdins cave of 'stuff'.
Kim X
-
06-12-2021, 04:26 AM #19427Senior Member
- Join Date
- Jan 2015
- Location
- Pinole, ca
- Posts
- 1,526
Thanked: 339
Yup, bellied full hollow.
Nice write up Rez. I’ve had my eye out for a cheap swivel vise. I may just sacrifice a smaller bench vise and do Charlie’s bowling ball vise setup.
-
06-12-2021, 04:46 AM #19428Senior Member
- Join Date
- Feb 2013
- Location
- Haida Gwaii, British Columbia, Canada
- Posts
- 14,448
Thanked: 4829
I have both a swivel vice and an engravers block. My little swivel vice is about a 4” vice with a swivel base. I use them both for making scales. The engravers block is a bit of an investment. Mine is a less expensive model from China. Still quite a bit more than an inexpensive swivel vice.
DZEC, all skills are about practise. I have made quite a few sets of scales, some hit the bin and others were a success. The ratio leans more towards success the more sets I make.It's not what you know, it's who you take fishing!
-
06-16-2021, 12:09 AM #19429Senior Member

- Join Date
- Dec 2018
- Location
- Gainesville, FL
- Posts
- 6,612
Thanked: 670
This is not exactly what I am currently working on but doing some black buffalo horn scale repair recently...or shortly there after ... something occurred to me. Maybe call it a musing.
So, fixing some beetle bites with epoxy I was trying to match the color so I mixed some charcoal dust to make it black and some dark wood dust to give it a little brown.
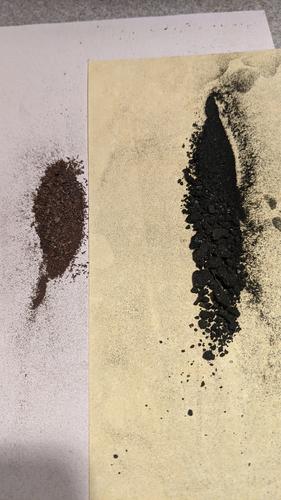
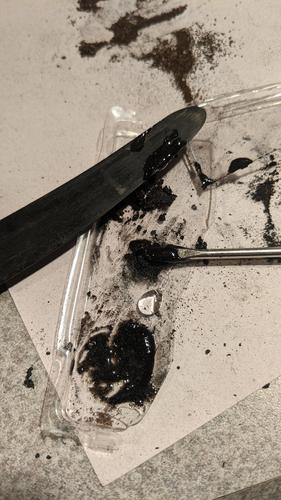
I wanted to use something fibrous and not just dye so it would not look too translucent but be more opaque. After a test mix or two I came up with a mix that worked pretty well, color-wise and texture-wise. It came out really well and you have a hard time seeing the patch. I'd call it a successful repair but then the next morning I was making a coffee for the wife and when cleaning the espresso maker I said, "hmmm."
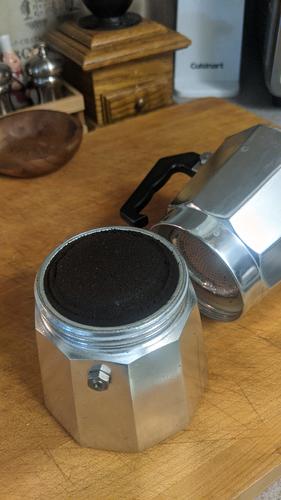
Has anyone ever tried spent espresso grounds to match dark horn? I don't know if anyone has or not but the color matches pretty well and it gives some substance to the epoxy like the wood and charcoal dust mix. I'd love to hear if anyone has. One way or another I think I am going to try it next time I have buffalo horn to patchIron by iron is sharpened, And a man sharpens the face of his friend. PR 27:17
-
06-16-2021, 12:15 AM #19430Senior Member
- Join Date
- Feb 2013
- Location
- Haida Gwaii, British Columbia, Canada
- Posts
- 14,448
Thanked: 4829
I have mixed graphite into epoxy to make it black. I know you know how black graphite is and it can make any and everything black.
It's not what you know, it's who you take fishing!


 Reply With Quote