
Results 1 to 10 of 55
 25Likes
 LinkBack URL
 About LinkBacks
Hybrid View
-
11-03-2008, 01:49 AM #1At this point in time...


- Join Date
- Jun 2007
- Location
- North Idaho Redoubt
- Posts
- 27,069
- Blog Entries
- 1
Thanked: 13249 Illustrated Guide to Fixing Warped Scales..
OK I am starting this thread today, As the scales are straight now!!!

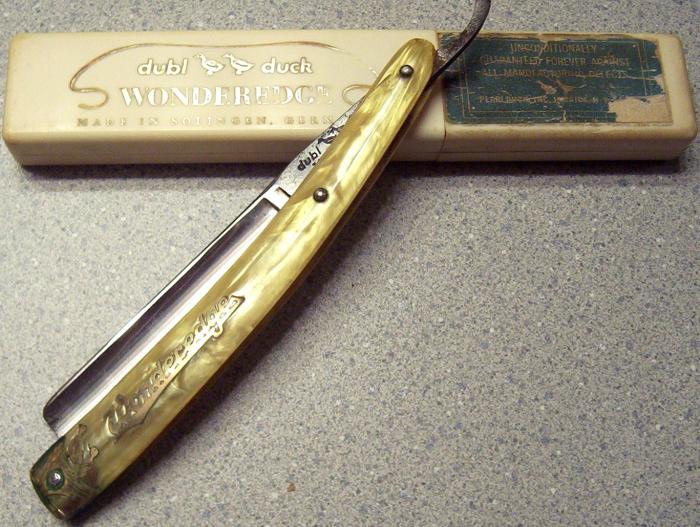
I started with a Dubl Duck Wonderedge with severely warped scales, This is one time I have to mention the owner as he was nice enough to let me experiment on his Wonderedge Thank You.... RayG !!!
We talked about what to do on this one as the blade is in great shape but the scales were shot...Ray and I decided that I could experiment with straightening these and if they were destroyed I would make him a set out of Ebony and do the inlays like Floppyshoes and I did in the Reaper thread....
The problem with straightening scales has always been the hit or miss heating and bending of the scales. I was looking for a way to eliminate that guess work and come up with a sure fire way of doing it....
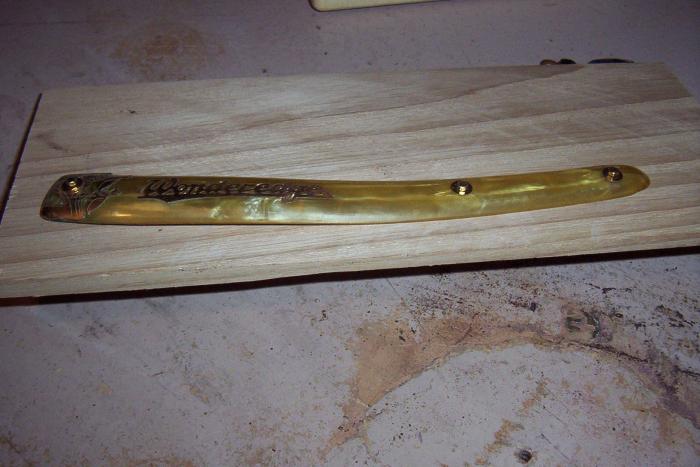
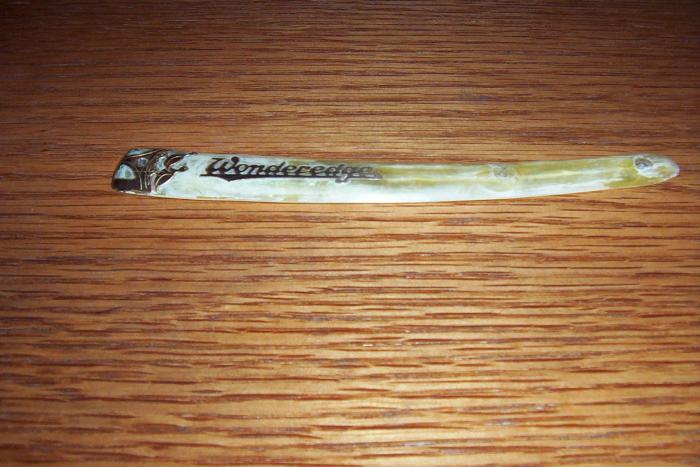
The beginning, the razor looks good from this angle...
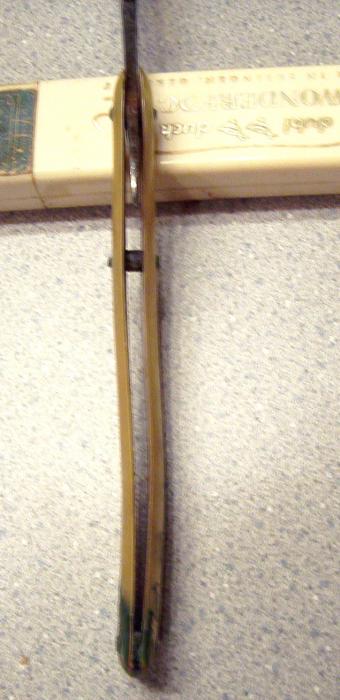
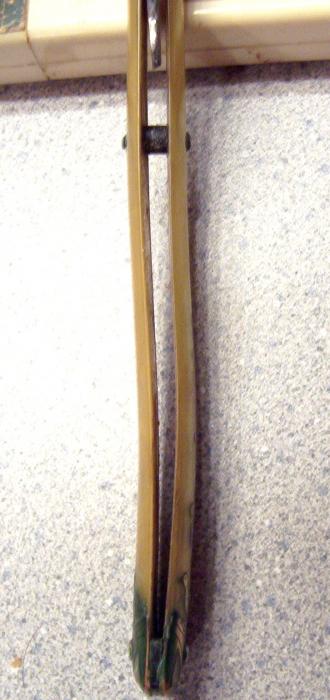
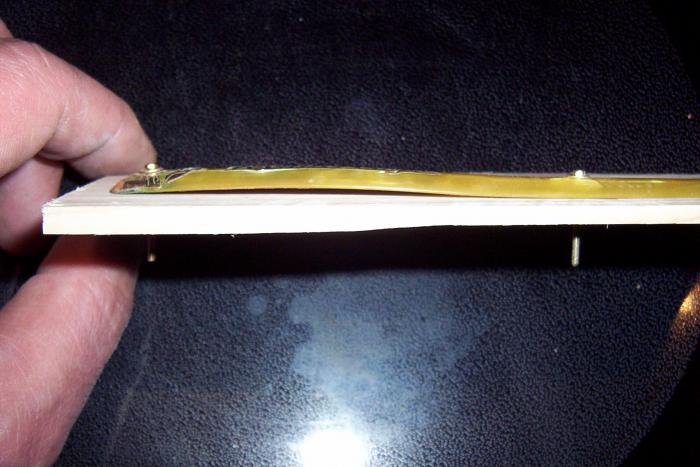
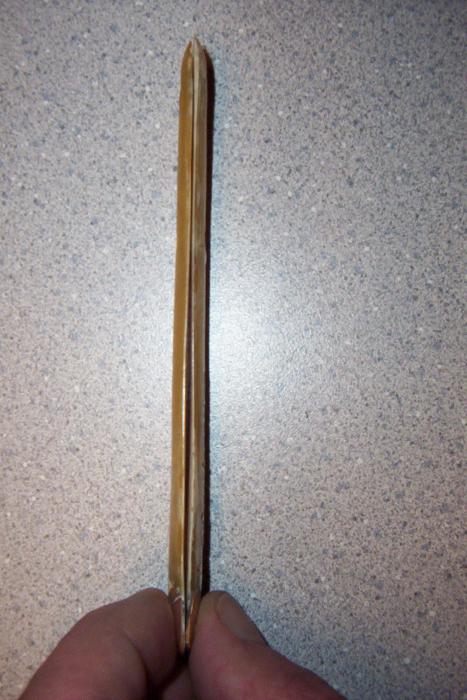
When the razor is turned at this angle the problem is obvious:
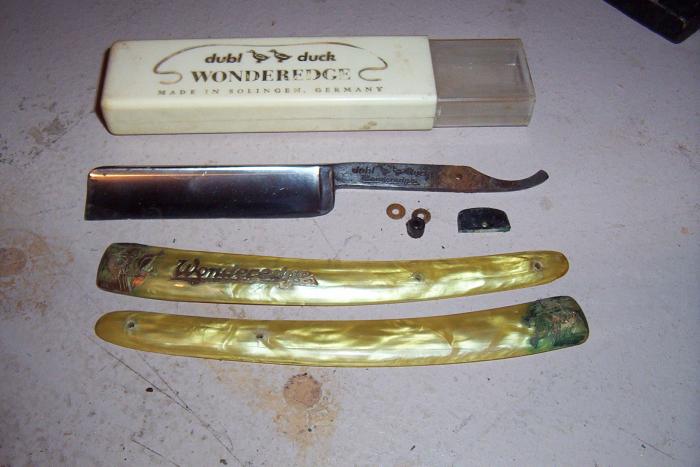
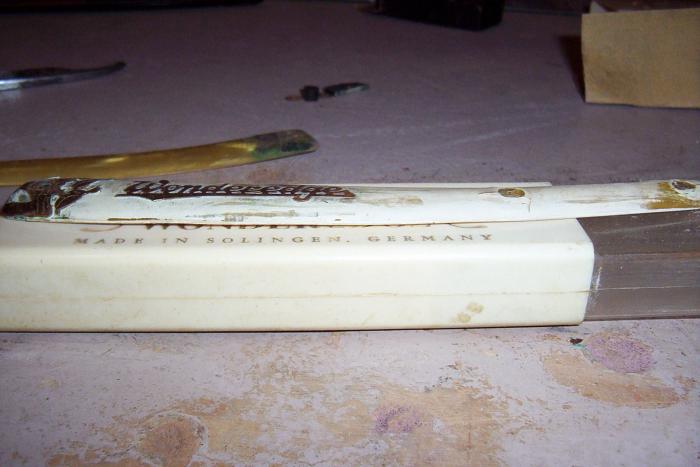
The razor broken down and ready for repair:
The trick has always been to heat the scales and re-bend them, the problem was burning the crap outta yer fingers while trying to get the bends right...Usually ending up with worse warps than you started with...
Boiling water or steam has always been the safest way, but how to keep the razor hot and fingers not???
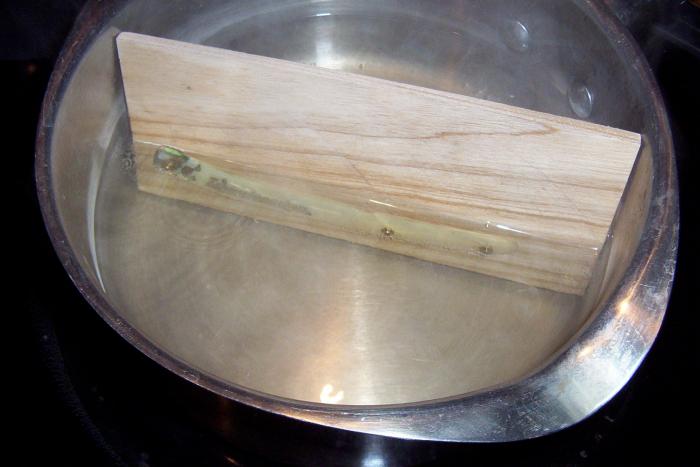
I built a Jig for this out of wood, and adjustable pins..... I drilled the holes through the razor and the wood so that when the pins were tightened the scales would be held straight... I used the #0 wide washers to spread the force, and the hex heads, so I could tighten them easy with the wrenches...
Dipping the jig with the scales attached loosely then waiting about 15 seconds the scales become flexible, I tightened the pins a little, then re-dipped and re-tightened until the scales were straightened out...
Then I put them in the fridge for about 15 minutes then took the pins off and the scales are "almost" dead straight....
The process:
The good news is that it works!!! YEAH !!!!
Here are some things I would change...
Make the jig out of metal not wood, attach a handle or wire to lift it in and out of the pot...
Use distilled water, the white coating is from our well water I think, or the wood itself...
When scales are this warped there are normally other problems, if you look close there are some tiny pressure cracks right by the center pin hole that I am going to have to be very careful with when I re-pin this razor, so I am not out of the woods yet on this one.....
Keep in mind that this is the first try at this technique, so go slow and careful when you try it... and keep us informed with your success's and failures!!!!!
Last edited by gssixgun; 11-03-2008 at 08:53 PM.
-
The Following 31 Users Say Thank You to gssixgun For This Useful Post:
badboris (01-10-2009), BigBubba (11-03-2008), bpave777 (11-10-2008), Carlos (11-05-2008), Chevhead (01-15-2014), Chreees (07-28-2013), DFriedl (06-02-2012), dooey (09-19-2014), ErreHache (08-10-2012), Exile (06-16-2011), FloorPizza (11-12-2008), Geezer (07-29-2010), gounthar (11-25-2008), jeremycarriveau (05-27-2010), JimmyHAD (11-03-2008), jmercer (03-06-2015), joke1176 (11-04-2008), macrob (03-05-2015), MW76 (02-24-2016), nurse42312 (11-03-2008), PhatMan (04-10-2011), Philadelph (11-03-2008), Quagmire53 (01-03-2014), recon (02-16-2009), Slawman (01-14-2017), Splashone (09-27-2013), Sticky (01-10-2009), stimpy52 (10-11-2009), timberrr59 (11-04-2008), xiaotuzi (01-12-2018), Zephyr (12-16-2011)
-
11-03-2008, 01:58 AM #2The Razor Whisperer

- Join Date
- Jan 2008
- Location
- Rhode Island
- Posts
- 2,197
Thanked: 474
Two questions: Should the water be boiling when you dip? Your picture makes it look like it should NOT be... Also, should you leave them submerged for 15 seconds or is it 15 seconds between dips? Thanks!
-
11-03-2008, 02:00 AM #3At this point in time...
- Join Date
- Jun 2007
- Location
- North Idaho Redoubt
- Posts
- 27,069
- Blog Entries
- 1
Thanked: 13249
Yes the water was boiling just not rapidly....
I dipped them for 15 pulled them out re-dipped for 15 and finished tightening
-
11-03-2008, 02:27 AM #4Senior Member


- Join Date
- Dec 2006
- Location
- Burkburnett TX
- Posts
- 3,100
Thanked: 2392
Glen,
I wonder what denatured alcohol would do to the white n the scales?
Great post.
Charlie
-
11-03-2008, 02:29 AM #5At this point in time...
- Join Date
- Jun 2007
- Location
- North Idaho Redoubt
- Posts
- 27,069
- Blog Entries
- 1
Thanked: 13249
MAAS took it right off...and a little elbow grease Originally Posted by spazola

 MW76 likes this.
-
11-03-2008, 02:50 AM #6Senior Member

- Join Date
- Oct 2007
- Posts
- 4,445
Thanked: 834
Brilliant, Glen! And thanks a TON for sharing this! That's so cool. You're very generous in how you share your info.
Chris L"Blues fallin' down like hail." Robert Johnson
"Aw, Pretty Boy, can't you show me nuthin but surrender?" Patti Smith
-
11-03-2008, 02:00 AM #7"Mister Nip n Tuck" ;)

- Join Date
- Feb 2008
- Location
- Tempe, AZ
- Posts
- 341
Thanked: 64
Wow Glen! Thanks for this and all of the other tricks that you post here!
I'm going to be trying this soon now.
It still amazes me that you keep posting how-to's to help out the self-restorers out there. I hope this info ends up in the wiki.
-
11-10-2008, 08:09 PM #8Retired Developer
- Join Date
- Mar 2008
- Location
- Berlin
- Posts
- 3,490
Thanked: 1903
Long done: Illustrated Guide to Fixing Warped Scales - Straight Razor Place Wiki Originally Posted by BigBubba
Someone needs to fix the descriptions for the images, though.
-
The Following User Says Thank You to BeBerlin For This Useful Post:
Jimbo (11-10-2008)
-
03-06-2015, 04:50 AM #9Senior Member

- Join Date
- Sep 2009
- Posts
- 913
Thanked: 83
What if you made a press? Think of a kydex molding press, usually wood with a foam attached. Then you clamp the two pieces.
http://ashevillewetshavers.weebly.com/ April 26-27th come to one of the greatest meet ups of wet shavers!
-
03-06-2015, 03:11 PM #10Senior Member


- Join Date
- Jan 2011
- Location
- Lorton, VA
- Posts
- 349
Thanked: 153
This may work as well. Was not familiar with kydex moulding press but found this Youtube video. It may have merit in this regard. Scales just need to be cooled off straight and vice serves that purpose. Kydex would a gentler solution and bet it would work even better. Thanks Originally Posted by rickboone


 Reply With Quote