
Results 1 to 10 of 15
 2Likes
 LinkBack URL
 About LinkBacks
Hybrid View
-
11-27-2009, 07:01 PM #1Comfortably Numb


- Join Date
- Jan 2009
- Location
- Charlotte, NC
- Posts
- 2,095
Thanked: 668 Brass lined scales (Bruno's resto challenge)
Hey Guys,
I have been really busy lately, so I’m sorry slacking off on this for a while but I have finally made some good progress on this Christensen that Bruno sent to me.
*(Thanks again for the opportunity Bruno!)*
I always try to document my process as well as possible, so I hope you don’t mind my ramblings or my pictures. Really there isn’t a lot to say about the blade work except that this razor came to me with a decent amount of rust and the usual junk at the pivot…Bruno could tell you more about the condition, but I can’t seem to find a before pic. Anyway, I cleaned the blade up using greaseless compounds on the buffer. I stopped at a nice satin sheen that looked almost exactly like a minty fresh Christensen that I used to have (that was a useful reference!).
The real process I documented here is how I went about making some brass-lined scales for this razor. So please enjoy, be entertained, and comment if you feel so moved. BTW, I matched the shape of the old scales and salvaged the old pivot washers.
Just before showing the pics, I'd like to apologize for the quality of the photos, these were taken with my phone while I was out in the shop... Better pics will be on the way once I get ready to send the razor off.
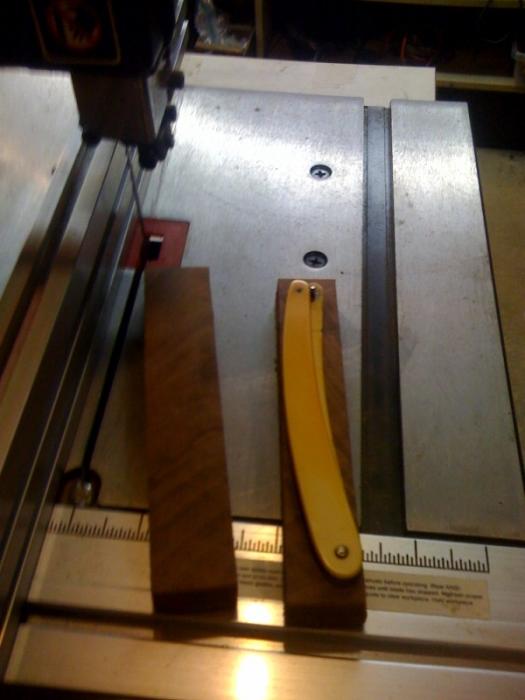
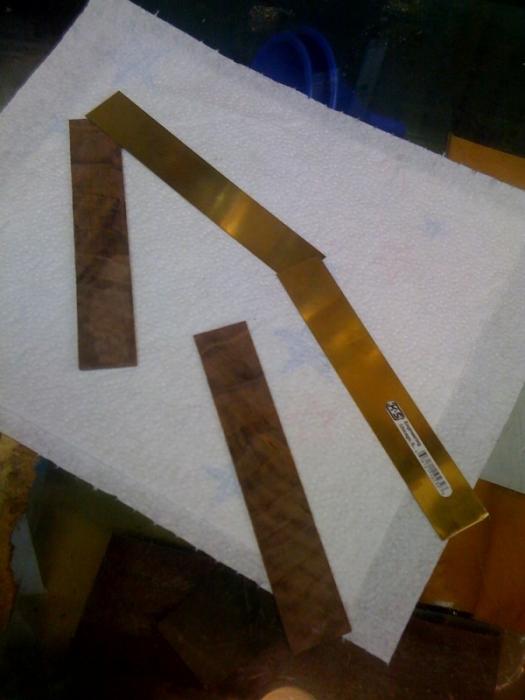
The first thing I did was to re-saw a bit of walnut on my little junky bandsaw
Next I made sure that the original scale shape would fit the blanks I just cut (to be completely upfront, I measured this about three times before ever re-sawing them in the first place).
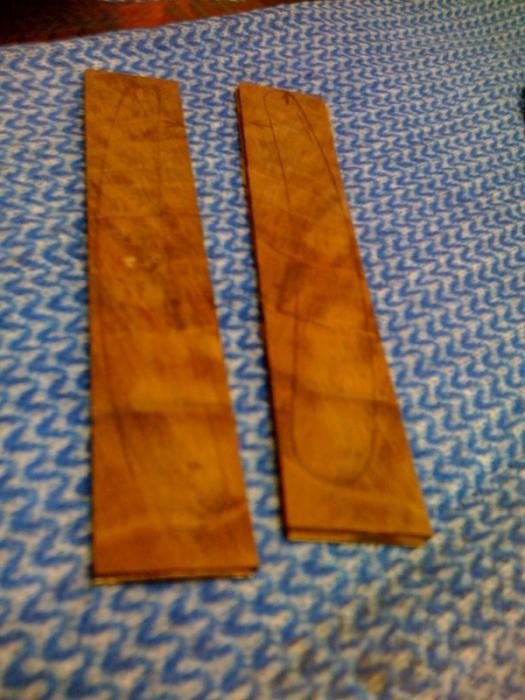
Next I sanded the blanks to thickness with a sanding drum/thickness sander setup I have on my drill press. For these scales I needed to go quite thin, but we will get to that later.
Once the blanks were the correct thickness (actually about as thin as the original scales) I drew the profile shape onto the blanks in a way so that the grain pattern would match on each scale. This is one of the benefits of re-sawing, you get a book-matched set of scales.
Next, I laid out the blanks and cut two pieces of brass to use as liners. I have been wanting to do some lined scales for a while, so I decided to go for it. The thin scales with the brass liners really have some good flex and strength, but if the wood were thicker I don’t think it would work very well but I digress…..
My next step was to epoxy the brass to the wood. In order to do this I believe that it is essential to have both gluing surfaces quite rough (as in 60-80 grit) in order to make a strong mechanical bond. After roughing up the surfaces, I mixed my epoxy and paired up the scales with their liners. Then I put them brass side down onto a piece of blue masking tape in order to hold them in place. Then I put another layer of tape on top. I did this only in order to keep everything in place, it may not have been necessary, but it did help a lot in my case.
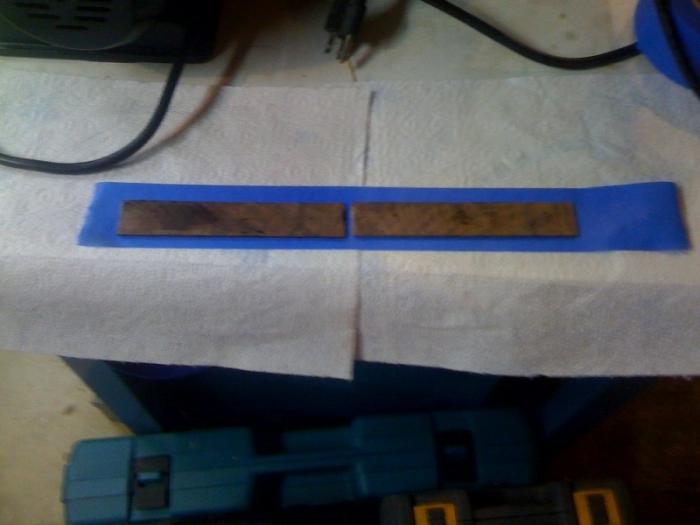
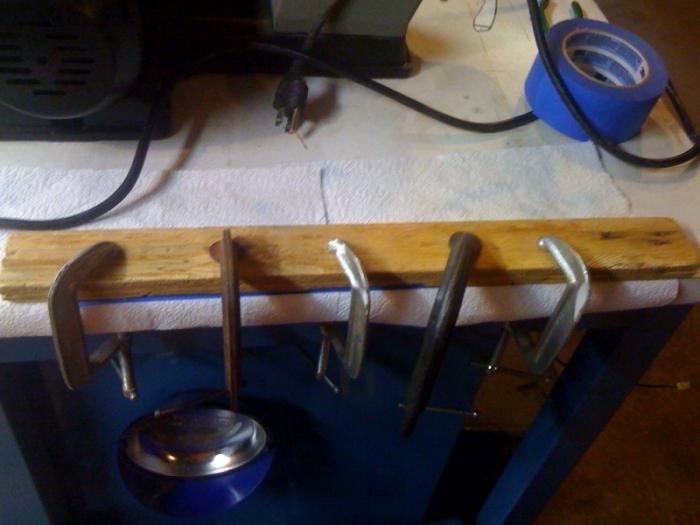
Next, I started setting up the clamps I laid a flat piece of wood over the top of the scale/masking tape sandwiches in order to evenly distribute the clamping pressure across the surface of the scales. *** note: Many people use very little pressure like paperclip tension even no clamping pressure. I use clamps, but with fairly light pressure. However you do it, you must not use heavy pressure or else you will squeeze the epoxy out and it will not hold.****
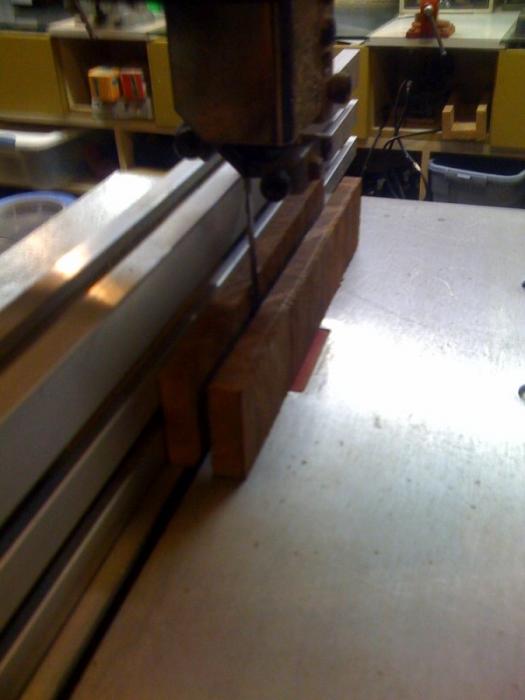
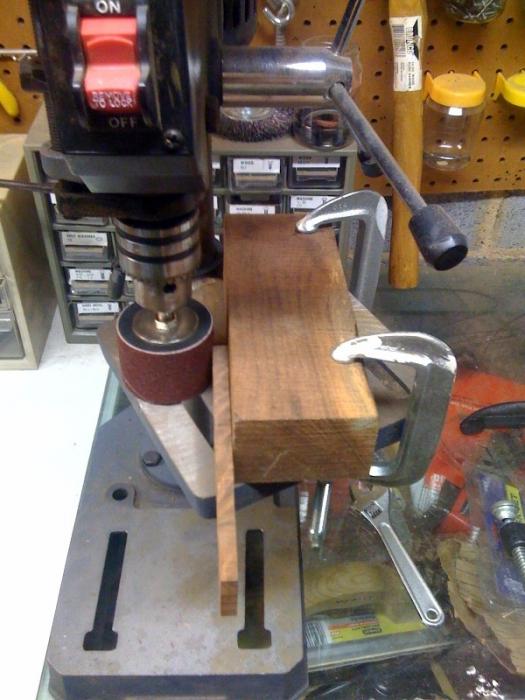
After the scales had set up for a good 24 hours, I started profiling the scales. Now I have been reading a few threads on lined scales and it is important to keep the heat down so that the brass doesn’t melt the epoxy and separate. FWIW I have found out that one crucial thing FOR ME is that when sanding to the final shape it is good to use a method where the abrasive moves perpendicular to the liner instead of parallel with it. This really keeps the heat down. I found out the hard way that when sanding parallel to the liners (as in with my drum sander drill press setup), the liner stays in contact and just gets way too hot. The disc sander on the other hand takes small bites off of the scales and there isn’t enough contact to really heat up.
Here are some pictures of the bad way,
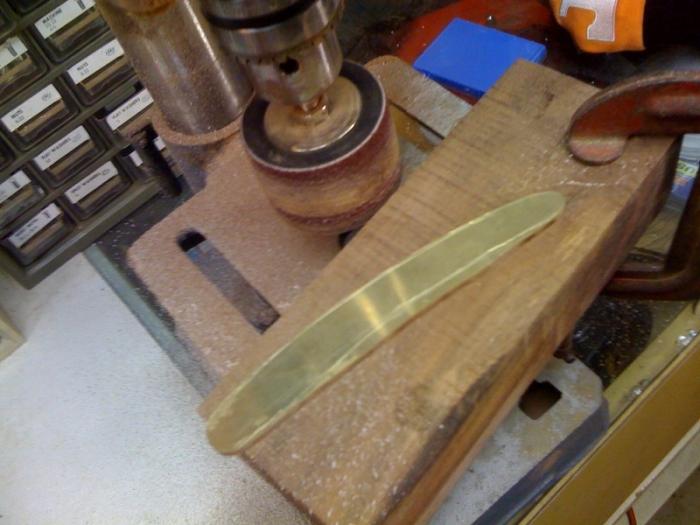
Then the good way

Then, once the scales had the profiles all sanded I sanded everything to it’s final shape (100 grit, 150 grit, then 220 grit). Next I drilled the pivot hole out, fit the scales for the wedge, and drilled the wedge hole…. Sorry, didn’t get the wedge process pics, but Glen and others have already documented that fairly comprehensively.
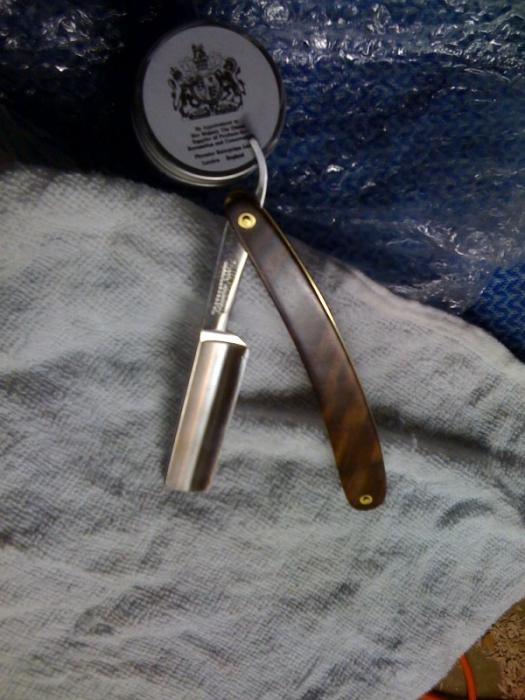
After a quick test fit, I started finishing... For these scales I did a coat of wipe-on poly, dried 3 hours, buffed lightly with fine steel wool, and repeated everything about 9 times. After the last coat, I let it dry for about 24 hours and gave everything a light hand buffing with Renaissance Wax, taking special care to completely coat the brass on the inside of the scales.
Finally, I put everything together with the adjustable screws in order to get a feel for the final product of the work. I will pin these up sometime this week, then give a shot at honing her up. Here is a final pic… again, I hope it was worth the read and I appreciate all comments.
Cheers,
DaveLast edited by Del1r1um; 11-27-2009 at 07:05 PM.
Chevhead likes this.
-
The Following 14 Users Say Thank You to Del1r1um For This Useful Post:
ben.mid (11-27-2009), Chevhead (06-01-2014), decraew (11-28-2009), floppyshoes (11-27-2009), gssixgun (11-27-2009), hi_bud_gl (11-27-2009), icedog (11-28-2009), Maximilian (11-29-2009), mrbhagwan (11-28-2009), persco (11-27-2009), ri7ani (11-27-2009), richmondesi (11-27-2009), sffone (11-27-2009), yoshida (11-27-2009)
-
11-27-2009, 07:09 PM #2Senior Member

- Join Date
- Sep 2009
- Location
- montreal , canada
- Posts
- 207
Thanked: 29
seriously man,,,thanx for all the info because i am about to complete my set for a full rotation and i want them all to have the same scales...so this really helps.
how much would it cost for the same set of scales?Last edited by ri7ani; 11-27-2009 at 07:13 PM. Reason: fogot to ask about the type of wood :P:P was too impressed by the post (the i read walnut) :)
-
The Following User Says Thank You to ri7ani For This Useful Post:
Del1r1um (11-27-2009)
-
11-27-2009, 07:29 PM #3Large Member

- Join Date
- Aug 2008
- Location
- Oxfordshire, England
- Posts
- 3,096
Thanked: 763
Great little walk through! Thanks very much. I really enjoyed it!
-
The Following User Says Thank You to ben.mid For This Useful Post:
Del1r1um (11-27-2009)
-
11-27-2009, 07:29 PM #4At this point in time...


- Join Date
- Jun 2007
- Location
- North Idaho Redoubt
- Posts
- 27,100
- Blog Entries
- 1
Thanked: 13249
Great job !!!! on the razor..
If anyone knows how much work goes into doing a photo essay I do
One hint for next time on the liners, as I used Epoxy for ages until Seraphim mentioned Gorlilla Glue to which I said "Really"????? He was right the Gorilla Glue withstands the heat way better... But you do have to use actual clamps not tape...Chevhead likes this.
-
-
11-27-2009, 07:51 PM #5Senior Member

- Join Date
- Dec 2006
- Location
- Mount Airy, North Carolina
- Posts
- 195
Thanked: 188
Really nice work!
...Just curious as to what size brass liners were used and where you got the brass blanks?
Ronnie
Fellow Tarheel!
-
The Following User Says Thank You to RonnieNC For This Useful Post:
Del1r1um (11-27-2009)
-
11-27-2009, 08:05 PM #6Comfortably Numb
- Join Date
- Jan 2009
- Location
- Charlotte, NC
- Posts
- 2,095
Thanked: 668
 Originally Posted by gssixgun

Thanks a lot Glen, I will have to try it next time... and I actually did use clamps even on this job, I just ran out of upload space... lets see if I can show you one here... the pressure was light and the tape was only there to keep them from sliding out of place.
Hey Ronnie, I think they were .030 thick and I believe I got them at ACE hardware... I just got some strips that were as wide as you see in the photo and about 14 inches long Originally Posted by RonnieNC
-
The Following User Says Thank You to Del1r1um For This Useful Post:
RonnieNC (11-27-2009)
-
11-27-2009, 08:08 PM #7Senior Member
- Join Date
- Dec 2006
- Location
- Mount Airy, North Carolina
- Posts
- 195
Thanked: 188
Thanks!
Living in a small town sometimes makes it diffucult to find things such as brass stock
-
11-27-2009, 08:34 PM #8Senior Member

- Join Date
- Jun 2009
- Location
- Baton Rouge, La.
- Posts
- 357
Thanked: 93
What material was used for the wedge?
-
11-27-2009, 08:55 PM #9Senior Member


- Join Date
- Nov 2005
- Posts
- 4,521
Thanked: 1636
Great Job.Thank you
-
11-27-2009, 08:55 PM #10Comfortably Numb
- Join Date
- Jan 2009
- Location
- Charlotte, NC
- Posts
- 2,095
Thanked: 668
the wedge was made of maple Originally Posted by sffone
-
The Following User Says Thank You to Del1r1um For This Useful Post:
sffone (11-28-2009)


 Reply With Quote