Results 1 to 10 of 17
 LinkBack URL
 About LinkBacks
-
03-03-2006, 10:21 PM #1< Banned User >


- Join Date
- Aug 2005
- Location
- Canada
- Posts
- 1,392
Thanked: 91 Dubl Duck Goldedge Restoration (...in progress)
Hey everybody.
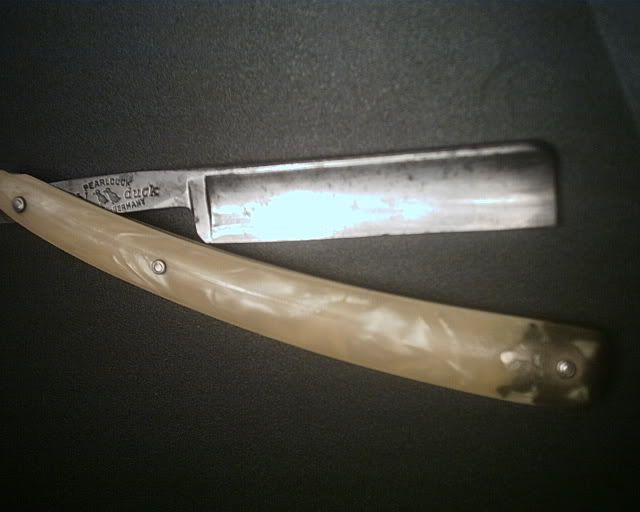
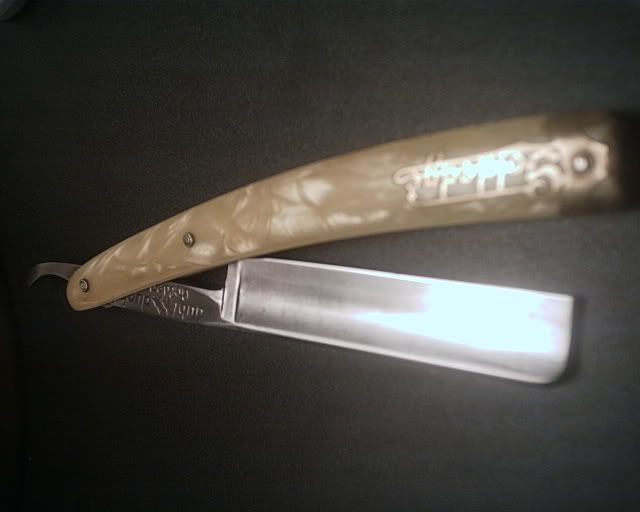
I bought a Double Duck Goldedge on eBay about a week ago for twenty-two bucks and it arrived this afternoon.
I couldn't tell from the pictures on the auction whether there was honing wear near the toe end of the razor (it appeared to slope), so when I opened up the package I was pleased to see that it had that nice rectangular shape to it. The only flaw, besides the grime, was a small (or maybe you'd call it big?), half-moon nick in the centre of the blade.
Anyhow, I decided to tackle things in order.
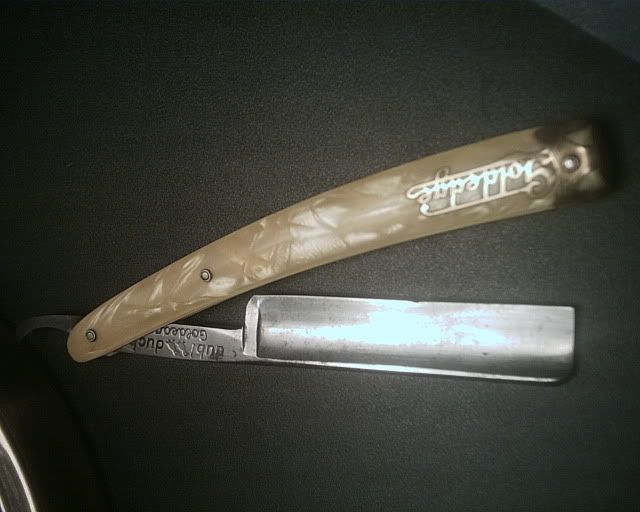
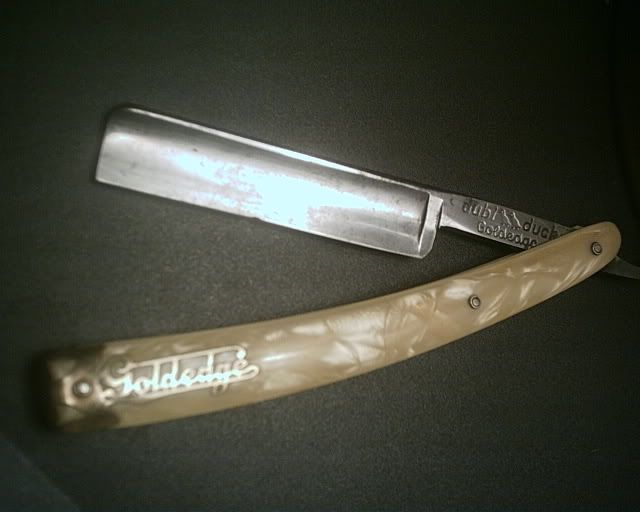
First I took a bunch of paper towel and cloth rags along with my metal polish and began to scrub as much of the excess grime off the blade as I could. I then polished up the metal on the scales, returning the original gold shine to the previously orange-looking ducks and lettering. After I had soaped up a toothbrush and cleaned the collected dirt from between the scales (I swear, it looked like there was soil in there!), their condition was restored to like-new.
The blade, however, is a little bit of a different matter.
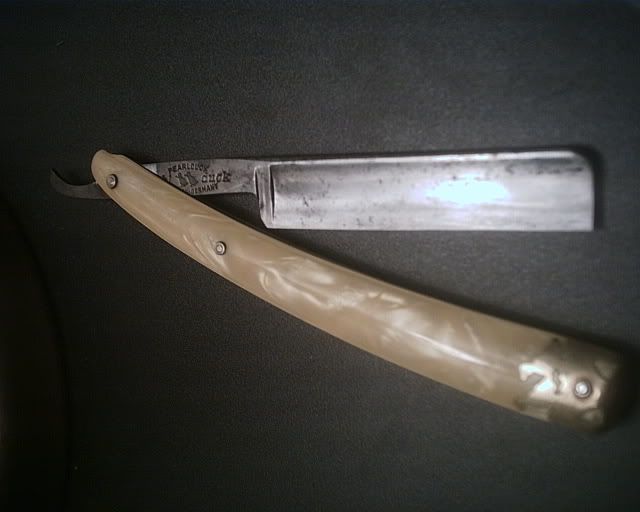
Using a small cotton wheel on my Dremel, I began to (what's the verb here?) Dremel away at the blade's rougher areas, being careful not to stay in one place too long or go near the scales (which I wrapped in a rag for protection in advance). There was a definite improvement in some spots, and I could see some of the original shine peeking through, but there were some areas that would not give and I eventually had to give up on them and give'er another hand polish and drying.
Then it was to the hone, where I began work on trying to get that chip out. Using the 4000 side, I began.
By the way, this being my first Dubl Duck, I immedietely understood what everyone raves about. Not only is the blade weighted very nicely, but when I was pushing it along the surface of the stone, I felt like I was very much in control of the edge. "This is my razor; there are many others like it, but this one is mine."
After a few minutes of honing and some progress on the nick, I thought to myself, "Woah, you've never done this before -- better call it in."
So now I put it to you gentleman: how should I procede and what should I be careful of when honing the chip out? Has any particular technique worked for you while doing similar restorations?
Also, about the Dremel -- how can I hope to get the existing tarnish off that blade? I know there's a really good razor under there and I really want to bring it out, you know?
Here's where I'm at right now:
Thanks for any suggestions/help you guys can provide!
-
03-03-2006, 10:24 PM #2< Banned User >
- Join Date
- Aug 2005
- Location
- Canada
- Posts
- 1,392
Thanked: 91
-
03-03-2006, 11:03 PM #3Senior Member

- Join Date
- May 2005
- Location
- New Jersey
- Posts
- 1,331
Thanked: 8
As of 5:24pm, you need to keep going on the 4K. I can still see unevenness in the edge, and I'm sure you'll feel bumps if you do the thumbnail test. When it feels completely smooth on your thumbnail, but it cuts in, you can come off the 4K.
Then go on to the 8K until you pass your sharpness test. As you get close, test often. Be aware that many old Ebay razors have oxidized edges. If you can't seem to make headway with the 8K, or if the edge looks pretty straight after the 4K and you begin to develope new micro chips (in a microscope) on the 8K, you may have an oxidized edge. You can often see in the microscope that the edge has tiny rust spots or is discolored. You need to use a coarser hone to create a new edge made of only clean metal.
If the 4K is all you have, try doing circular strokes on each side alternately. Do one side clockwise and the other side counterclockwise. It'll go faster if you do multiple circles on each side. You'll know you're done when the bevels are all one color in the microscope. Then go to a normal honing motion on the 4K until the edge is nice and even. Now when you go to the 8K it should hold the edge.
When you're doing a new edge like this it's a good idea to tape the spine. After you have a new edge take off the tape to do the normal stroke. Soon you'll see that the edge has formed two bevels because you changed the angle of the blade. WHen you're back to a single bevel you'll usually be ready for the 8K.
-
03-03-2006, 11:27 PM #4< Banned User >
- Join Date
- Aug 2005
- Location
- Canada
- Posts
- 1,392
Thanked: 91
Okay, I'm going to get back to honing on the 4K side, this time with tape on the spine. I used electrical tape. Good?
I'm not sure what you meant by putting it "on the spine," so I've got the tape going over the the spine and about three quarters of the way down the blade. More than enough room remains for where the new edge will be, though. Is this correct?
I knew I still a long ways to go on the hone, by the way. I just thought I'd stop and double check with people like you, Joe, who have done this before.
Any advice on cleaning up the finish some more?
-
03-04-2006, 02:52 AM #5Senior Member

- Join Date
- Nov 2005
- Location
- Montreal, Canada
- Posts
- 683
Thanked: 7
The tape on the spine is good. You need to hone quite a bit to get the nick out. You have to hone enough to wear the edge past the nick. So the blade will be narrower by the depth of the nick.
Keep an eye on the tape. It may wear through and you will start to get honing wear near the spine. If the tape wears through, then just peel it and replace.
Once the nick is almost gone (under microscope if you have one, about 1/2000" deep or by eye when you can hardly see it) you'll want to take the tape off and finish without it. That way the bevel angle will be the correct one by the time the nick is honed out. If you hone it out with the tape, you will still have to hone a bit more after removing the tape until a new bevel with the correct angle is established. Not much of a saving but considering you are already loosing the width of the nick from your blade you want to minimize unnecessary wear.
To get the finish better you will need to go to abrasives. Either wheels, disks or sandpaper by hand. If you are going to do that then stop honing the edge! You will need to do it after the restoration of the blade and you don't want to work on a blade that is sharp!
Since the blade already has a nick, I would pass the edge on 220 grit or rougher do dull the edge completely. It will also serve to make the nick shallower and reduce the honing time later. You will have to establish a new bevel either way so there is no harm done by dulling the edge.
If there is no pitting you can probably get away with sanding with 1000 or 1200 grit to get rid of the stains and then sand with 1500 and/or 2000 to get a fine finish. After 2000 you can polish to a shine. Sand perpendicular to the edge so the scratch lines will look like grind lines.
If 1000 grit does not do it, drop to 800, if not enough then 600. I don't think you will need to go below 600 from the photos, but can't be sure. Whatever the git you use to get the blade cleaned up, then you will have to work the grit numbers upwards. With each higher grit number you have to sand until ALL the scratch marks from the previous grit are gone.
If you miss some, you may not realize it until 1 or 2 grit numbers up. Then you will get scratch lines that just won't come out and you will have to drop 1 or 2 grits down. Always try to drop by 1 grit size and see if it gets the lines out. If not, then drop to the next lower grit number. Always be conservative when going to lower grits. If you jump to low you just create more work for yourself.
I would recommend hand-sanding. It goes slower but lets you get the feel for the process of removing metal and the scratch lines. After doing it once by hand, you will probably want to find an easier way. But hand sanding is an excellent start, especially on a blade of value. It goes slow which means it removes very little metal at a time. So you can't screw up quickly either.
-
03-04-2006, 04:49 AM #6Senior Member
- Join Date
- May 2005
- Location
- New Jersey
- Posts
- 1,331
Thanked: 8
Electrical tape is good. Originally Posted by Blade Wielder
All you need to do is cover the little flats on the spine that you get from honing. The idea is to prevent too much material removal.
I just use sandpaper to clean up the finish. The kind of stuff you have I've handled successfully with 1000 sandpaper. I then work my way through 1500 and 2000 to produce a mirror finish.
-
03-04-2006, 06:01 AM #7< Banned User >
- Join Date
- Aug 2005
- Location
- Canada
- Posts
- 1,392
Thanked: 91
Thanks for the help, guys! You've filled me in on a lot of details I was uncertain of before.
Those were some detailed replies, and I plan to use all of the information in them tomorrow when I go to pick up the sandpaper you've mentioned. I haven't shaved since Wednesday, so my mission is to complete my restoration of this razor, sharpen it, and then shave with it. Heh.
I found that the electrical tape is a really handy tool to be using. It really lets you lay the razor right down on the stone and get a great edge in a short amount of time.
I think I spent about two hours working on that chip in the blade. At first, I was trying to keep the razor very flat against the stone, but I was making very little progress that way. Plus, when I'd look at the edge I was creating, it wasn't all that straight.
What I did was switch to a steep angle, which straightened the edge out nicely and diminished the size of the chip considerably. Now it's almost completely gone. I can still detect a very slight bit of it, but I have to turn the blade for it to catch the light, and even then it's very subtle. Barely detectable with my fingernail. I figure that because I'm still going to have to put a good edge on with the 4K and then refine with the 8K, it will be undetectable by then. I think now's a good time to stop and approach the sanding and polishing tomorrow.
Anyhow, here's the progress so far:
I hope I can show you guys a finely polished blade tomorrow.
So, in summary, which sandpaper grits will I need? 1000, 1500 and 2000?
-
03-05-2006, 07:13 PM #8< Banned User >
- Join Date
- Aug 2005
- Location
- Canada
- Posts
- 1,392
Thanked: 91
It still needs more work, but...
-
03-05-2006, 07:21 PM #9Senior Member

- Join Date
- Oct 2005
- Location
- Auburn, AL
- Posts
- 839
Thanked: 8
Lookin' good!
For future reference, you might want to try regular masking tape rather than electrical tape for protecting the spine. I've found that electrical tape (yes the plastic type) tends to leave more residue on my stones than does masking tape.
Just another data point .
.
Ed
-
03-05-2006, 08:19 PM #10< Banned User >
- Join Date
- Aug 2005
- Location
- Canada
- Posts
- 1,392
Thanked: 91
Masking tape. Noted.
I didn't grind on the electrical tape enough to have it eat through to the stone, but I could definitely see that happening.


 Reply With Quote