Results 1 to 10 of 16
-
04-05-2011, 09:38 PM #1
 New "Resto" Technique (Tutorial Style) - Tumbler Alternative
I have been playing with a new "resto" technique, and I wanted to share it with you guys. I'm putting resto in quotes, because I wouldn't really call this restoration work. If you remember Glen's thread about the scale of vintage resto through full custom restore, this would be even farther to the vintage resto side. Perhaps just "cleaning" is a better way to put it. Read through, check the photos, and then you can decide.
I came up with his method while trying to find a good way to clean up full hollows. I'm really not comfortable taking them to greaseless - heat and metal loss can become big issues there. But I was finding that using just a stainless or emery (i.e. the gray and black compounds that SRD carries) wasn't doing as much as I wanted. So what I came up with is nowhere near as aggressive as greaseless compounds, but more aggressive than a gray or black compound.
I have been using Norton synthetic steel wool in the 000 grade (I got it at Woodcraft; it's the gray one; you can just search their website for "synthetic steel wool" and it's right at the top) and MAAS. What I do is apply MAAS liberally to the blade, and then, very lightly, "sand" the blade from heal to toe (back and forth) with the synth steel wool. It's important to not be "dry sanding;" the MAAS is there to tame the effects of the wool. Feel free to add more MAAS if you find you need it. Not using MAAS will still work, but you'll get deeper scratches that will take longer to get out. Same if you drop to 00 grade or lower. But when you see the photos, you'll see why I say I don't think there is any point in getting more aggressive on the blade.
For the thick parts of the razor (spine, tang, and tail), going more aggressive is ok. Those parts of the razor don't reach the same level of hardness as the blade itself during the HT, so it's easier to get the deeper scratches out. Go ahead and get more aggressive there if you want to, but be careful of the maker's mark.
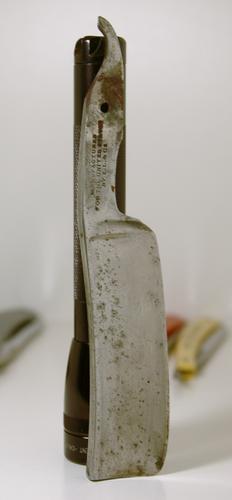
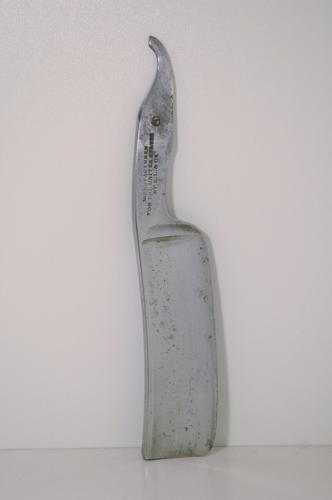
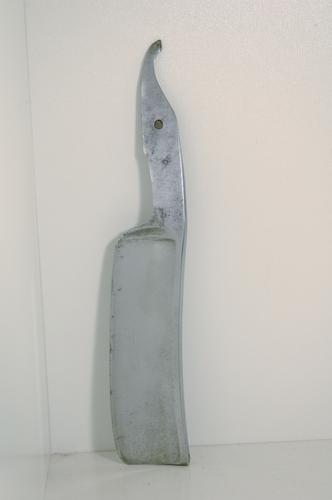
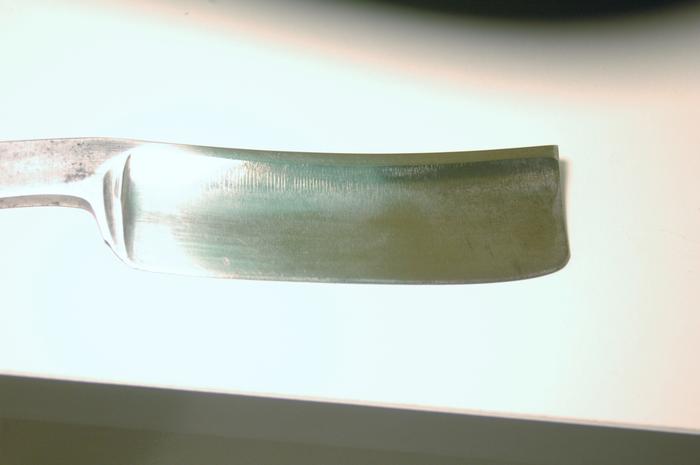
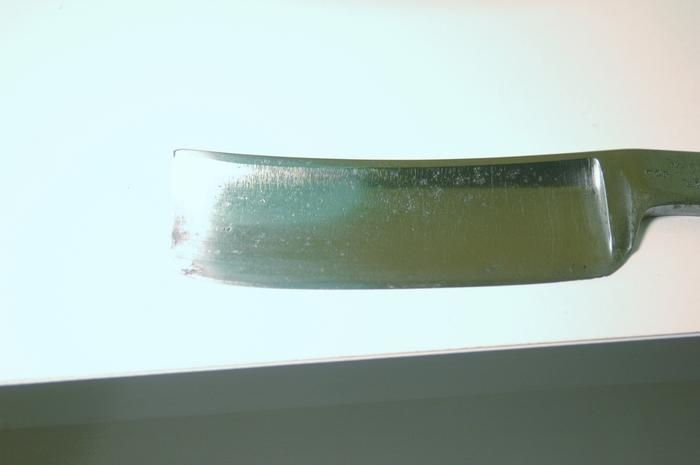
As you look at the photos, you'll see that this method WILL NOT remove pitting, but it will take out mild and medium staining. You'll have the pits left behind, and they will look black from the shadows they cast on themselves, but the vast majority of the staining in the pits will be removed (unless it's Devil's Spit deep). In addition to leaving behind pitting, this method will also leave behind etches, factory grind marks, and blade stampings. Given how I like my razors to come out looking, this is a totally acceptable tradeoff. You WILL NOT get a mirror finish if this method is your baseline, unless there are already no "marks" on your razor.
You can go back and repeat with MAAS and the 000 as much as you want, but it shouldn't take you more than about 5 mins per side of the razor MAX. Beyond that, you start to see diminishing returns to the point that I don't think it's worth it.
From there, I go to the buffer with the gray compound, followed by black, green, and white. I typically will not finish up through a rouge because I'm really not looking for a mirror finish. I'd say you definitely want to go through the green, and the white is optional. I say that because I find the green still leaves marks that I want to get out, but I don't notice it from the white. If you are going for a full mirror, then you'll probably want to use the rouge.
Anyway, here are some photos. There is a before photo of the front, followed by a photo of the front and back after the 000 and MAAS. I also included some photos in what I like to call "dynamic light," so you can see what the finish looks like under various lighting conditions in a single photo. Those, too, are after the 000. (Because of the grind marks on this razor, I could probably not even go to the buffer, but in person the difference will be noticeable. In photos, maybe not so much.)
Given what I have seen and been told, I think this method, starting with the 000 + MAAS and going on up, yields about the same effect as if you were to use a tumbler. Takes out staining, leaves everything else.
Last edited by holli4pirating; 04-05-2011 at 09:41 PM.
-
The Following 8 Users Say Thank You to holli4pirating For This Useful Post:
bharner (04-07-2011), Lazarus (04-06-2011), MarkinLondon (04-06-2011), Qatsats (04-06-2011), ScottGoodman (04-06-2011), spazola (04-06-2011), str8fencer (04-06-2011), Timedwards (04-06-2011)
-
04-05-2011, 11:22 PM #2

Just to clarify the bottom four photos are all showing the result of nothing more than 000 steel wool and MAAS?
-
04-06-2011, 12:53 AM #3

That is correct. The only important part is to have the MAAS on the blade while you use the (synthetic) 000 steel wool.
-
The Following User Says Thank You to holli4pirating For This Useful Post:
Lazarus (04-06-2011)
-
04-06-2011, 02:37 AM #4

Really useful information. Thanks.
-
04-06-2011, 04:20 AM #5

Thanks for the tip Dylan.
You da man!
-
04-06-2011, 10:45 AM #6..mama I know we broke the rules...


- Join Date
- Feb 2010
- Location
- Toronto, Ontario, Canada
- Posts
- 2,895
- Blog Entries
- 8
Thanked: 993
From what I just read, I'll need to give this a try. Thanks for the info Dylan.
-
04-06-2011, 10:33 PM #7

Thanks for the tip. I've got a resto project razor I picked up but the thought of spending hours sanding has been keeping me from it. Would flitz or blue magic liquid metal polish work? I stopped by my local Ace on the way home and they didn't have MAAS. But they did have neatsfoot oil and saddle soap. They had the synthetic steel wool and those two polishes.
Last edited by bharner; 04-06-2011 at 10:44 PM.
-
04-07-2011, 12:01 AM #8

I would guess that Flitz would work, given that I have seen Flitz and MAAS used interchangeably. Can't say from experience, though.
-
04-07-2011, 12:15 AM #9< Banned User >

- Join Date
- Mar 2011
- Location
- Chicago
- Posts
- 92
Thanked: 13
That blade looks like one I saw on Ebay a couple days ago, lol. If it is you spent some coin, ouch! Pretty blade though. Thanks for the tip on synthetic steel wool
-
04-07-2011, 12:20 AM #10

No, I've had this razor for months, at least. I rarely work on razors that I intend to keep, so she's been sitting around all this time.
Had her since http://straightrazorpalace.com/show-...est-razor.htmlLast edited by holli4pirating; 04-07-2011 at 12:23 AM.


 5Likes
 LinkBack URL
 About LinkBacks


 Reply With Quote
