
Results 11 to 18 of 18
 6Likes
 LinkBack URL
 About LinkBacks
-
05-15-2011, 01:18 PM #11Senior Member

- Join Date
- Jan 2008
- Location
- Northern California
- Posts
- 1,301
Thanked: 267
Thanks for the look at what you are doing. Very nice.
R
-
The Following User Says Thank You to riooso For This Useful Post:
Nphocus (05-15-2011)
-
05-16-2011, 04:32 AM #12Senior Member
- Join Date
- Mar 2011
- Location
- Richmond, Virginia
- Posts
- 104
Thanked: 11 Little Bugger
Saying that the wedge was a bugger is a bit of an understatement. I think that next time I will be a bit less ambitious and go with a simple spacer.

That's 60 grit dry sandpaper on my handy dandy granite tiles.
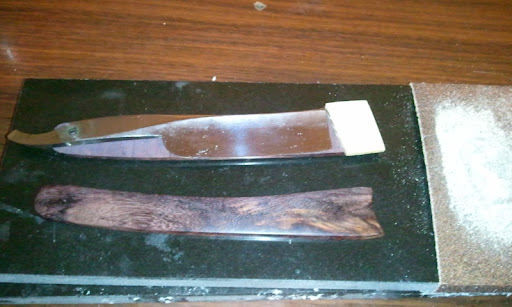

Way too thick. I sanded down alot after this. I was really surprised by how thin I needed to go with the wedge, and also by how little angle you need in the wedge.... and also by how difficult it is keeping the wedge sides flat and even relative to each other.

Test fit, with brass bolts and nuts providing temporary assembly duty. Thank you SRP wiki... at least 1 guy read it

I didn't think I had enough things to go wrong, so I figured what the heck, lets throw another pin in there! When I went to pin it, I couldn't find the hollow rod that I had bought... back to microfasteners again. Hopefully, their shipping will still be ridiculous
Last edited by Nphocus; 05-16-2011 at 05:16 AM.
-
05-16-2011, 04:43 AM #13Senior Member
- Join Date
- Mar 2011
- Location
- Richmond, Virginia
- Posts
- 104
Thanked: 11 What is that tap, tap, tap that I hear?
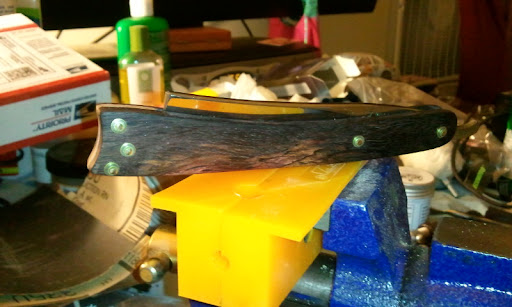
Why yes, that's me at midnight, using a large kitchen spoon to pin scales. It shouldn't take long, there's only 5 pins and 30 washers... and I can't seem to locate my flush cut pliers, so I ended up doing a fair bit of manual filing... oh well, live and learn.
She is sanded to 12,000 grit using micromesh and a foam block. I thought that stuff would be overkill, but it really brings out the natural grain and leaves a very worn in feel to the surface. The satin finish isn't too bad and the texture and grain stand very well on their own.
My pinning sucks. I don't know what you can see in the pics, but in person it's not even remotely up to snuff. Fortunately I have plenty of rods and spacers.


My next set of scales will be much better and incorporate the lessons learned. I'm thinking less destroyer and more cresting waters. I might have to save the water theme for my Genco Fluid Steel. The next scales will definitely be much less beef and more curvy and lithe.
I will be tearing these back down to put a proper spacer bar in the resting pin and to sand the inside of the scales to hopefully correct some closing geometry issues. I made the mistake of leaving them rough cut from the saw and the scales are closing to one side. I put a thicker washer on the tight side and a hammered washer on the gaping side and that helped a bit, but I still think the issue is that the surface it's rotating against is rough and unsquare.
I also need to coat it in tung oil. That being said, I still intend to shave with it tonight, as is.baldy likes this.
-
05-16-2011, 04:46 AM #14Scale Maniac


- Join Date
- Mar 2009
- Location
- Decorah, IA
- Posts
- 2,671
Thanked: 641
You're doing a great job for your first attempt!
My only advice: don't abandon the wedge. The angle is your friend.
-
The Following User Says Thank You to BKratchmer For This Useful Post:
Nphocus (05-16-2011)
-
05-16-2011, 05:14 AM #15Senior Member
- Join Date
- Mar 2011
- Location
- Richmond, Virginia
- Posts
- 104
Thanked: 11
What's your reasoning for keeping the wedge? Originally Posted by BKratchmer

What advantages does it offer over a simple spacer?
What's your take on the proper amount of angle in the wedge? I'm thinking the spacer needs to be perfectly square in all dimensions relative to itself and then a few passes on coarse sandpaper to give it the wedge. I'm thinking that the angle isn't drastic at all, not more than 5 or 10 degrees at most.
-
05-18-2011, 02:24 AM #16Senior Member
- Join Date
- Mar 2011
- Location
- Richmond, Virginia
- Posts
- 104
Thanked: 11 Still not finished
I'm thinking about finishing in CA glue based on the recommendation of my betters. Basically, tung oil would have to be reapplied annually.
I did rub a bit of baby oil into the finish to see what it did. It seemed to darken it a bit.
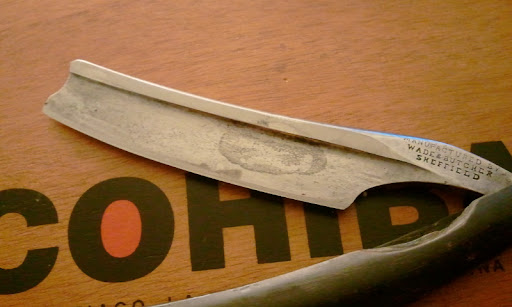
Better pics without the background clutter. Also, a pretty good book:
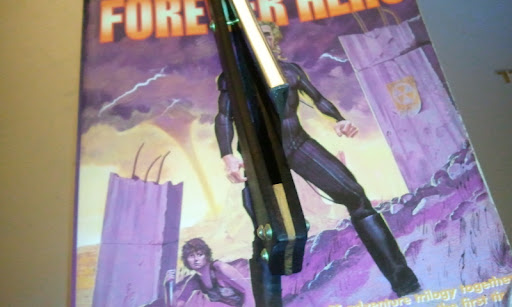
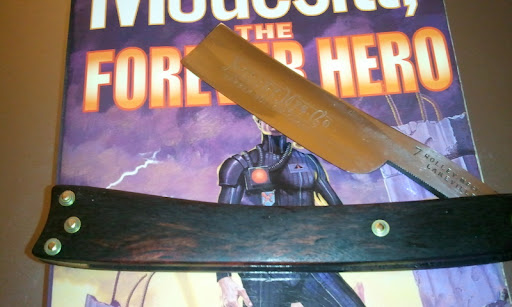


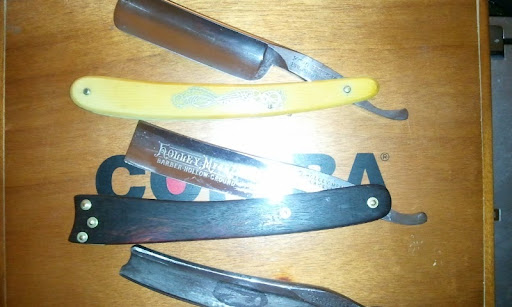
I apologize for the flash. The top is a Karl Pecker 6/8ths, another beauty. The bottom is my next project. It's a W&B faux frameback.

I'm going with a hollow girder type look. Something along the lines of Orange County Choppers Web themed bikes. I want each of the pins to be at the center of of each web, including the ones used in the wedge. I also want to put hollows into the wedge. I'm going to use a densely grained oak for the scales. Hopefully they won't fall to pieces when I hollow them out.
-
05-18-2011, 02:33 AM #17This is not my actual head.


- Join Date
- Nov 2009
- Location
- Middle of nowhere, Minnesota
- Posts
- 4,624
- Blog Entries
- 2
Thanked: 1371
I really like what you've done so far.
My only suggestion is to make the tang end of the scales narrower, so that it matches the width of the tang when the razor is opened 180 degrees (basically make a smooth transition from the tang to the scales). That makes stropping and honing easier.Nphocus likes this.
Strange women lying in ponds distributing swords is no basis for a system of government.
-
The Following User Says Thank You to HNSB For This Useful Post:
Nphocus (05-18-2011)
-
05-18-2011, 02:40 AM #18Senior Member
- Join Date
- Mar 2011
- Location
- Richmond, Virginia
- Posts
- 104
Thanked: 11
Thank you. I've actually thought about thinning the scales out alot more. They are pretty close to the original 1/8ths thickness and they feel very beefy. I also still need to smooth out the inside of the scales. I'm considering making them more of an almost oval shape and tapering both the inside and outside edges of the scales.
I also drilled two different size peens in my desktop anvil. Surprisingly it completely smoothed out my peens and well rounded them and the triple washer stack. They feel right now. Peening them on the same flat anvil left the surface of the peen smooth, but the edges were rough, snaggy.
Thanks again for the feedback.


 Reply With Quote