
Results 1 to 10 of 18
 LinkBack URL
 About LinkBacks
-
05-29-2011, 01:15 AM #1face scraper


- Join Date
- May 2011
- Location
- west virginia
- Posts
- 352
Thanked: 62 wester bros. little de-fi restore (my first restoration)
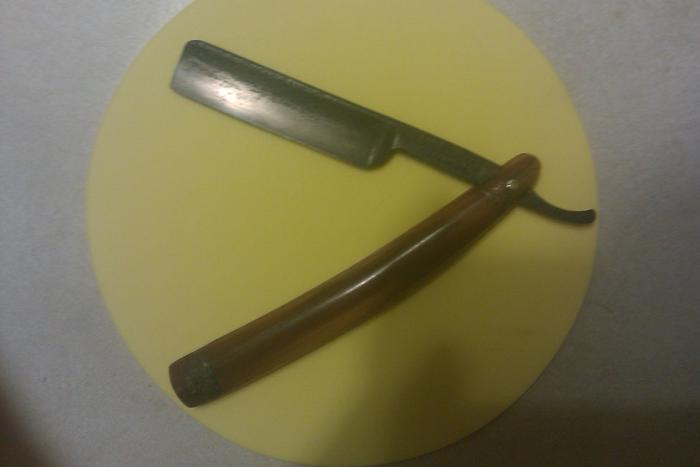
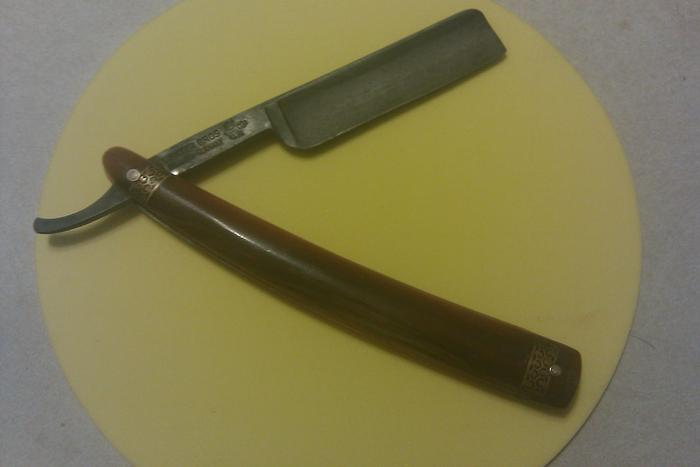
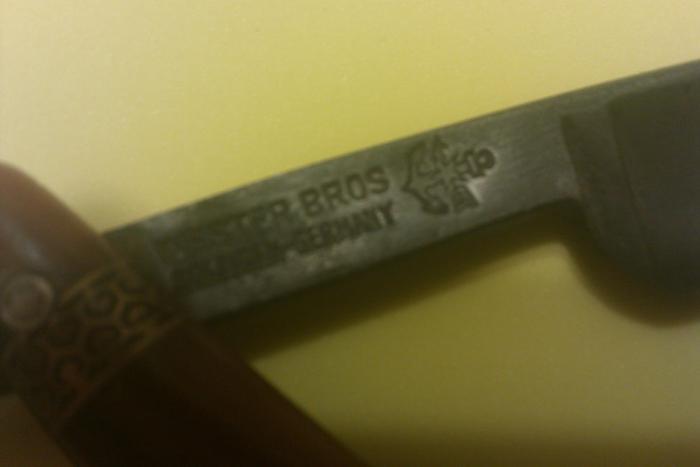
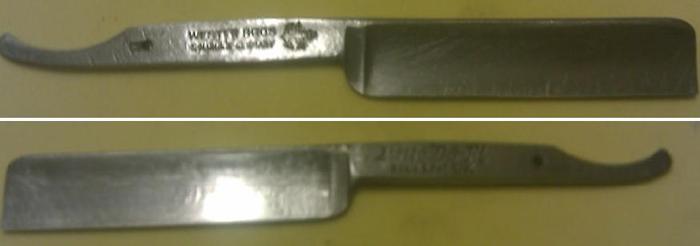
This is my first restore, I purchased it off of ebay with 3 other razors in the lot. I honestly placed my bid because I liked the anchor, star, and arrow logo, plus the little brass enlays looked neat. There was a W&B in the lot that didn't look to be in too awful condition. I decided to try this as my first restore because the blade is in the worst shape, one of the pins was pulled half way through the scales, and the other pin looked as if it was filed on at some point. If I can bring this one back to life the others will be very little challenge. I am crafty and think outside the box plus I have a lot of free time. I have read through the wiki and creeped the forums for months before joining. Everyone here seems to have a great sense of community, and I would love and appreciate any advice, tips, and input. enough rambling...onto the pictures. (sorry about the low light but the pitting is bad enough to see from the moon)
-
05-29-2011, 01:20 AM #2face scraper
- Join Date
- May 2011
- Location
- west virginia
- Posts
- 352
Thanked: 62
the razor as I received it, and after removing pins.


-
05-29-2011, 01:22 AM #3face scraper
- Join Date
- May 2011
- Location
- west virginia
- Posts
- 352
Thanked: 62
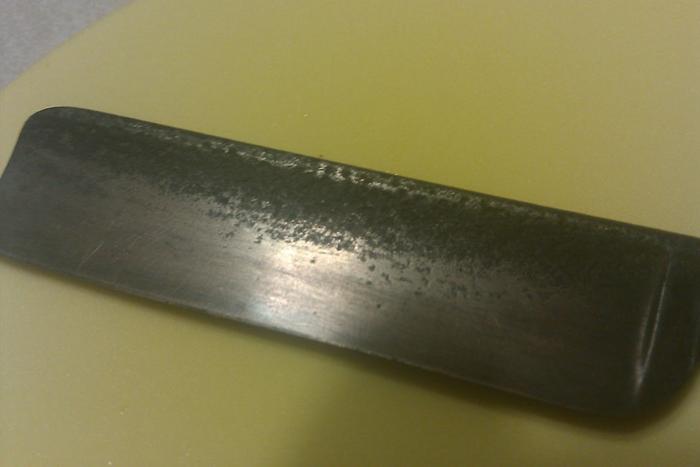
after about 4 hours of sanding with 60 grit.
now to sand some more.
-
05-29-2011, 01:28 AM #4Some kind of Zombie


- Join Date
- Feb 2011
- Location
- Le Mars Iowa
- Posts
- 1,019
Thanked: 166
Should be a great first restore. Seems to be shaping up very well.
-
05-29-2011, 01:32 AM #5Geriatric Gamer/Surf Fisher

- Join Date
- Mar 2011
- Location
- Manassas, VA
- Posts
- 298
Thanked: 42
So far, so good.
Go easy with the heavy grits down there near the edge. Wouldn't want to get it too thin, but you're probably already aware of that.
Keep us posted.
-
05-29-2011, 01:37 AM #6face scraper
- Join Date
- May 2011
- Location
- west virginia
- Posts
- 352
Thanked: 62
thanks! been trying to not go down there at all. majority of the pitting was on one the side with the company stamp near the top.
should i have put this in workshop? since it is an ongoing thing?
-
05-29-2011, 01:55 PM #7At this point in time...


- Join Date
- Jun 2007
- Location
- North Idaho Redoubt
- Posts
- 27,168
- Blog Entries
- 1
Thanked: 13250
Yes Originally Posted by bondpunk


I moved it for you, with the finished project pics you can go either way, the choice is yours,, Myself I usually leave them in one place as it gives continuity to the whole story ...
Looks like your off to a good start
Remember the number 1 rule in this "Rush a Restore, Wreck a Razor" take yer time and have some fun...
-
05-29-2011, 04:27 PM #8face scraper
- Join Date
- May 2011
- Location
- west virginia
- Posts
- 352
Thanked: 62
thanks. new guy mistake but I should have known better. I sanded and polished till the wee hours of the morning. I was lucky enough to have a girlfriend who is out of town (she does not share my joy when it comes to razors or cakes). I am heading to Woodcraft later to see if they have 1/16 rod and tiny washers. otherwise I am on hold until later in the week.
Last edited by bondpunk; 05-29-2011 at 06:33 PM.
-
05-29-2011, 04:30 PM #9face scraper
- Join Date
- May 2011
- Location
- west virginia
- Posts
- 352
Thanked: 62
Thanks for this tony, a lot of stuff to remember the advice is welcome. Originally Posted by tonycraigo
-
06-02-2011, 08:57 PM #10face scraper
- Join Date
- May 2011
- Location
- west virginia
- Posts
- 352
Thanked: 62
and i got my rod and washers today, I am gonna practice peening for a few days then try to reassemble it.


 Reply With Quote