
Results 11 to 20 of 36
 14Likes
 LinkBack URL
 About LinkBacks
-
12-31-2011, 01:52 PM #11Senior Member


- Join Date
- Jun 2008
- Location
- Upstate NY
- Posts
- 5,003
Thanked: 1827
Restoring ebay razors can be fun if you do the work yourself and expensive to the point of exceeding the razor's value if you sent them out for restoration. I have restored many a razors but this one reminds me of the work you are doing: http://straightrazorpalace.com/custo...o-8-razor.html
Be sure to enjoy the time you spend on your restorations. Many of my personal restorations are a family project mostly with my son who is not 17 and even sometimes CarrieM. They mostly work on finishing the scales but it may be time to get Jr into the metal work.Martin103 and greasygreaser like this.If you always do what you always did, you will always get what you always got. (A. Einstein)
-
12-31-2011, 03:02 PM #12Senior Member

- Join Date
- Sep 2011
- Location
- SoCal
- Posts
- 287
Thanked: 30
One day, I'm going to try a true restoration...but let's get honing down first. Looking forward to seeing your finished product.
greasygreaser likes this.
-
01-01-2012, 04:24 AM #13Senior Member


- Join Date
- May 2011
- Location
- Ipswich, Australia
- Posts
- 481
Thanked: 64
I hear you on that score Originally Posted by medicevans

Got a blade jig already, and it really has made things easier
Sliced sandpaper several times already, but no fingers ... yet
Thanks again for the useful tip
To Joed
Nice looking restore in your thread
I don't think I will get to that level on my first time out
It's slow and tedious sanding by hand, but I can see some results for the effort
The scales will be decided on soon as sanding is finished
To eflatminor
This is my very fist try at a restore
I have done a lot of reading and asking questions
And decided to tape the plunge
Honing will be another challenge for me
The journey is half the challenge
Off to start on the next stage now
Sanding with 600 grit and maybe move to 800 time permitting
Have fun
RickLast edited by RickyBeeroun222; 01-01-2012 at 04:35 AM.
-
01-01-2012, 03:46 PM #14Senior Member
- Join Date
- Jun 2008
- Location
- Upstate NY
- Posts
- 5,003
Thanked: 1827
Thank you for your kind words regarding my restoration. We all have to start somewhere. Here is my first restoration: http://straightrazorpalace.com/razor...o-co-str8.html My son wants me to leave it as is since it was the first we did together. Keep at it if you like doing this type of work. SRP's members set some high targets in restorations but they are not unobtainable. Good luck. Originally Posted by RickyBeeroun222
RickyBeeroun222 and greasygreaser like this.If you always do what you always did, you will always get what you always got. (A. Einstein)
-
01-06-2012, 11:44 PM #15
Very nice work. I believe that hand working the first one gives a better idea of what may work better in the future. I usually do over 50% of any blade by hand.
greasygreaser likes this.Be yourself; everyone else is already taken.
- Oscar Wilde
-
The Following User Says Thank You to Geezer For This Useful Post:
RickyBeeroun222 (01-06-2012)
-
01-07-2012, 04:56 AM #16Senior Member

- Join Date
- Jul 2011
- Location
- Indianapolis, IN, USA
- Posts
- 179
Thanked: 9
I was wondering if one of you guys got that. I was looking at it earlier. Originally Posted by RickyBeeroun222
-
01-20-2012, 07:46 AM #17Senior Member
- Join Date
- May 2011
- Location
- Ipswich, Australia
- Posts
- 481
Thanked: 64
Hi again
Time to update this job
Got to near finishing 600 grit wet/dry and decided I was not happy with the finish
Too many scratches I couldn't get rid of
So went back to 400 wet/dry and used window cleaner on the paper
Got a better finish this time, sorry didn't stop long enough to take pics at this stage
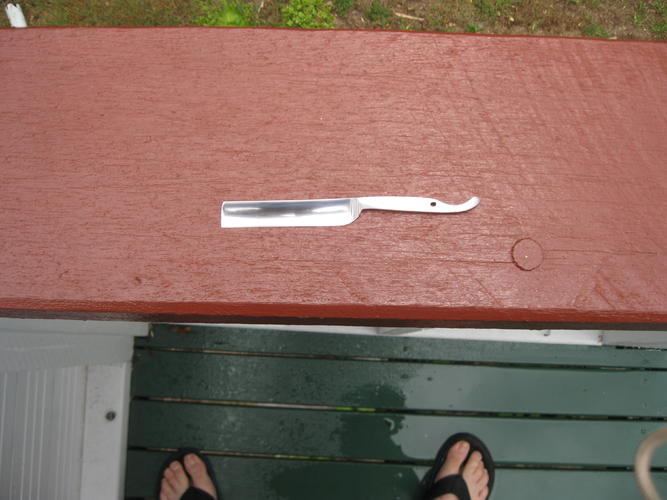
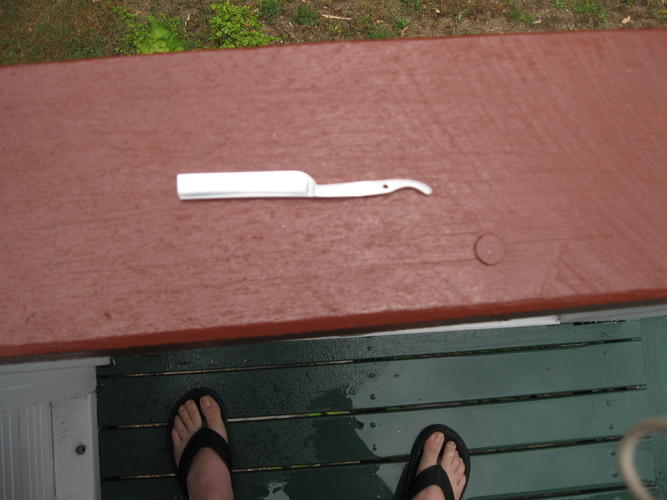
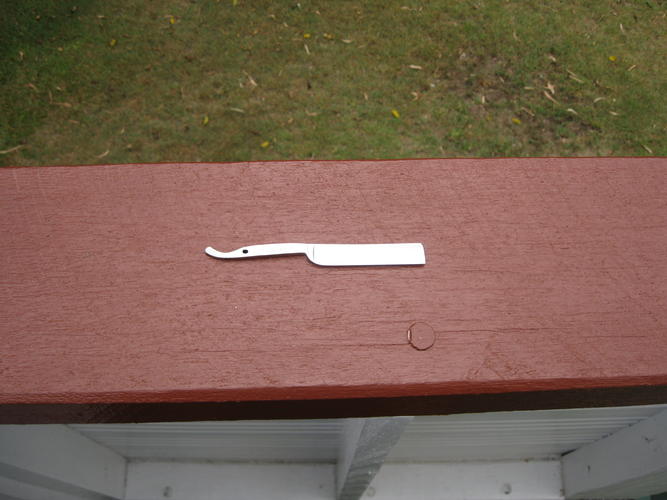
Carried on to 600 grit and got some progress pics to share
Not re sized this time
 greasygreaser likes this.
-
01-20-2012, 08:08 AM #18Member

- Join Date
- Apr 2011
- Location
- Brisbane, Australia
- Posts
- 1,434
Thanked: 642
Looks good......I think........

You need to get a bit closer with the camera mate don't be shy.
Stugreasygreaser likes this.
-
01-20-2012, 08:54 AM #19Senior Member
- Join Date
- May 2011
- Location
- Ipswich, Australia
- Posts
- 481
Thanked: 64
Thanks Stu
Yeah the photos are a bit hard to see without re sizing
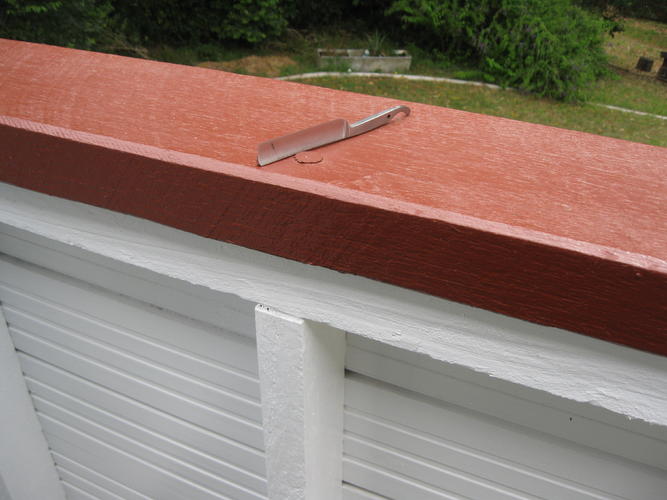
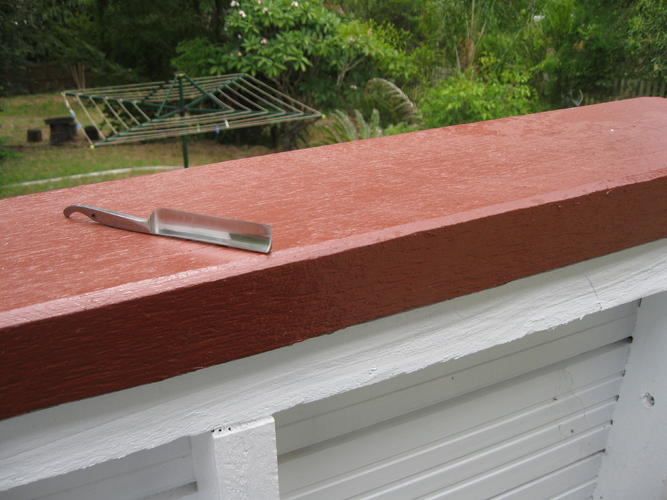
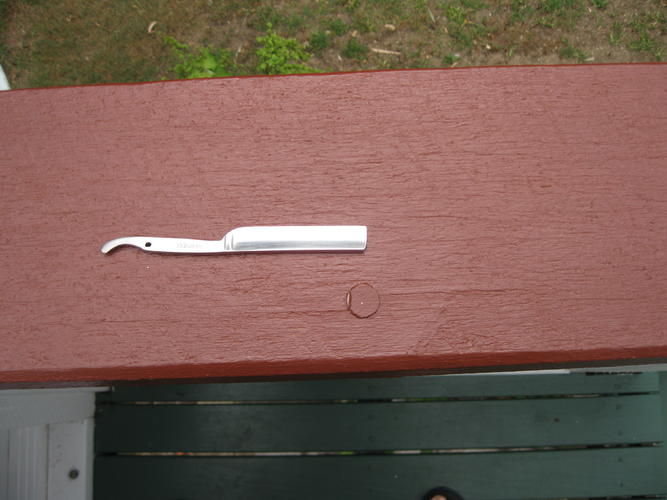
Got some more of similar quality pics after 800 grit
This one used wd40 to see what difference it made
Seems the sanding time was shorter and a nice glow to the blade is a bonus
Starting on 1000 Grit now using wd40 sprayed on the paper
Have more pics up soon
They will get re sized
Loking at downloading GIMP program to help out
Does anyone know about this one, good or bad


-
01-20-2012, 01:02 PM #20Member
- Join Date
- Jan 2012
- Location
- Phoenix Arizona USA
- Posts
- 43
Thanked: 4
Thank you so much for sharing your step by step.
Damn you for making me hit antique stores before I pick up my kids for the weekend!


 Reply With Quote

