
Results 11 to 20 of 24
 26Likes
 LinkBack URL
 About LinkBacks
-
01-31-2012, 06:03 AM #11This is not my actual head.


- Join Date
- Nov 2009
- Location
- Middle of nowhere, Minnesota
- Posts
- 4,624
- Blog Entries
- 2
Thanked: 1371
Yeah. I don't think index finger scales will ever catch on.
gssixgun likes this.
Strange women lying in ponds distributing swords is no basis for a system of government.
-
01-31-2012, 08:28 PM #12At this point in time...


- Join Date
- Jun 2007
- Location
- North Idaho Redoubt
- Posts
- 27,052
- Blog Entries
- 1
Thanked: 13249 Finished
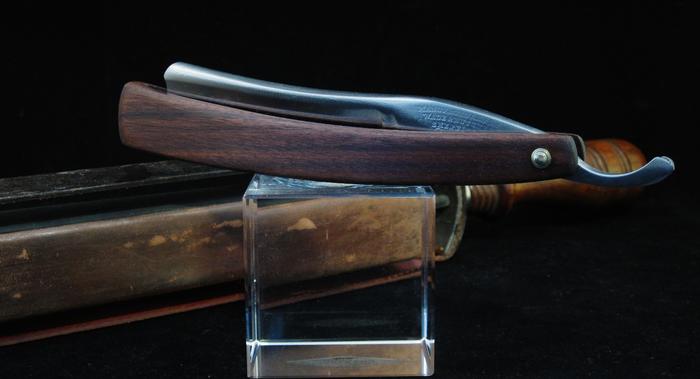
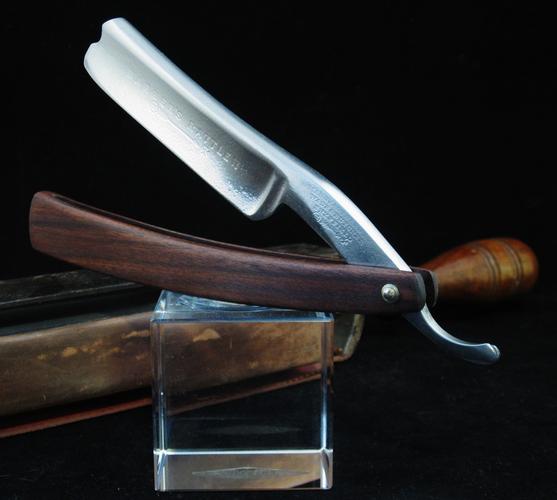
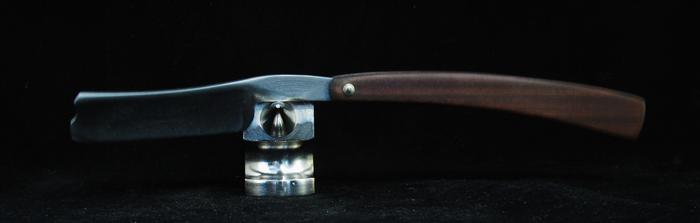
So after couple of days with this, I learned a bit, Skipnord you were right, there was a bit of bounce back after the first "bending".. After the next day and doing the procedure a second time worked much better...
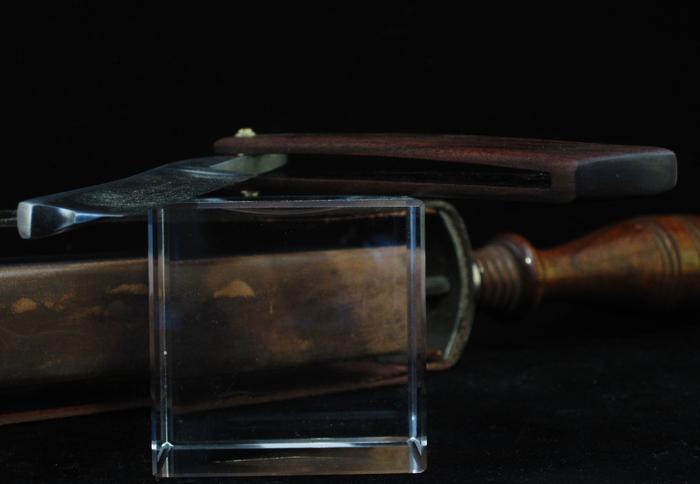
I would call this a success as the proof was in the action of the razor once pinned in.. Before there was little flex going on and the razor was very tight then looser when opening and closing also the tang was very tight in the scales when closed.. Now I could easily have added a 3rd pin to solve those problems but that pressure over time would have caused warping. You can see in the one pic that there is now a nice flex to the scales and a typical bowing of the scales..(fingerprints cost extra BTW) Also the scales balance out the razor to the tang which is something I like on every build I do..
Thanks for the suggestions and for following along, please feel free to add pics and ideas from your own builds..
Last edited by gssixgun; 01-31-2012 at 08:31 PM.
-
The Following User Says Thank You to gssixgun For This Useful Post:
cudarunner (07-18-2012)
-
01-31-2012, 09:26 PM #13Senior Member

- Join Date
- Mar 2011
- Location
- Jeffersonville, IN
- Posts
- 467
Thanked: 164
Glen's at it again, using that noggin of his. Better watch out folks, no telling what will happen next. Looks great Glen, you never cease to amaze me. Not just your skills, but also your attitude to not let a damn piece of wood get the best of you. Great work once again.
gssixgun likes this.
-
The Following User Says Thank You to whavens For This Useful Post:
gssixgun (01-31-2012)
-
01-31-2012, 09:28 PM #14Senior Member
- Join Date
- Sep 2011
- Location
- West-Flanders, Belgium
- Posts
- 171
Thanked: 14
amazing work as usual

-
The Following User Says Thank You to fragalot For This Useful Post:
gssixgun (01-31-2012)
-
01-31-2012, 10:05 PM #15Member
- Join Date
- Nov 2011
- Posts
- 33
Thanked: 2
Looks good! I cant wait to get it back!
-
The Following User Says Thank You to Mansgame For This Useful Post:
gssixgun (01-31-2012)
-
01-31-2012, 10:37 PM #16Senior Member

- Join Date
- May 2011
- Location
- Heart of Dixie
- Posts
- 159
Thanked: 31
Man that's awesome craftsmanship!
-Bubba (the tapatalk redneck shooting a Droid X2)
-
The Following User Says Thank You to bamabubba For This Useful Post:
gssixgun (01-31-2012)
-
02-01-2012, 12:35 AM #17Senior Member

- Join Date
- Oct 2011
- Location
- Festus, MO
- Posts
- 377
Thanked: 113
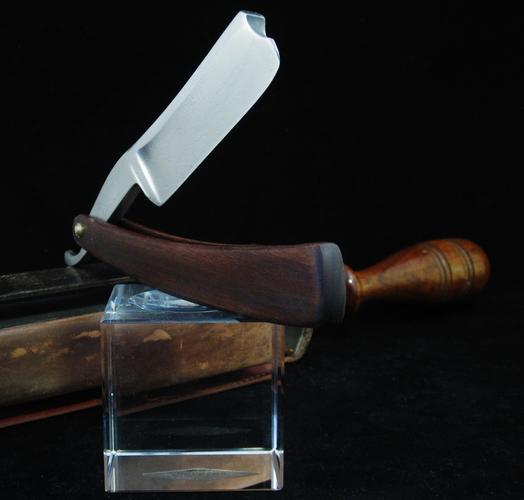
I do like how clean and minimalist that looks on the end without a wedge in there. Very Classy and Clean!
-
The Following User Says Thank You to RayCover For This Useful Post:
gssixgun (02-01-2012)
-
02-01-2012, 12:39 AM #18Junior Member
- Join Date
- Jan 2011
- Posts
- 12
Thanked: 2
First of all, Excellent looking work.
I'm new at this so take it for what it's worth, but could it be done with a router? It seems to me with the right jig you could cut whatever angle, flair, or whatever else you'd want into a piece of material. Then cut the desired scale shape out with a band saw. Sand everything down and walla...one piece scales. Like I said, I'm new and know nothing about pinning the scales and how it would affects the shape so I could be completely talking out of my back side.gssixgun likes this.
-
-
02-01-2012, 12:55 AM #19At this point in time...
- Join Date
- Jun 2007
- Location
- North Idaho Redoubt
- Posts
- 27,052
- Blog Entries
- 1
Thanked: 13249
Perhaps using one of those little mini bits, might be worth a try. I have a Router table and was going to get it all set up a few years back to use for scales.. Got sidetracked along the way Originally Posted by clintopher

 might have to return to that idea one of these days..
 gotta try and see I guess
-
02-01-2012, 01:52 AM #20Junior Member
- Join Date
- Jan 2011
- Posts
- 12
Thanked: 2
Just looked at Whiteside's website...they've got a 1/8" spiral bit that has a 1/2" cutting length. So I'm thinking the material would need to be flipped over to get it cut out completely, which means any jig would need to be dead nuts and set up dead nuts on the table as well. Making practice runs with pine or whatever would be a good idea until it was dialed in. Then, to make the effort worth it, make more than one. Of course, this all assumes that 1/8" cut isn't too big. LOL.


 Reply With Quote