Results 1 to 10 of 18
Hybrid View
-
03-06-2012, 09:32 PM #1
 Joseph Elliot Double notch restore, WIP.
Here's how it looked before I started work.
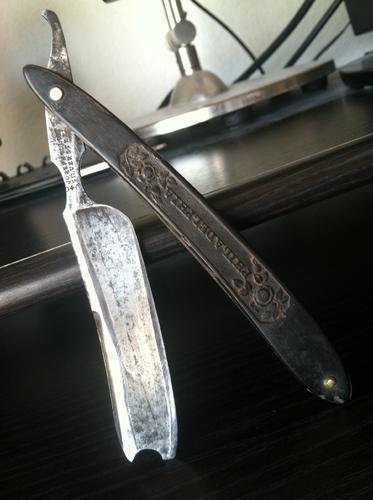
Here it is after a sizable chunk of hole-filling and sanding.
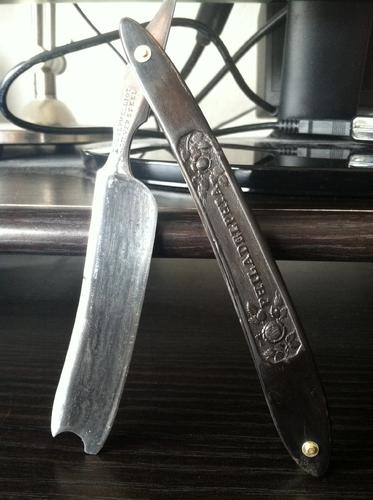
Getting it taken apart caused a bit more damage to the scales than is evident in the first picture -- the horn was just very brittle (and in full-on moron mode I disassembled it before soaking in neatsfoot oil). So the repairs you're seeing in the second picture are more extensive than is visible. Three full gaps opened in the border around the 'Philadelphia' pressing, so I had to remake several portions of border. Also, the inside of the scales was in terrible shape. They'd been near-hollowed near the toe (some of which you can see in the first image). There were lots of cracks and delaminations to deal with too.
What's left to do.
There are still a couple of gaps in the scales I want to fill in, plus one of the leaves in the pressing has a bug bite in it. Also, there are a few spots that need more coat & glue to even out the texture a bit.
I'd like to get the blade sanded better, but it's proving really problematic. I might just give it a satin finish with the micromesh and call it a day.
The wedge needs to be trimmed slightly. It blocks the blade (which is why it's assembled with microfasteners at the moment). That's because there's a tiny amount of warpage to the scales and I'm too timid the process of fixing that to try. Plus, I suspect baking the scales in a vise might damage the pressing.
Finally, I'll make some custom washers, pin it, hone it and shave.-Zak Jarvis. Writer. Artist. Bon vivant.
-
03-06-2012, 11:12 PM #2
 One answer among many: the infamous 'why a barber's notch'?
I've been continuing to dink around with getting the blade to close without hitting the wedge. I really didn't want to have to cut it down.
So I took out the bearing washers I'd added (it didn't originally have any). That makes it fit.
However there's something very interesting going on here. The pivot hole is designed as an oval and the tang tapers just a bit. The tolerance of distance between the blade tip and the wedge is such that you need to push the blade back slightly to get it to miss the wedge, and then once closed, it locks into place. The hollow toe (barber's notch) actually makes this easy and I could almost swear it was designed this way on purpose. The blade won't open without a bit of force and you have to use the notch to close it. Almost as though the notch were intended as a locking feature.
This might well change once I pin it for real, but for the moment I consider this a distinct 'hmmmm!' feature.
Then again, maybe it's just an artifact of the way I've fixed up the scales.-Zak Jarvis. Writer. Artist. Bon vivant.
-
03-07-2012, 04:33 AM #3

That will definitely be sweet when your done. I commend you on restoring the scales, thats alot of work and they look pretty good to me in the pictures. I can't wait to see the finished razor.
I just finished restoring an old Joseph Rodgers Full Wedge Lip lopper and I did the blade in a satin finish and the spine and tang fully polished. The satin finish really made the blade pop. So the idea of the satin finish would probably really make that razor really stand out. Please keep us updated and keep up the good work.
-
03-07-2012, 08:35 AM #4

Thanks! I wish I'd gotten better 'before' pictures, because it's hard to see some of the work I did (as in I know I did more fill-ins than I can currently find while looking at it up close with good light). I played around with knocking the finish down to satin using micromesh, but the blade isn't really having any of it. I might need to send it to someone that's got a buffer for proper cleaning. At some point before I got this razor, someone did a really lousy job cleaning it with a Dremel (or like tool). It's got telltale wandering patterns of ground-out metal as well as deep pitting. I tried getting it out with hand-sanding. My patience ran out.
However, I'm also thinking of fixing up this razor to the same level:
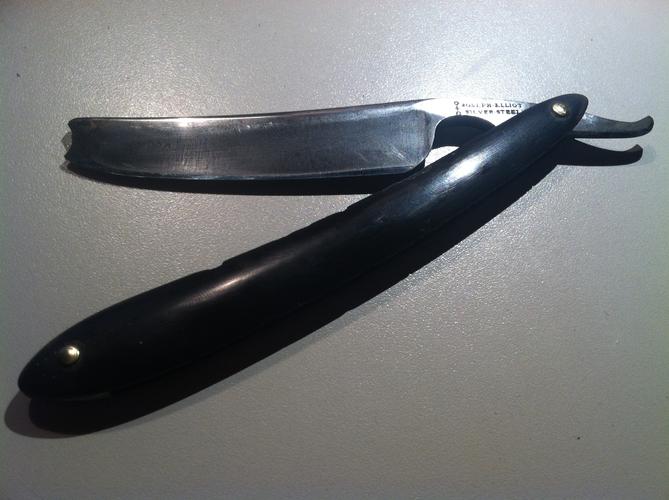
(While that blade does have a lot of toe wear, the taper is actually an intentional design feature)
I'd make a nice presentation box to put them in when I was done fixing the razors. They're both Joseph Elliot blades and I'd guess they were made within a few years of each other. I think they'd make a really neat pair.-Zak Jarvis. Writer. Artist. Bon vivant.
-
03-08-2012, 12:16 AM #5
 The last mile is always the hardest.
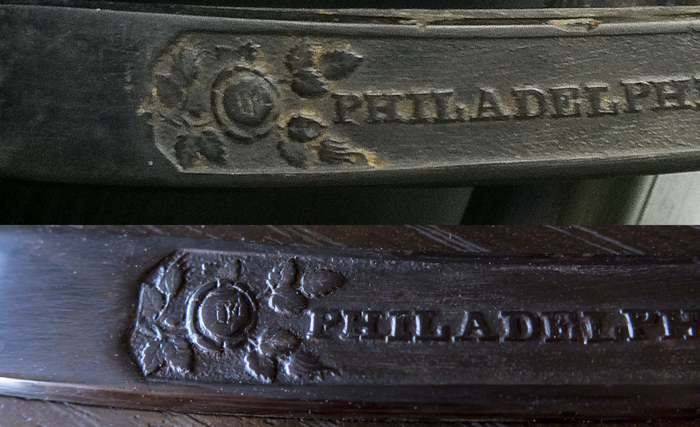
A close up of the detail work I've done restoring these scales.
(the difference in color is due to different cameras and different times of day -- my main light source is the window of my office)
I'm filling gaps using horn shavings (from a piece of donor horn) and CA glue. From the initial attempts I've modified slightly and now compressing the horn shavings down after I apply the CA glue, repeating until the gap is filled.
Getting the gap in that one leaf below the flower filled without putting a bunch of filler-material in the outlying design was... interesting.
I'm not entirely happy about the fine details I lost in getting a good polish, but having dug a piece of pre-restoration photo reference out of my phone's camera means I can (and might) go back in with a dental pick and add the detail back. Getting the leaf shape wasn't horrible. It's doing the CA coat & polish shuffle that's being a larger pain. That whole process of: coat! sand! polish! (find spot where the polish has gone through the coat) re-coat! sand! polish! (start swearing) re-coat! sand.... etc.-Zak Jarvis. Writer. Artist. Bon vivant.
-
03-08-2012, 06:20 AM #6

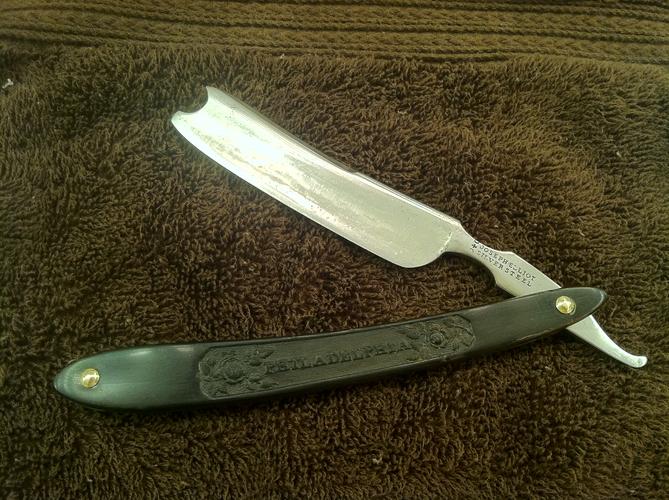
Now I just need to hone it.
I made the washers with some wide #00 brass and my doming block. In a last ditch effort to make the blade look less cruddy I taped the spine and stabilizer and then hit the blade with what remains of my last 320 grit sanding-puff for the Dremel. It doesn't have much virtue left in it, but it did give me small, reasonably consistent scratches that align with what would've been the original grind-marks if they had survived the surface-destroying apocalypse.
Tomorrow I'll get better pictures. The full porno-spread, in fact. -Zak Jarvis. Writer. Artist. Bon vivant.
-
04-15-2012, 09:13 AM #7

I've had success sanding out really deep pits on the face of razors using a piece of dowel wrapped in sandpaper. If you sand lengthwise with a course grit you can bring out good steel relatively quickly. The dowel prevents the paper from going in and out of the pits and ripples. It's easy then to just move up the grits with or without the dowel. It's an awesome razor as is though!!
-
04-15-2012, 11:50 AM #8

I think it looks great as is! Just leave it and enjoy.
-
04-16-2012, 07:44 PM #9

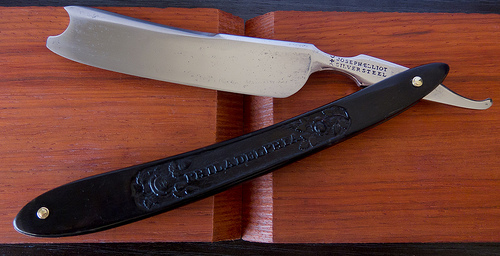
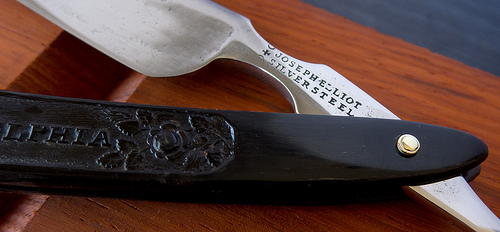
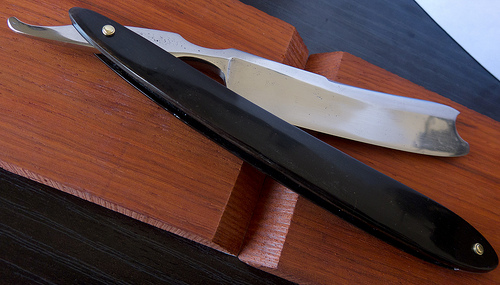
I ended up getting some little hard rubber wedges designed specifically for hand-sanding different shapes of wood. I didn't eliminate the pits on the surface -- partly because I was paranoid about changing the blade profile, some of those pits were DEEP -- but I did make it a whole lot shinier.
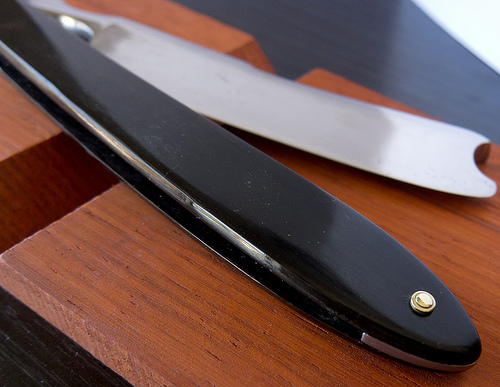
I'd done a bunch more work on this one and its cousin, documented over here, but I am apparently constitutionally incapable of leaving well enough alone. I hated the 'brushed' finish on the scales so I took it apart and sanded them some more. Then I figured while I had it all disassembled again I might as well try for a better finish on the blade. Much hand-sanding later, and three days in the vibratory tumbler, and I got this:

-
04-16-2012, 08:09 PM #10

very nice, and much better !


 6Likes
 LinkBack URL
 About LinkBacks


 Reply With Quote
