Results 1 to 10 of 17
Thread: Scales Design/Restore
-
03-12-2013, 03:18 PM #1Junior Member

- Join Date
- Mar 2013
- Location
- Texas Panhandle
- Posts
- 16
Thanked: 0 Scales Design/Restore
Okay Ladies and Gents,
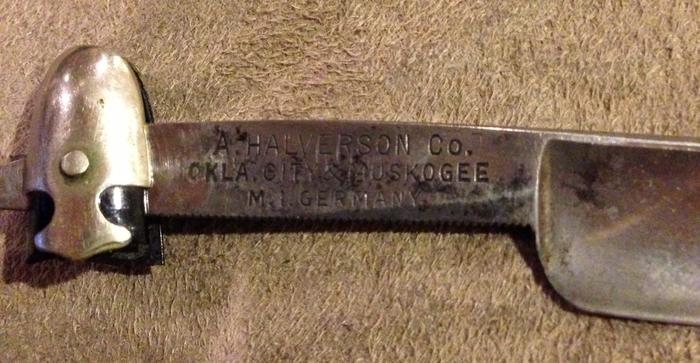
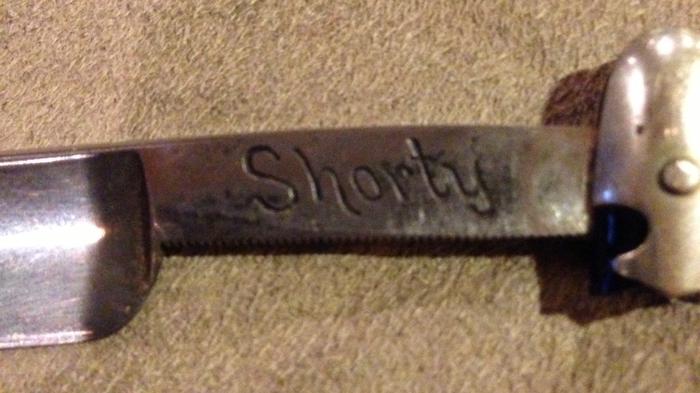
Since I received this blade from my grandfather in a broken state I figured I'd give my best a shot at designing and building a custom set of scales for it.


The attached PDF has a rough sketch of my initial design.
I came to this design for one main reason. My grandfather's favorite hobby is model aircraft (gliders mainly but getting into some powered prop planes and designs) and this scales design is based on a wing design he and I worked on back in the early 2000s for one of his planes. Since it came from him, I figured I'd base the design of my first scales on something that, maybe most people won't get, but he will.
Now, I have a tendency to highly over engineer my designs but most of my builds will probably last longer that I will . I'm going to start with what I believe is some Red Mahogany. I have 4 2" x 2" x 18" blocks. These were taken from an outdoor table that I chopped down and cut in half to make outdoor planters for the wife. Its weathered but 1/8" to 1/4" of planing should remove all the weathering. Then they will be cut in 1/4" blanks. I will be cutting all of them since all 4 blocks do have some cracking. Hopefully I will get enough blanks that I can make multiple sets of scale blanks because I know I will screw this design up.
This design incorporates a 2 sides with no wedge. Instead I will cut/file/sand out where the blade will go and make the "wedge" part of the scale design. I'm starting with 1/4" blanks but total maximum width will be around 3/8" to 7/16" after all sanding and everything.
Has anyone tried 2 piece scales like this without a wedge but removing wood from the inside of the scales to make the negative space required for the blade?
Any advise, criticism, proposed adjustments, etc... welcome. I can take much abuse.
-
03-12-2013, 04:10 PM #2

Ryu, While I am by NO MEANS an expert on this it is hard to tell if the scales will "fit" the blade without SEEING the blade itself.
I did post a thread on Making Scales on the CHEAP. My idea was to use PAINT STIR STICKS to rough out the shape you wanted. They are FREE or VERY CHEAP at least so no worries about messing up your GOOD WOOD.
If you wanted to just sand the inside to create room for the blade this would be easier to play around with using the paint stick idea. If you needed to make the scales the right thickness you can just rubber cement two pieces of the stick together to make one side. (make sure it is DRY before sticking them to each other)
Then the shape can be made quite easily. I can usually get a pair of scales done in 5-10 minutes.
Just my thoughts on this. Maybe you can at least see if the design would work without wasting any wood that you could use for further scale designs!
-
The Following User Says Thank You to Chevhead For This Useful Post:
Ryu (03-12-2013)
-
03-12-2013, 04:22 PM #3At this point in time...


- Join Date
- Jun 2007
- Location
- North Idaho Redoubt
- Posts
- 27,190
- Blog Entries
- 1
Thanked: 13250
Not abusive but some help...
You kinda need to have a Vintage Razor in your hands, and since you like to "Engineer" it will soon become apparent why razor scales are built to incoporate Flex and Angle, the design you have there does not..
The wedge being part of the scales is a Vintage idea but not the way you designed it, you didn't build in the angle. You could also build a One Piece design which is also Vintage but it takes some doing to get them right.. The are a couple of threads on SRP to get some ideas of how to make them work out correctly..
Most people take the Vintage scales and reverse engineer them, then start adding their own unique ideas after they get the basic working design figured out
Hints, at the pivot end on your design the "Flip" going up toward the blade is probably going to be in the way when stropping... Balance is also important especially when honing and stropping, that small a razor with a triple pin wedge is going to be hard to get a good balance out of..
Blanks usually start at about 1/8 (.125) per side after sanding they will end up at about 1/10 or just over (.100) again balance is important so the thickness must still be flexible and also feel right for the size of the razor...Last edited by gssixgun; 03-12-2013 at 04:30 PM.
-
03-12-2013, 04:28 PM #4Junior Member

- Join Date
- Mar 2013
- Location
- Texas Panhandle
- Posts
- 16
Thanked: 0
Chev,
That sir, is a brilliant idea. but instead of paint sticks i have some oak scraps (since i'm always building with red oak) laying around that i have no use for because they are too small to use in my larger projects. i can just plane down some of them and give it a shot. I may even end up with a set of red oak scales as well, but i like the mahogany color a lot better. but if i ever run out of oak scraps, paint sticks.
and i made this design around the blade and made all the measurements so, in theory, the scales should work properly.
(And i take it from your name you are a Chevy guy? if so, we will get along great)
Ryu
-
03-12-2013, 04:44 PM #5Junior Member

- Join Date
- Mar 2013
- Location
- Texas Panhandle
- Posts
- 16
Thanked: 0
-
03-12-2013, 04:45 PM #6
-
03-12-2013, 05:38 PM #7Junior Member

- Join Date
- Mar 2013
- Location
- Texas Panhandle
- Posts
- 16
Thanked: 0
-
03-12-2013, 05:41 PM #8
-
03-12-2013, 06:46 PM #9Junior Member

- Join Date
- Mar 2013
- Location
- Texas Panhandle
- Posts
- 16
Thanked: 0
68 is my favorite year, but i bought it off a family who lost their father to help out with some expenses and they didn't want to buy it back so they gave me free reign with it. The unfortuate part is that i was living in an appartment at the time and already had my truck and my 2000 camaro, and my father couldn't store it so i sold it off and boy do i reget it now.
-
03-12-2013, 07:53 PM #10

Ryu, you NEVER SELL your hot rods!
EVER!


 1Likes
 LinkBack URL
 About LinkBacks


 Reply With Quote


