Results 11 to 13 of 13
Thread: Resinating a WIP
-
04-17-2013, 03:10 PM #11

Bye the way a pressure cooker with a good seal is a good vac tank. Fergot about making one like that. Cheap air tool parts work for valves etc. Boston reminded me.
~Richard
-
05-11-2013, 06:51 PM #12Senior Member

- Join Date
- Apr 2012
- Location
- Jersey City
- Posts
- 225
Thanked: 50
Still at it. Vacuum chamber, check.
In my checkered past, I worked in a foundry that did investment (lost wax) casting so when Richard suggested a sandwich mold that filled from the top, I could see what the next step ought to be. Research on various forums led me to this set up using Legos. Sounds stupid but seems to work well.
I make my mold box with Legos and let the scale masters stay about a half an inch from the edge of the box. Using the Lego base has the advantage of the surface having keys built in so the mold will always lock securely together.Because the base is actually lower than the scales, the the finished bottom mold has the scales encased in silicone.
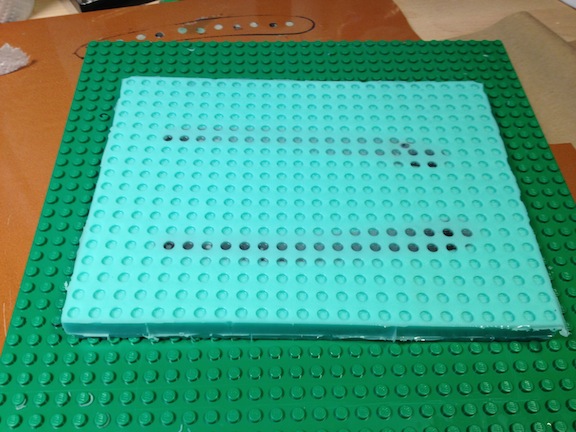
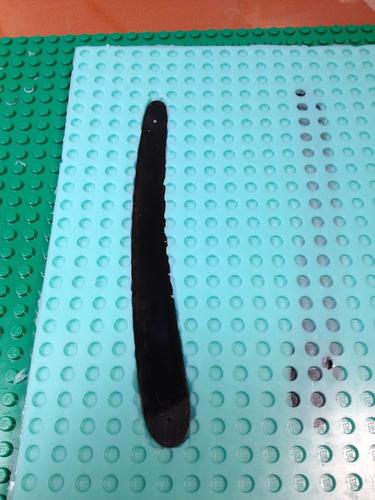
I then trim away the silicone from the back of the scale making sure not to disturb it. This should allow a good part line because when the reverse is poured, the silicone will fill in the edges cleanly.
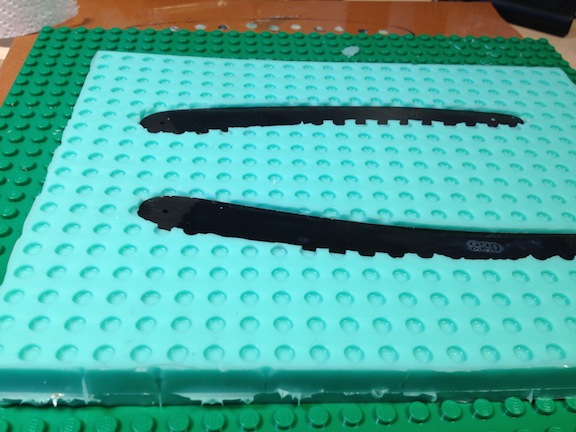
In investment casing, the gates and sprues are made of wax and when heated in the oven they burn off. Here I used clay to create the gates and sprues. I wanted them to be located where the scales would be drilled out for the pins.
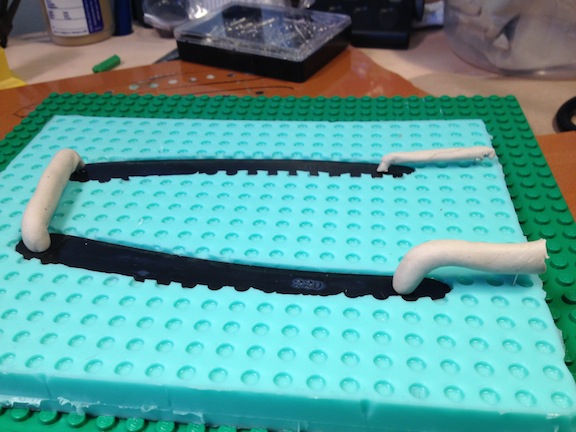
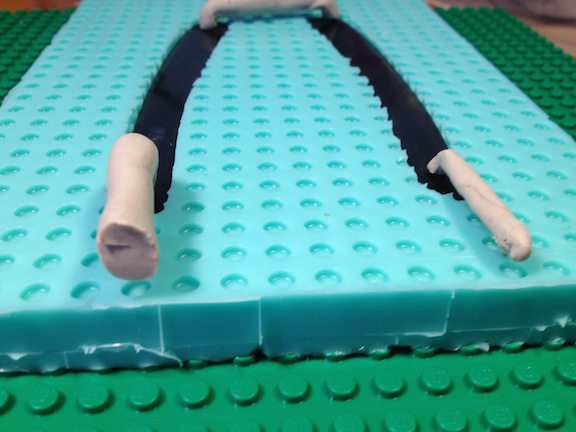
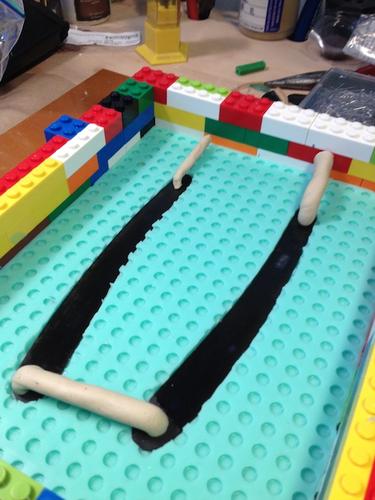
The larger of the two pieces of clay is the gate and the smaller is the vent. In theory.
So far, so good. Poured the top half of the mold and cut some plexi to act as plates to clamp the mold together when curing. This helps to prevent blow outs on the seams.
Vacuumed the resin separately, Smooth On 326 with the longer pot life, and mixed. Attempted to pour but the viscosity of the the resin seemed to shut off the pour and there wasn't enough venting. Added vents thru the back of the master but there still seems to be points in the mold where air is getting trapped and creating voids.
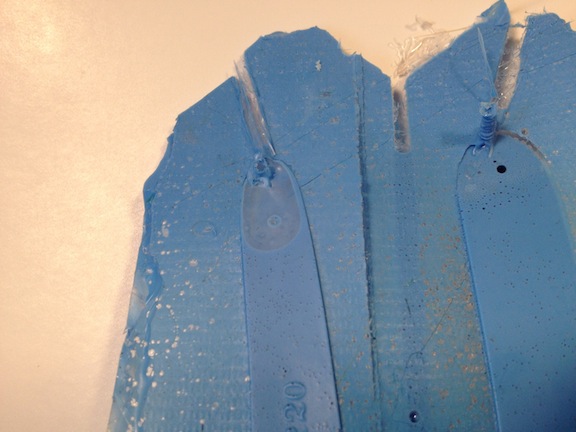
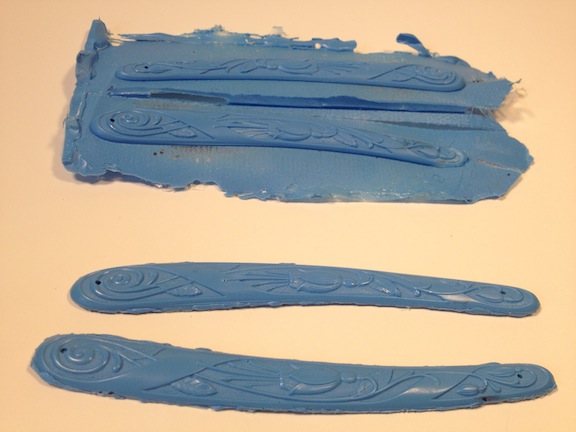
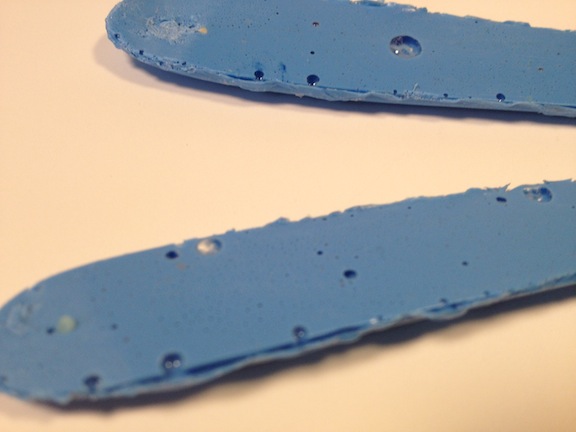
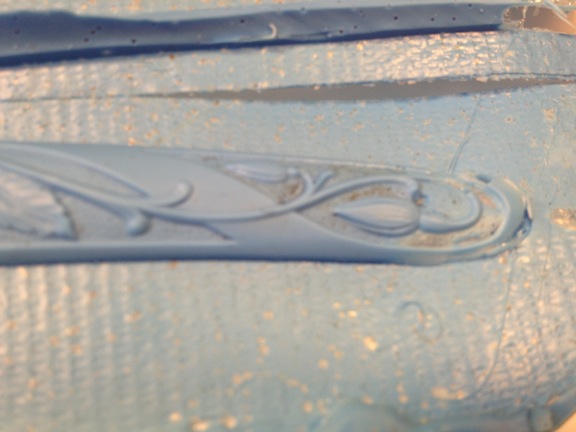
What you are seeing is not the first iteration of the molds. Assorted rods and channels have been cut into other pours and have still run into these problems of voids. There don't seem to be bubbles on the face of the scale so that part is doing alright. Small bubbles on the inside of the scales is something I can live with for the moment. Voids, however, are another issue.
The lego molds do create a nice part line and trimming them is easy while still soft.
Going thru a lot of expensive silicone to get this right.Every gun that is made, every warship launched, every rocket fired, signifies in the final sense a theft from those who hunger and are not fed those who are cold and are not clothed. Dwight Eisenhower
-
05-11-2013, 08:23 PM #13Senior Member

- Join Date
- Mar 2011
- Location
- Corcoran, Minnesota
- Posts
- 665
Thanked: 170
I'd suggest you PM Geezer - He did a lot of plastic moulding during his career, and may have some suggestions about vacuuming you mould process.


 5Likes
 LinkBack URL
 About LinkBacks


 Reply With Quote
