Results 1 to 10 of 13
Thread: Resinating a WIP
-
04-14-2013, 09:37 PM #1Senior Member

- Join Date
- Apr 2012
- Location
- Jersey City
- Posts
- 225
Thanked: 50 Resinating a WIP
I have regretfully concluded that, after several attempts, turning my apartment kitchen into a woodshop was not going to be practical. Routers and power sanders don't seem to be a good fit with pots and pans. And I live alone, so my mess is my own.
Following earlier threads, I have gotten into doing some urethane resin casting of celluliod scales with fancy designs. I like the old designs and would like to keep the patterns after the celluloid is long gone. With the modern resins, we should be able to create scales for your blade's next 100 years.
I need some advice from those who have done it before. It's as much about finishing as quality control.
I’ve been making molds using RTV platinum silicone and have had middling luck. There are two primary issues, one is crowning above the part line with the urethane and the other is degassing. I can get the mold flat and level but after the pour there often seems to be a crown in the finished product. In order to get an even line on the edges of the scale, the whole back would have to be sanded. Which would mean a belt sander, something I would hope to avoid.
Here are some WB replica's in chocolate brown that have that problem.
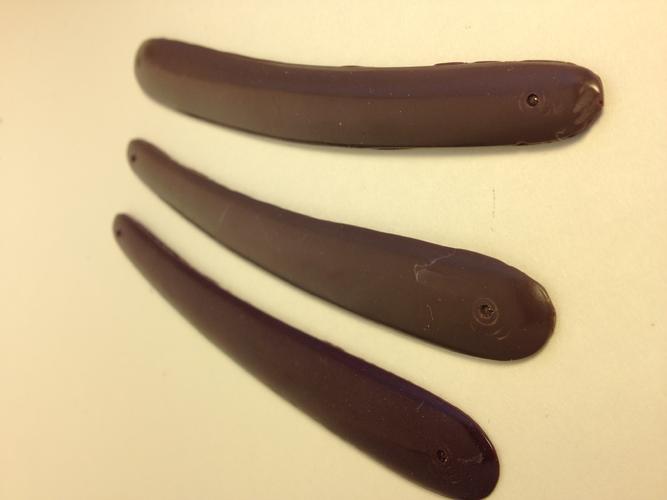
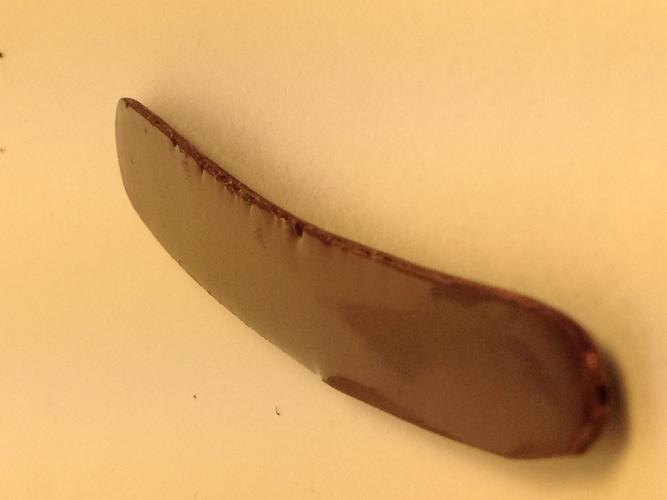
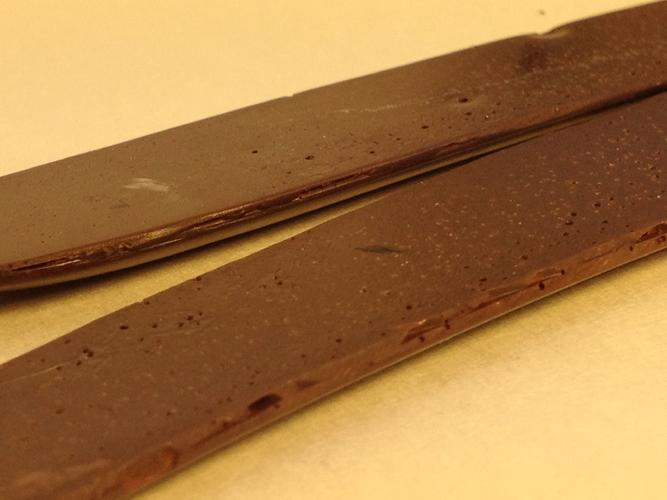
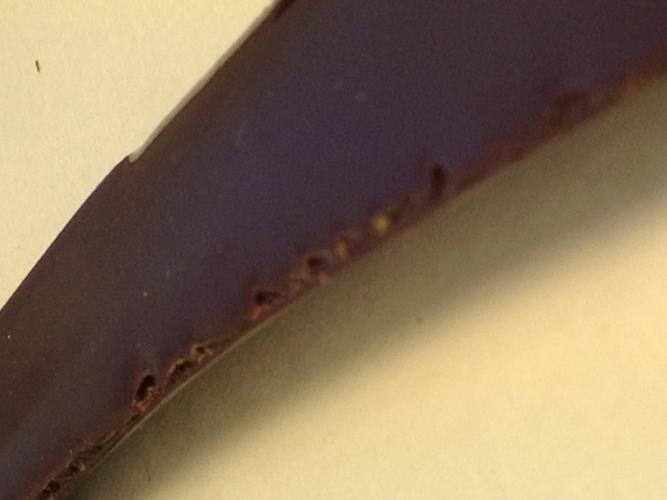
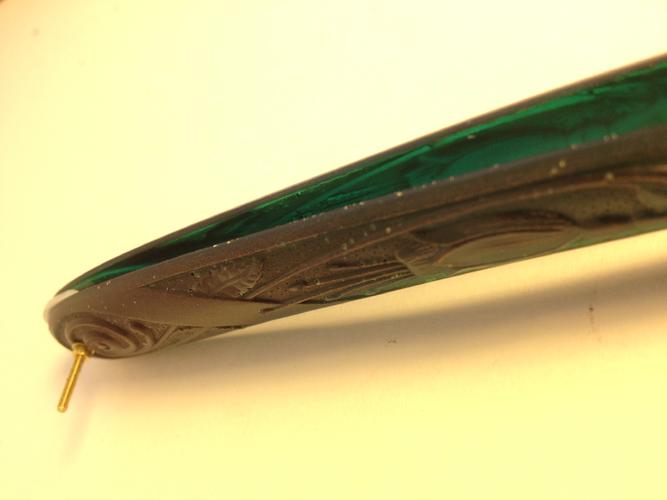
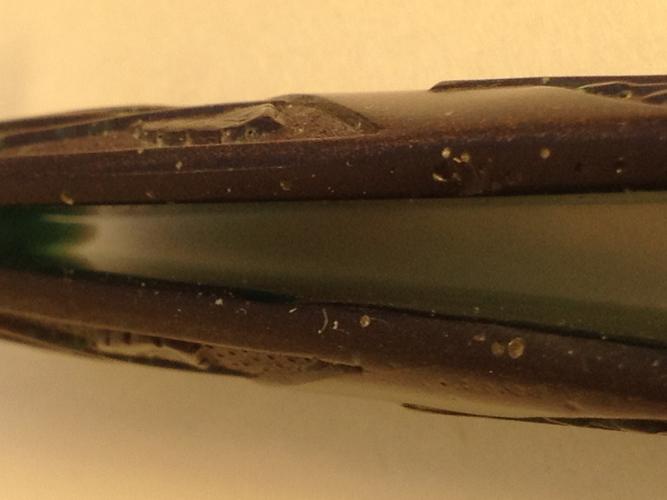
The other issue is bubbles. In opaque casts, interior bubbles aren’t a problem until they form along the part line. This is today’s work. It has a green translucent base and brown iridescence.
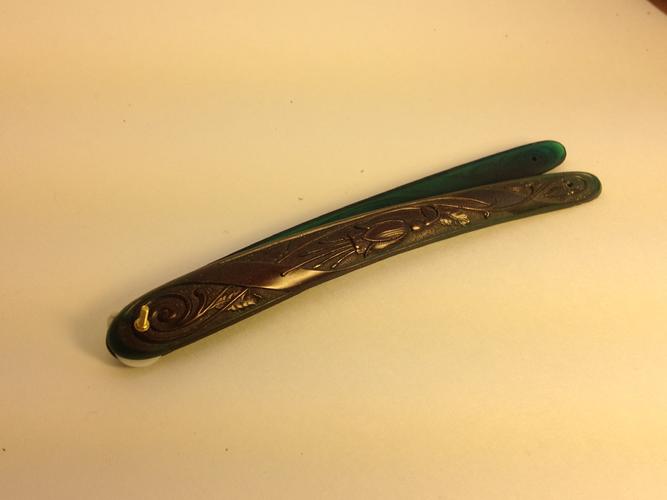
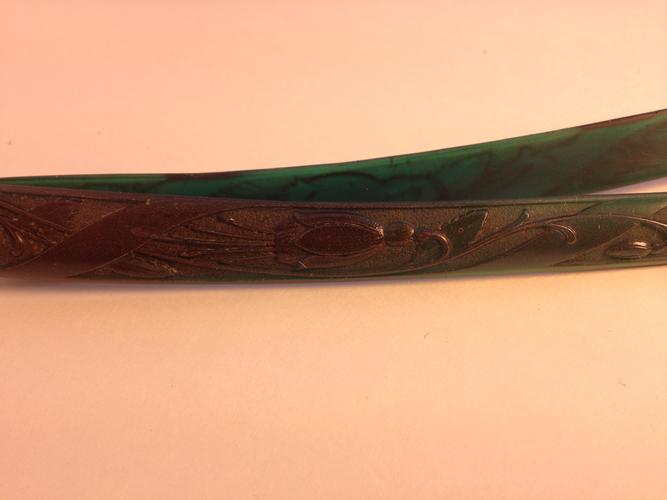
It has minor bubbles that can be seen if held to the light.
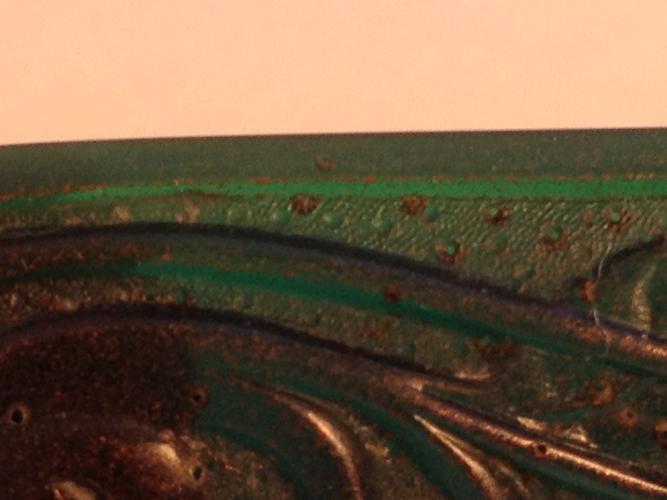
The issue here is that, like pitting along the bevel when you're honing, they tend to form at the part line and if I sand them completely out, I’ll destroy the pattern, or at least the two sides probably won’t be symmetrical.
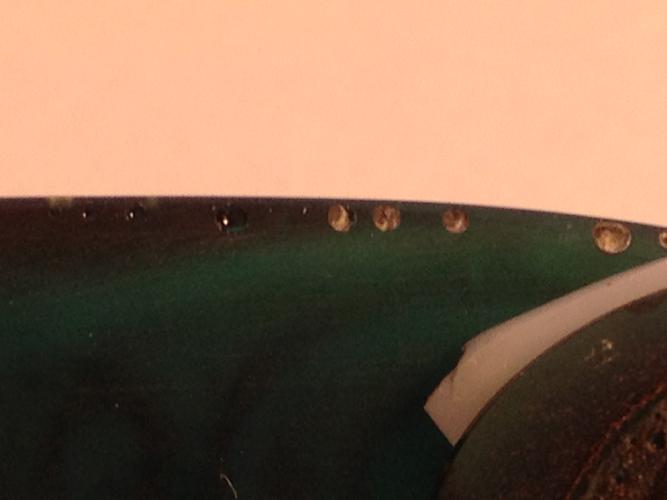
Vacuum degassing will probably solve bubble issue (do you pressure cure?) but the crowning has me scratching my head. A small pump and chamber set up is easier to live with that the dust. Any help?
-
04-15-2013, 02:12 AM #2

Spent most of the last thirty years of my work life often pouring resin prototypes and making silicone molds. Vacuum is the only real answer! And 28"Hg or higher. The stuff will foam over so drop the vac to ambient pressure and pull it up again a few times to shake out all the bubbles without having excess resin all over the place. Many resin's hate water and will foam and spew readily with any moisture at all in the mold. It pays to keep molds in a dehydrator before use.
Have fun and use a vent fan! Most of the heavy metals have been taken out of the formulas by now but, I hate going to the MD and getting a MRI and CT scan every year for "shadows." And it is horribly expensive!
~Richard
-
The Following 4 Users Say Thank You to Geezer For This Useful Post:
Chevhead (04-15-2013), saitou (04-15-2013), skipnord (04-15-2013), TonyFranciozi (04-17-2013)
-
04-15-2013, 04:36 AM #3Senior Member

- Join Date
- Apr 2012
- Location
- Jersey City
- Posts
- 225
Thanked: 50
Thanks Richard. Iowa boy myself, Dubuque County.
Just read the msds. Think I'll move the operation out of the kitchen.
http://www.smooth-on.com/msds/files/...,_326,_327.pdf
Ordered a pump today in fact. I'll build a simple chamber and start from there.
Two questions. In your experience, would you cast scales under pressure or save that for clear resin pieces?
The other question involves the doming effect of overfilling the molds. Any way to avoid that other than sanding? Seems like you would need to slightly overfill rather than underfill in order to get a nice, smooth side to the inside of the scale.
-
04-15-2013, 10:13 AM #4
-
04-15-2013, 04:31 PM #5

In the past, I have done some really weird mold work to get around the problem, however, The stuff sands quickly with wet / dry paper on a flat plate like lapping a stone with running water.
If you do not remember that each and every square inch of surface of your mold box will have about 15lbs of weight upon it, the noise and flying material after the implosion will remind you!. For small items we used 3/8ths" thick plastic that we glued and screwed together with machine screws. A thin layer of RTV will serve as a seal for the opening. There are other methods but that was our safety molding flasks the we used for many years..
Have fun but be safe!
~Richard
-
04-16-2013, 09:11 PM #6Senior Member

- Join Date
- Apr 2012
- Location
- Jersey City
- Posts
- 225
Thanked: 50
Thanks for the advice. One of the things that I have learned (and relearned, and relearned) is about the time value of money. I could spend a get deal of time looking for scrap and second hand shops to cobble together something that might or might not work based on some half assed idea I had in order to save a little money. Or I could spend a littler greater amount of money on something that was designed for the job and will work correctly the first time, saving me a greater amount of time. Time is the one asset that you can never recover. Thus I ordered this today.
1 5 Gallon Vacuum Chamber for Degassing Urethane Silicone Epoxies | eBay
If I may pick your brain a bit more Richard, on one of the forums devoted to making props, a poster suggested that in casting small amount as I would be doing with scales, warming your resins and molds would aid in finishing. Was this your practice?
Another poster contented that you can avoid running into pot time issues by degassing your Part A and Part B separately and then mixing. His view was that this achieved the bulk of that you were trying to accomplish by degassing and you did not start the chemical reaction any earlier that you had to. I would think that mixing would undo most of the degassing and you would have to do it over again anyway, perhaps for a shorter period of time tho. Do you think that this is valid?
-
The Following User Says Thank You to DGilloon For This Useful Post:
skipnord (04-16-2013)
-
04-16-2013, 10:27 PM #7Senior Member

- Join Date
- Mar 2011
- Location
- Corcoran, Minnesota
- Posts
- 665
Thanked: 170
Please be sure to let us know how the tank works. It sounds really good from the description.
-
04-17-2013, 12:23 AM #8
-
04-17-2013, 02:01 AM #9Senior Member

- Join Date
- Apr 2012
- Location
- Jersey City
- Posts
- 225
Thanked: 50
Thank you very much for the information and the encouragement. I'll need to get a little more comfortable with the equipment and the process before I start to pepper you with questions again. I'll need to get at least a couple done right before I can start to think about mass production. Might be a good retirement job.
I'm thinking of a non-functioning wine refrigerator with a low wattage lamp inside for a dehydrator. I make my yogurt in the oven the same way but the temp is well over 100 degrees.
There is also a need for a proper work bench now. I can make room in the extra bedroom but in order to create the square footage, somethings got to go.
Anybody interested in a pair of seats from old Yankee Staduim? Right price but local pick up only.
-
04-17-2013, 07:38 AM #10
 Til shade is gone, til water is gone, Into the shadow with teeth bared, screaming defiance with the last breath.
To spit in Sightblinder’s eye on the Last Day


 5Likes
 LinkBack URL
 About LinkBacks


 Reply With Quote


